
The MirrorOp software offers a lot of extra presentation features. Because we try to give everyone the right tools for their presentation situation, almost every feature on wePresent/MirrorOp can be enabled, disabled, or customized. Every user can also individually decide which features he wants to allow, or not. These preferences can be set within the MirrorOp software Preferences.
There are differences between MirrorOp Sender (Windows and macOS) and MirrorOp Presenter (Android and iOS)
| Feature Support table | One-To-Many | Audio | Moderator | Touch-Back/ Remote Control | Screen Mirror | 4-way Split Screen |
| MirrorOp Presenter for Android | X | O (only Video Streaming) | X | X | O | O |
| MirrorOp Presenter for iOS | X | O (only Video Streaming) | X | X | X | O |
| MirrorOp Sender for Windows | O | O | O | O | O | O |
| MirrorOp Sender for MacOS | O | O | O | O | O | O |
| MirrorOp Sender for Chromebook | X | O | O | X | O | O |
| Google Cast/Google Home | X | O | X | X | O | X |
| Airplay | X | O | X | X | O | X |
Most important MirrorOp Sender Preferences are:
- WebSlides
- Control computers through the wePresent
- Favorites
- Duplicate, or Extended Screen
- UMT(Universal Multi Touch), or Simulate as Local USB
Other advanced MirrorOp Sender features:
Most important MirrorOp Sender Preferences
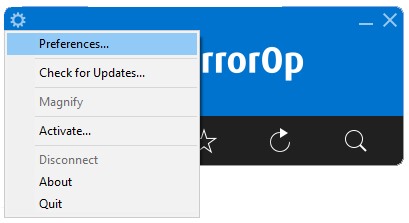
You can find your MirrorOp Preferences here:
WebSlides
View and save WebSlides (also possible without MirrorOp Sender installation)
You can choose to allow your audience to follow the presentation on their own WiFi device. Everything an audience member needs for this is a WiFi device with a web browser. Please direct your audience to visit the IP address of the wePresent Base Unit. There they can select 'WebSlides' to view and save any screenshots of the current presentation.
Some wePresent models also offer a virtual whiteboard and on-screen annotation feature. When you share via WebSlides, then your annotations made will also be shared with the audience.
Because following WebSlides does not require software/app, just a web browser, the number of audience members that can follow WebSlides is not limited, it is mainly determined by your local network/bandwidth.
More information can be found in [KB8038]
Disable
If you do not want to allow your audience to view your presentation, then you can disable Allow screen projection to be redirected to browsers. If unselected, your audience will not be able to see or capture your WebSlides.

Touchback/ Remote Control (Control from wePresent Receiver)
Allow Touchback/ Remote Control (also available without MirrorOp Sender installation)
You can let any computer be controlled on the wePresent system with an additional USB device added.
On every wePresent Base unit, it is easy to connect any USB device, or even a touch screen, which will allow you to control any computers that are presented through wePresent.
This means that computers can present to the wePresent Base Unit from any location (over the network) by simply starting the MirrorOp software. During Presentation, they can fully control their computer remotely with the mouse/keyboard/touch screen attached to the wePresent Base Unit.
By default, whenever someone projects via MirrorOp software, the Remote Control function is turned on, and the option of Allow control inputs from receivers is selected in MirrorOp Sender Preferences.
Disable Touchback/ Remote Control
You can disable this in your MirrorOp Sender Preferences by unselecting Allow control inputs from receivers.

Favorites
Favorites, or Device Discovery
Whenever you start MirrorOp Sender it will perform a Device Discovery scan on your network connection to list all available wePresent Base Units. If not all wePresent Base Units are listed directly, you may still be able to add them by manually by entering the IP address.
Once a wePresent Base Unit has been detected within MirrorOp, it can be made a Favorite by pressing the 'star-symbol' next to it. Every wePresent Base Unit that has been made a Favorite will be listed on the Favorites tab the next time MirrorOp is started.
Favorites-Only
The default Device Discovery scan that MirrorOp performs at startup, may not always give an optimal result. For instance, if a user is on a restricted network segment, or if there are too many wePresent devices, the scan may give confusing results. To avoid the Device Discovery scan at startup, you can pre-set the MirrorOp software to Favorites-only. This means MirrorOp will launch in Favorites mode and only lists all previously saved Favorites.
Import, or Export Favorites
The Favorite List is created if you save the wePresent Base Units you use most frequently to Favorites. Open the Favorites tab in MirrorOp Sender Preferences, and you will see where the Favorite List is located by default. You can click “Browse” to choose a different location to save the Favorite List.
You can also import or export the Favorite List in order to exchange the list with other computers or colleagues.
To export your Favorite List, click the Export button, and then select the folder to save it.
To import the data of the Favorite List from a file, click the Import button and then locate the file. The contents of the external file will be imported to the current Favorite List. The original contents of the current Favorite List will be over-written.

Duplicate or Extended Screen
Duplicate (default)
When you click Play in MirrorOp, by default the software will start to duplicate your screen content to the wePresent. This is the most common way of presenting, simply showing a 1-to-1 copy of the content that is on your own device.
Extended Screen (software install needed)
It is also possible to set your MirrorOp software to Extend instead of Duplicate if you want to use the virtual extended desktop. If you already physically have a secondary screen setup, then MirrorOp will mirror the content from your secondary screen.
On some Operating Systems MirrorOp will ask you to download a Virtual Display Driver before it can be set as Extended screen.

UMT or Simulate as Local USB
Universal Multi-Touch
As mentioned, wePresent devices are perfectly suited to combine with touch displays. For wePresent devices to work optimally, the connected touch display needs to be a 'Standard HID' touch display. If this is the case, then you simply connect the USB cable from the touch display to the wePresent Base Unit and you will instantly be able to control the wePresent interface on the touch display.
Because most common touch displays are Standard HID, your MirrorOp Sender software is by default set to 'Universal Multi-Touch'. This means that whenever a user projects his Win/Mac computer with MirrorOp, that the user can be instantly controlled on the touch display, wirelessly! (up to 10-points).
Simulate as local USB
In some cases, the connected touch display may not be a Standard HID display. This means it will not be recognized directly by the wePresent and/or the MirrorOp software. If this is your situation, then you can set your MirrorOp software to 'Simulate as local USB' (i.e. USB over IP or UoIP), to mimic as if the touch display was connected directly to the USB port of user's computer. This may give correct touch control over the projected user.
- When your touch display requires 3rd party drivers/software to work, it is likely not Standard HID!
- Both “Simulate as Local USB” (USB over IP or UoIP) and “Universal multi-touch” (UMT) are about multi-touch support. However, if you want to use “special” hand gestures to remotely control the projecting PC from the display, you need to use UoIP, not UMT. Special hand gestures, used in some game apps and interactive whiteboard apps, include “hand eraser”, “long press” (the equivalent of a mouse right-click), and so on.

Other advanced MirrorOp Sender features
Application Window Sharing
Screen Mirroring, or Application Window Sharing
“Application Window Sharing” is a special feature offered by the Chromebook version of MirrorOp Sender. This feature allows a sender to limit content sharing to a single active application. In other words, a sender can choose not to share the entire Chromebook screen, but to share only a single application window instead.
The Application Window Sharing feature not only helps to protect the sender’s privacy but also allows the sender to do other tasks (such as checking important emails) while sharing a specific application to the display.
Simple Steps to Use Application Window Sharing
Here are the steps on how to use “Application Window Sharing”:
- After your Chromebook is connected to a receiver and you click the Play button, you will see the image below:

- Click on Application Window, and you will see the thumbnails of all the running applications. Select the application you want to share and double-click its thumbnail (or click on its thumbnail and then click Share). The window of the selected application will be shared to the display.

Student Monitor (Moderation via MirrorOp Sender UI)
Student Monitor
“Student Monitor” is a new feature supported by wePresent WiCS-2100. This feature enables moderator preview and control from a Windows/Mac sender (teacher). With this feature, monitoring and moderation can be done directly via the MirrorOp Sender UI (User Interface) on a teacher’s Mac/Windows computer.
Simple Steps to Use Student Monitor
- Moderator/Teacher Login:
A crowd icon will appear on the upper-left corner of the MirrorOp Sender Info Panel after your sender device is connected to the WiCS-2100. Click the icon and enter the password (default password: moderator) to log into “Student Monitor”. Once you have logged in, the white crowd icon will turn blue.
- Moderator/Teacher Preview and Control:
After logging into “Student Monitor”, you will see the thumbnails of connected senders’ device screens in the moderator window. This gives you a preview of what to expect. In addition to the thumbnail preview, you can perform the control functions by clicking the following buttons:

