7.3 Replace a lens

Caution: When installing an EN76 lens, an iris calibration must be performed. See “Lens calibration
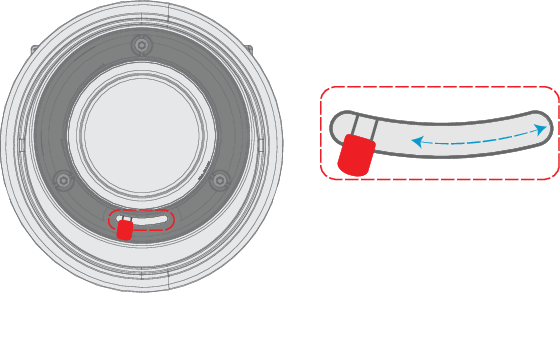
Lens lever

The F90 lens mount and lens lever is designed to prevent damage to the lens board while providing an easy and stable lens change procedure.

The lens lever, located at the bottom of the lens mount (ref. ) slides between two positions, far left (default position — locked) and far right (unlocked).

Tip: Always activate the projector shutter before attempting to remove or install a lens.

To do this, press the shutter button on the keypad, or shutter Close on the remote, to activate the shutter. The keypad button will illuminate red when the shutter is activated.

Press the shutter button again, or shutter Open on the remote, to deactivate the shutter and resume normal operation. The keypad button will illuminate white when the shutter is deactivated.

Note: When changing from a lens with motorized Iris, zoom and focus positioning functionality, to a lens without this functionality (e.g. from a EN 63 to a EN42 lens), it is recommended to power down, and pull the AC cord. This is because the memory of the iris position will not be reset, but will show the position in LCD or OSD for the lens that was removed. When rebooting the projector, the memory will be reset.

The reverse scenario will happen when changing from a lens with no motorized positioning support, to a lens with motorized positioning support. The iris position will not be showed with a correct value. The functionality is still present, but the displayed value is not correct.

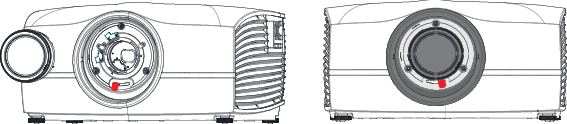
Image 7–3
Install a lens
  1. Verify that the projector shutter is deactivated (shutter is deactivated when the shutter icon on the projector keypad is red).
  2. Verify that the lens release lever is in its default position at the far left of the slide, as illustrated.
  3. Remove the protective cap at the lens bayonet end
  4. Align the lens so that the red marking on the bayonet is facing upwards, towards the red marking on the top of the projector cabinet.
  5. Position the lens bayonet into the projector lens mount and support in place with one hand.
  6. Slide the lens lever to the far right.
  7. Verify that the lever is firmly in place at the far right end of the slide before removing your hand from the lens.

    Image 7–4
  8. In case the projector is mounted above people, it is mandatory to have a lens safety cable installed. See “Lens safety cable installation”.
Remove a lens
  1. Remove the lens safety cable if installed.
  2. Support the lens with one hand.
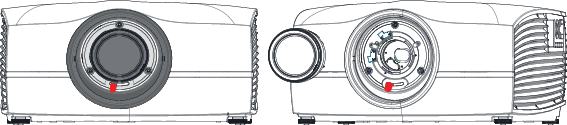
  3. Use the other hand to slide the lens release lever to the far left position..
  4. Pull the lens straight out of the projector lens mount.
  5. Replace with another lens, or install the projector lens cap.

    Image 7–5