About Base Units WiFi and network settings
The webUI availability can be set via the WiFi.
For the LAN settings, the use of the a proxy server can be set.
The webUI availability can be set via the WiFi.
For the LAN settings, the use of the a proxy server can be set.
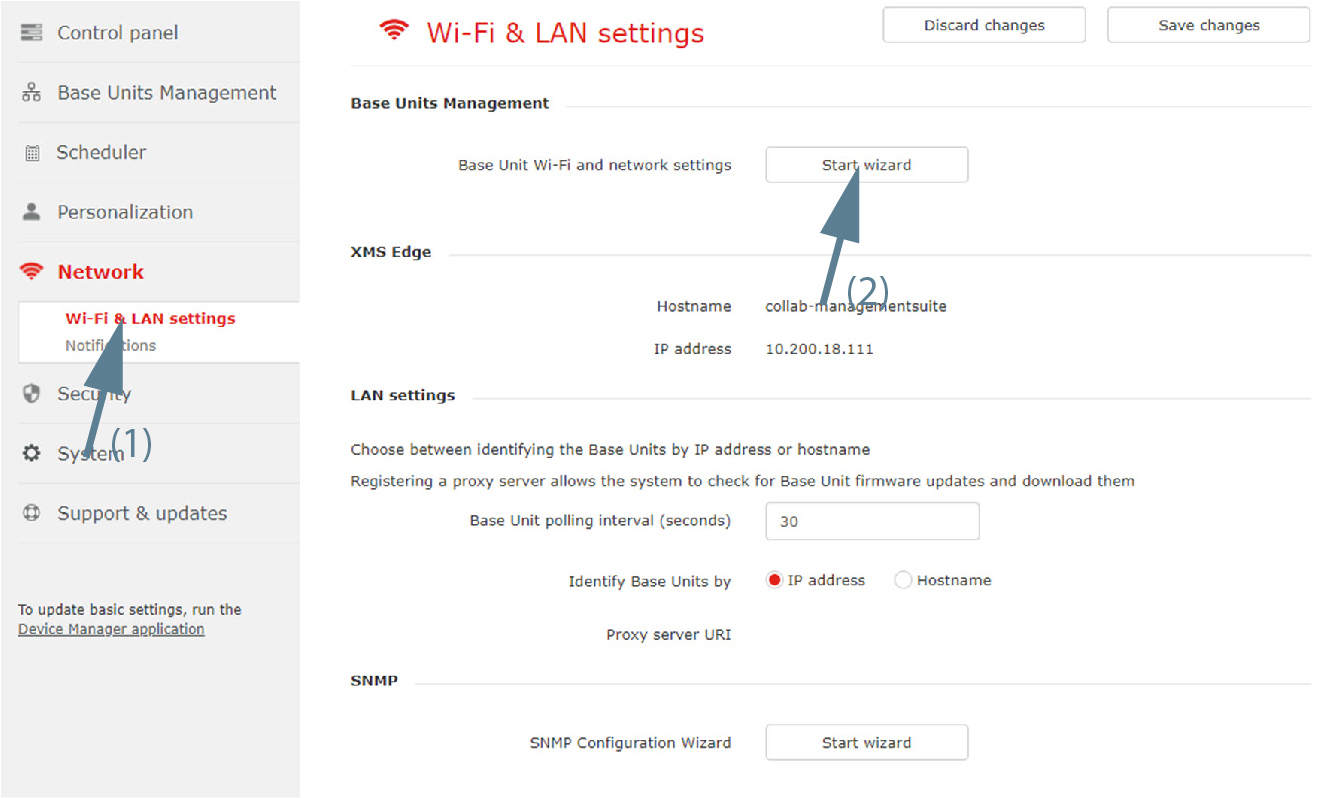
Select Network and click Wi-Fi & LAN settings to display the page.
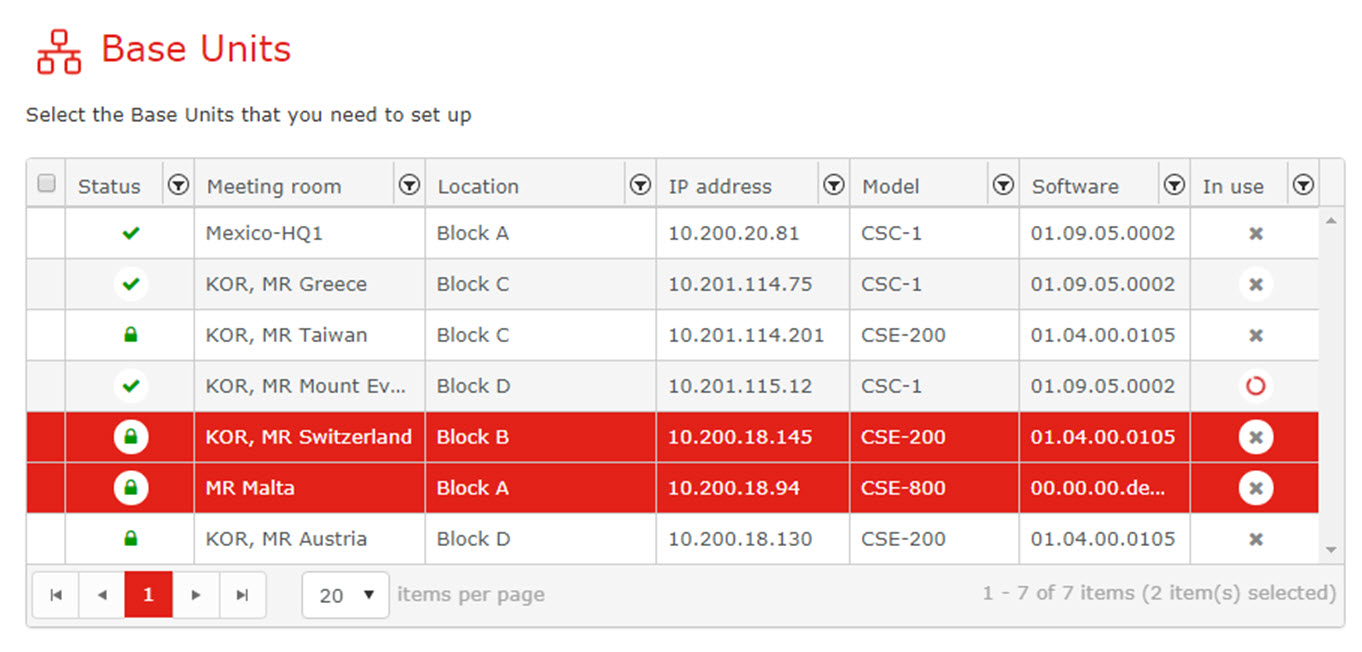
Select the Base Units. Click Next to continue.
To change the setting for the WebUI availability via WiFi, click on the drop down box next to and select the desired setting.
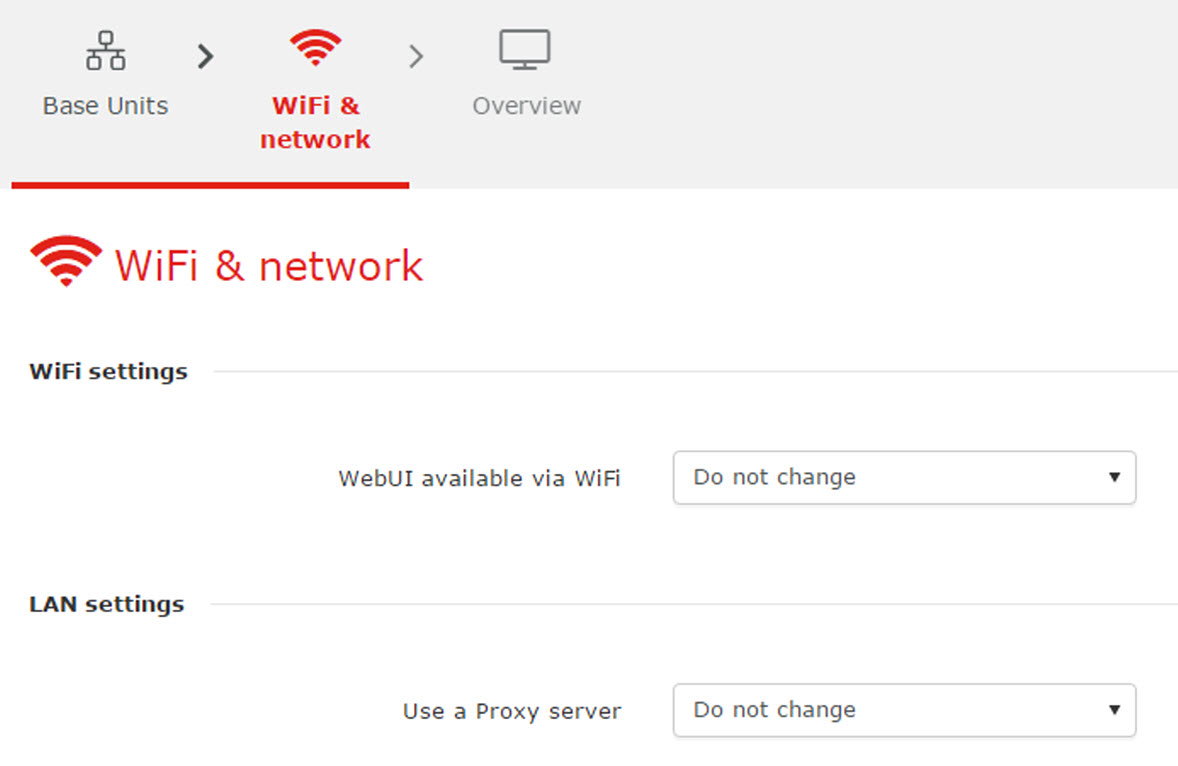
The following setting are possible:
To change the Proxy server setting, click on the drop down box next to and select the desired setting.
The following setting are possible:
Click Next to continue to get an overview.
If you agree with the overview settings, click Finish.
WiFi networks settings might affect (downgrade) previous Base Units security settings and need button re-pairing.