“Network Integration” aims at deploying the Base Units in larger organizations without interfering with the existing wireless network infrastructure. In a default stand-alone setup, the ClickShare Base Unit creates its own wireless access point (AP) which the ClickShare Buttons use to connect. These so-called “rogue” APs can become a nuisance in larger installations. Additionally, meeting participants who are sharing content from mobile devices have to switch networks to connect with the ClickShare Base Unit.
This is where Network Integration comes in. Once fully configured and enabled, the built-in AP of the Base Unit is disabled. The Button or the mobile devices can then connect to a wireless access point that is part of the corporate network. At this point, the Base Unit needs to be connected to the corporate network via the wired Ethernet interface so that the Buttons and mobile devices can share their content on the Base Unit.
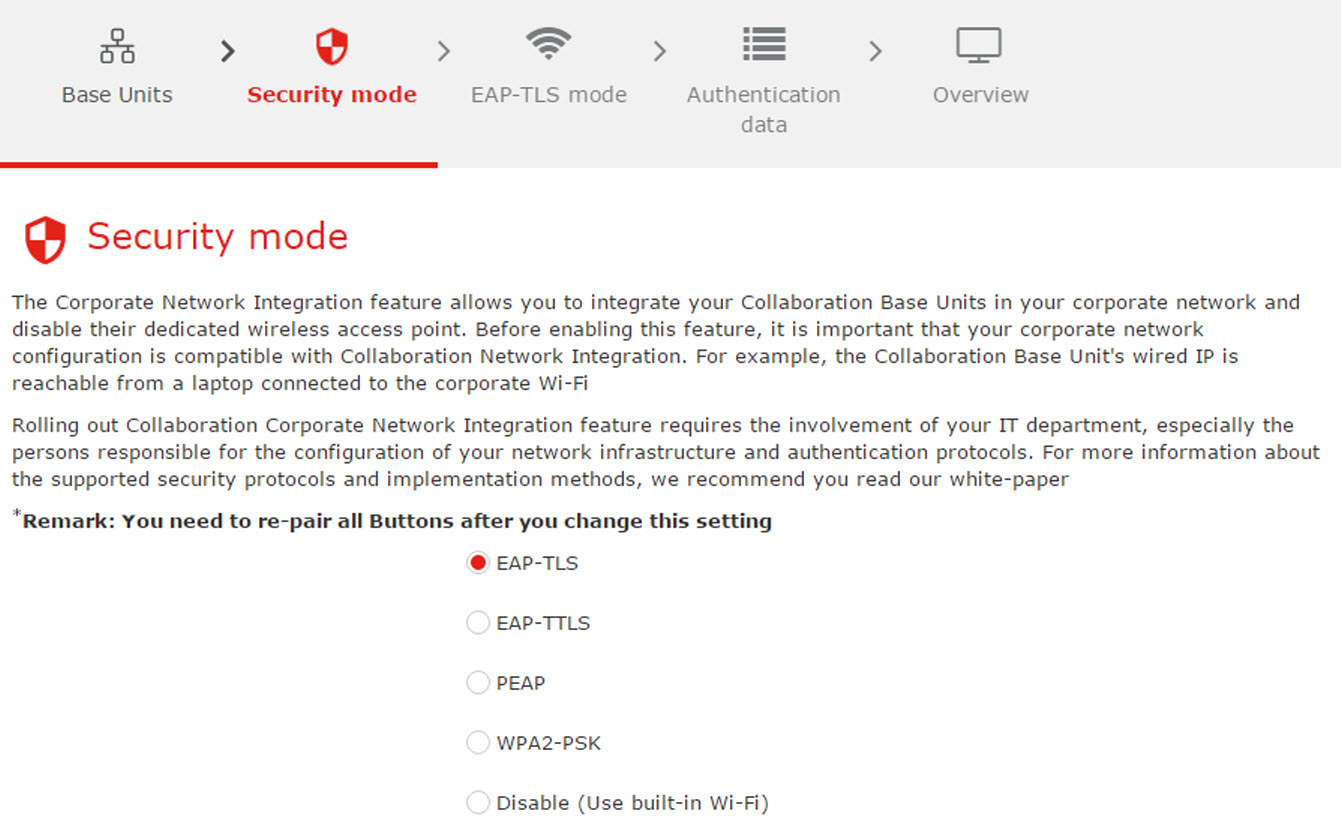
Security modes
There are 2 security modes supported by the Button to connect to the corporate network:
The first one, which applies to a typical corporate network setup, is WPA2-Enterprise with 802.1X.
As we also want to support smaller organizations, which might have a more traditional Wi-Fi setup, there is also support for WPA2-PSK, also known as WPA2-Personal.
Both modes are based on Wi-Fi Protected Access (WPA). We talk about WPA2, an improved version of the original WPA standard, which adds AES encryption and removes TKIP to improve security.
WPA2-Enterprise with 802.1X
WPA2-Enterprise relies on a server (using RADIUS) to authenticate each individual client on the network. To do this, authentication 802.1x is used (also known as port-based Network Access Control). 802.1x encapsulates the Extensible Authentication Protocol (EAP) for use on local area networks. This is also known as “EAP over LAN” or EAPoL. Using RADIUS, these EAPoL messages are routed through the network in order to authenticate the client device on the network – which, in the case of ClickShare, are the Buttons.
The 802.11i (WPA2) standard defines a number of required EAP methods. However, not all of them are used extensively in the field, and some other ones (which are not in the standard) are used much more often. Therefore, we have selected the most widely used EAP methods. The list of EAP methods supported in the ClickShare system is:
EAP-TLS
PEAP
EAP-TTLS
Considerations
When you choose to integrate the ClickShare system into your corporate network, there are a few things to consider up front. First of all, make sure that all your Base Units can be connected to your network via the wired Ethernet interface. Also, take into account the amount of bandwidth that each Button needs to stream the captured screen content to the Base Unit – this is usually somewhere between 5 and 15 Mbps. So, prevent bottlenecks in your network (e.g. 100 Mbps switches) that could potentially degrade your ClickShare experience due to a lack of bandwidth.
Prerequisites
Before rolling out ClickShare Network Integration, make sure your infrastructure meets the following prerequisites.
Network
Once you enable the corporate network, the internal Wi-Fi access point of the ClickShare Base Unit is disabled. Make sure your Base Unit is connected to the corporate network via its wired Ethernet interface.
Firewall
To ensure that you can successfully share content via the ClickShare Button, or from mobile devices, to the Base Unit, make sure the ports mentioned in “Network requirements” are open on your network.
VLAN
A lot of corporate networks are divided into multiple VLANs – for example, to separate BYOD (Bring Your Own Device) traffic from the “core” corporate network. Take this into consideration when integrating ClickShare into your network. ClickShare Buttons connecting to your wireless infrastructure should be able to connect to the Base Units. Furthermore, if you want to use the mobile apps, these should also be able to reach the Base Units. It is advisable to put all ClickShare Units into a separate VLAN so they are easily manageable.
DNS
For the Buttons to be able to stream their content to the Base Unit, they must be able to resolve the Base Unit’s hostname within the network. If no DNS is available Buttons will fall back to the IP of the Base Unit at the moment of USB pairing. Because of this we strongly advise to reserve IP addresses in your DHCP server for each Base Unit to prevent issues when the hostname is not resolvable.
NTP
When using EAP-TLS, you must also configure NTP on the Base Unit. This can be done via the Base Unit WebUI. The Base Unit must have the correct time to handle the certificates required for EAP-TLS. Preferably, you should use an NTP server with high availability on the local corporate network. Be advised that, when using an NTP server on the internet, the Base Unit cannot connect through a proxy server.
Start up the wizard
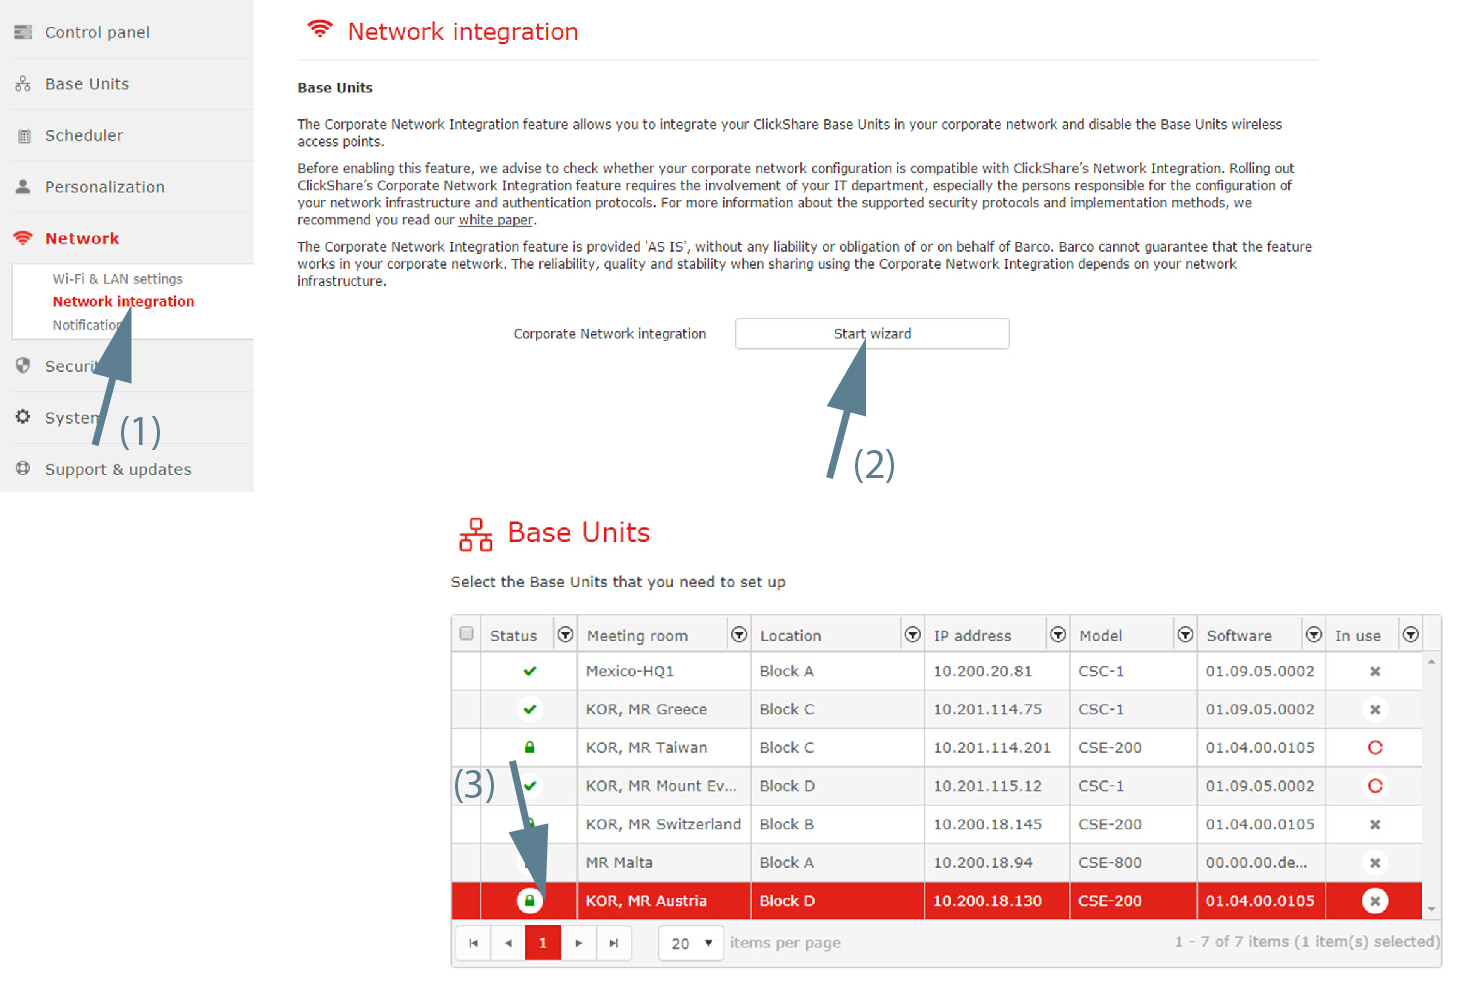
Select Network and click Network integration to display the Network integration page (1).
Image 3–50Network integration, start wizard
Click Start wizard (2).
Select the Base Units that you need to set up (3). Click Next to continue.