About date & time
The date & time of one of or multiple Base Units can be set.
The date & time of one of or multiple Base Units can be set.
In the menu pane, click on System and select Date & Time (1).

Choose the mode for setting date and time.
The following modes are available:
Click on the drop down box next to and select .
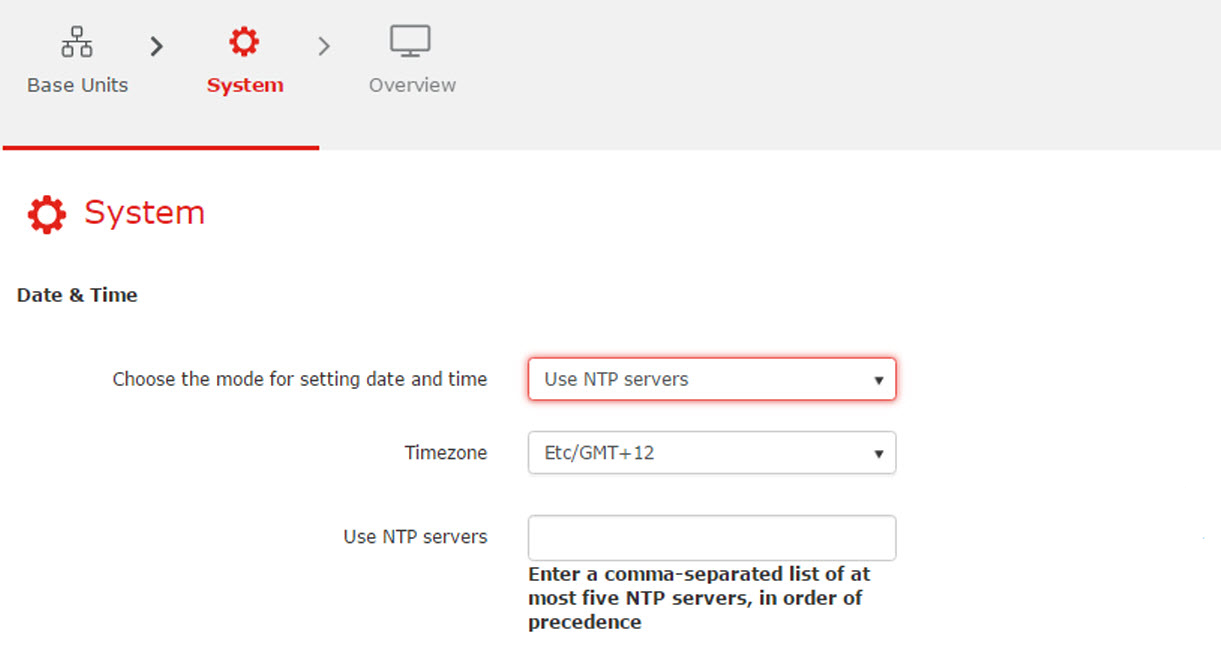
Click on the drop down box next to and select the corresponding time zone.
Enter the hostname or IP address of the NTP server.
Up to maximum 5 server can be added, separated by a comma.
Click on the drop down box next to and select .
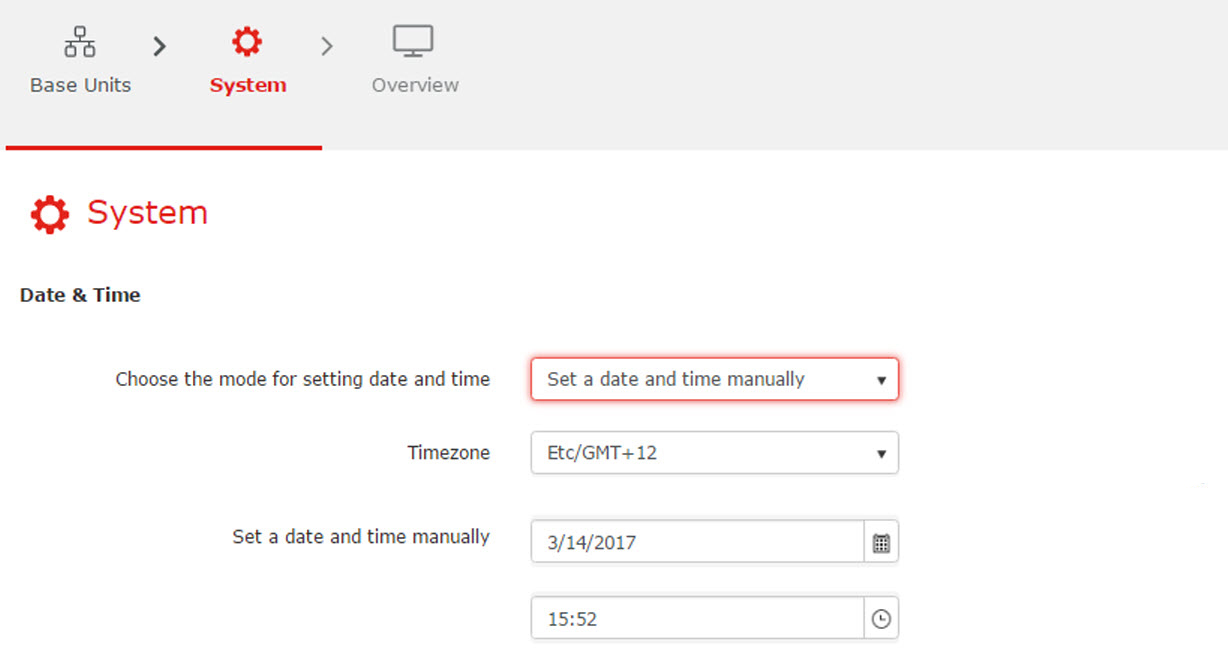
Click in the date field, select the current value and enter a new value. Use the following mask .
click on the icon next to the input field and select a month and a day. The current date is indicated with a red background.
To change the month, click on the right or left arrows next to the month name until the desired month and year are obtained. To select the day, click on a number in the number field.
Click in the time field, select the current value and enter a new value with you keyboard. Use the following format .
click on the icon next to the input field and select a time from the drop down list.
Click Next to continue.
An window is displayed.