About Date & Time setup
The date and time can be set manually using the time zone indication or using at least one NTP servers.
The date and time can be set manually using the time zone indication or using at least one NTP servers.
Click → .
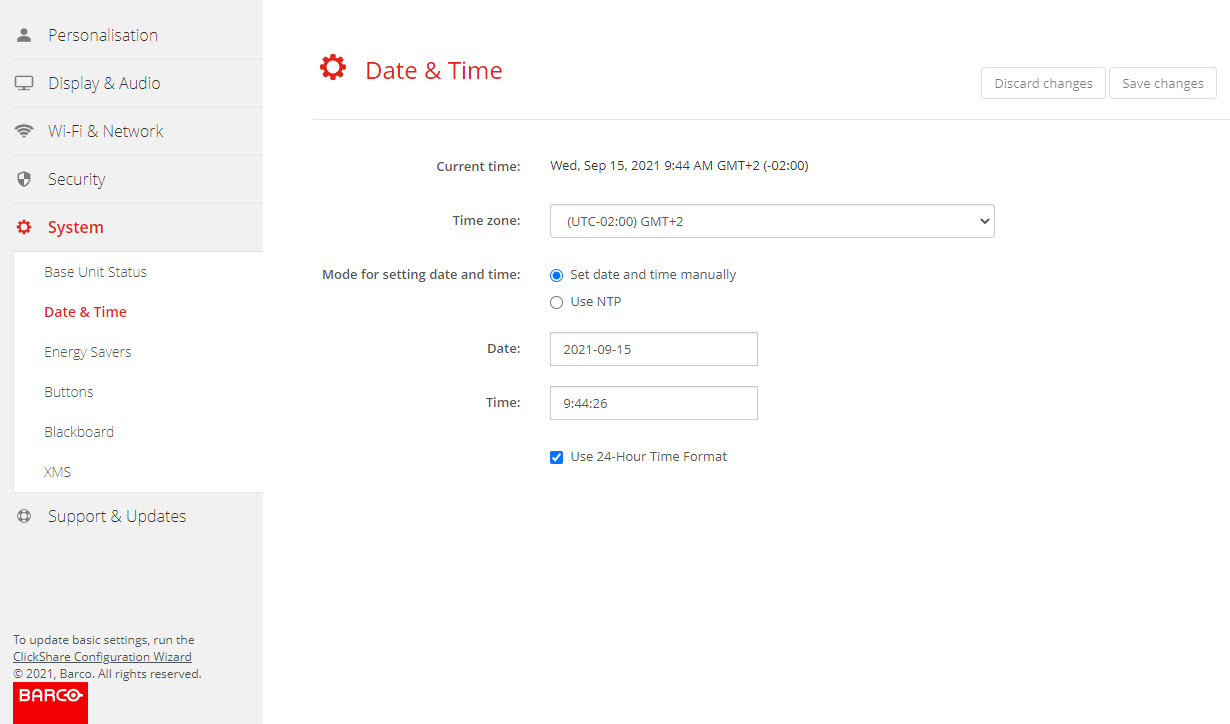
The current time is indicated next to .
To change the date, click in the input field next to .
A calendar window opens. The current date is indicated with a red background.
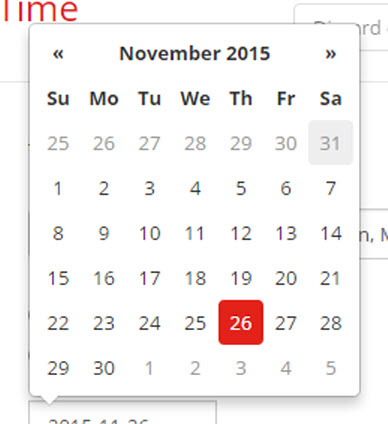
To change the month, click on the left or right arrows next the month name until the desired month and year are obtained.
Click on a number in the number field to setup the day.
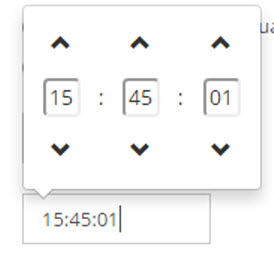
To change the time, click in the time field next to .
A window with 3 scroll counters open.
Select the time format.
Checked: use of 24 hour time format
Not checked: use of 12 hour time format