Direct Ethernet connection between PC and Base Unit.
Via the Base Unit's wireless network
When accessing the configurator for the first time, the ClickShare Configuration Wizard starts automatically.
This configuration wizard can be started at any moment to change your configuration instead of using the menus.
To access the Configurator via the LAN
Open a browser.
Note: Supported browsers are Microsoft Edge, Firefox, Google Chrome and Safari.
Browse to the IP address of your device.
Note: If you do not know the IP address due to Show network info is disabled, connect via a direct connection or via a wireless connection to your device to discover the wired IP address.
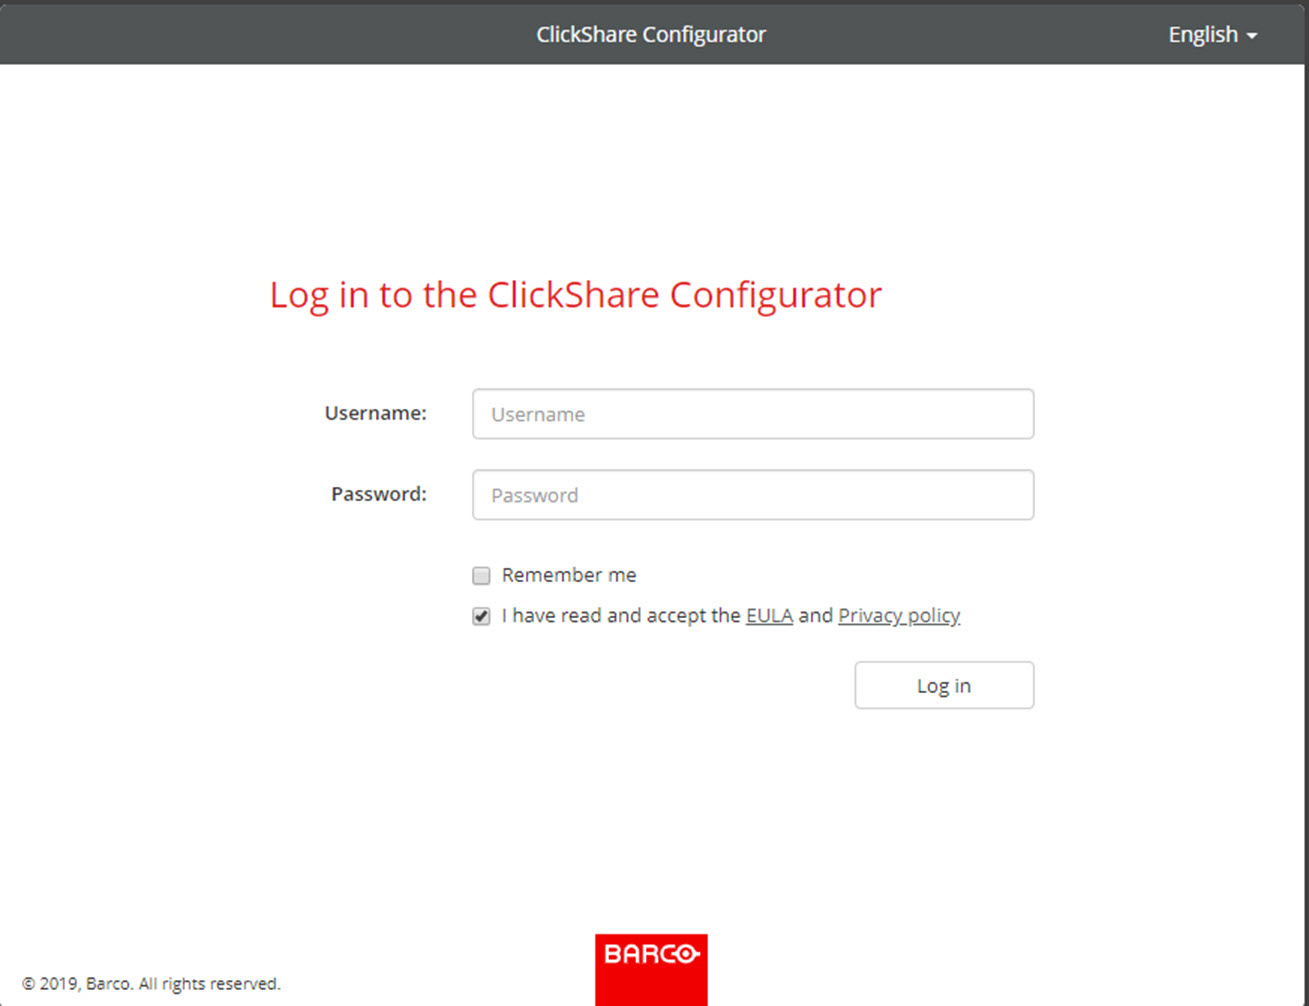
A login screen appears.
Image 6–1Login screen
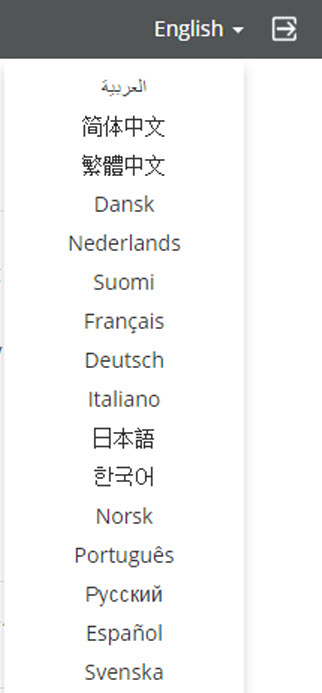
To change the language of the Configurator, click on the drop down next to the current selected language and select the desired language.
Image 6–2Configurator lanuguages
The following languages are possible:
Arabic
Simplified Chinese
Traditional Chinese
Danish
Dutch
English
Finnish
French
German
Italian
Japanese
Korean
Norwegian
Portuguese
Russian
Spanish
Swedish
The Configurator language changes to the selected language.
Enter the user name 'admin' and the password, read and accept the EULA and the Privacy policy and click OK.
By default, the password is set to 'admin'.
Warning: It is strongly recommended to change the default password into a strong password on first use, to prevent that anyone else accessing the configurator can change the settings of the ClickShare Base Unit. See section “Security, passwords”.
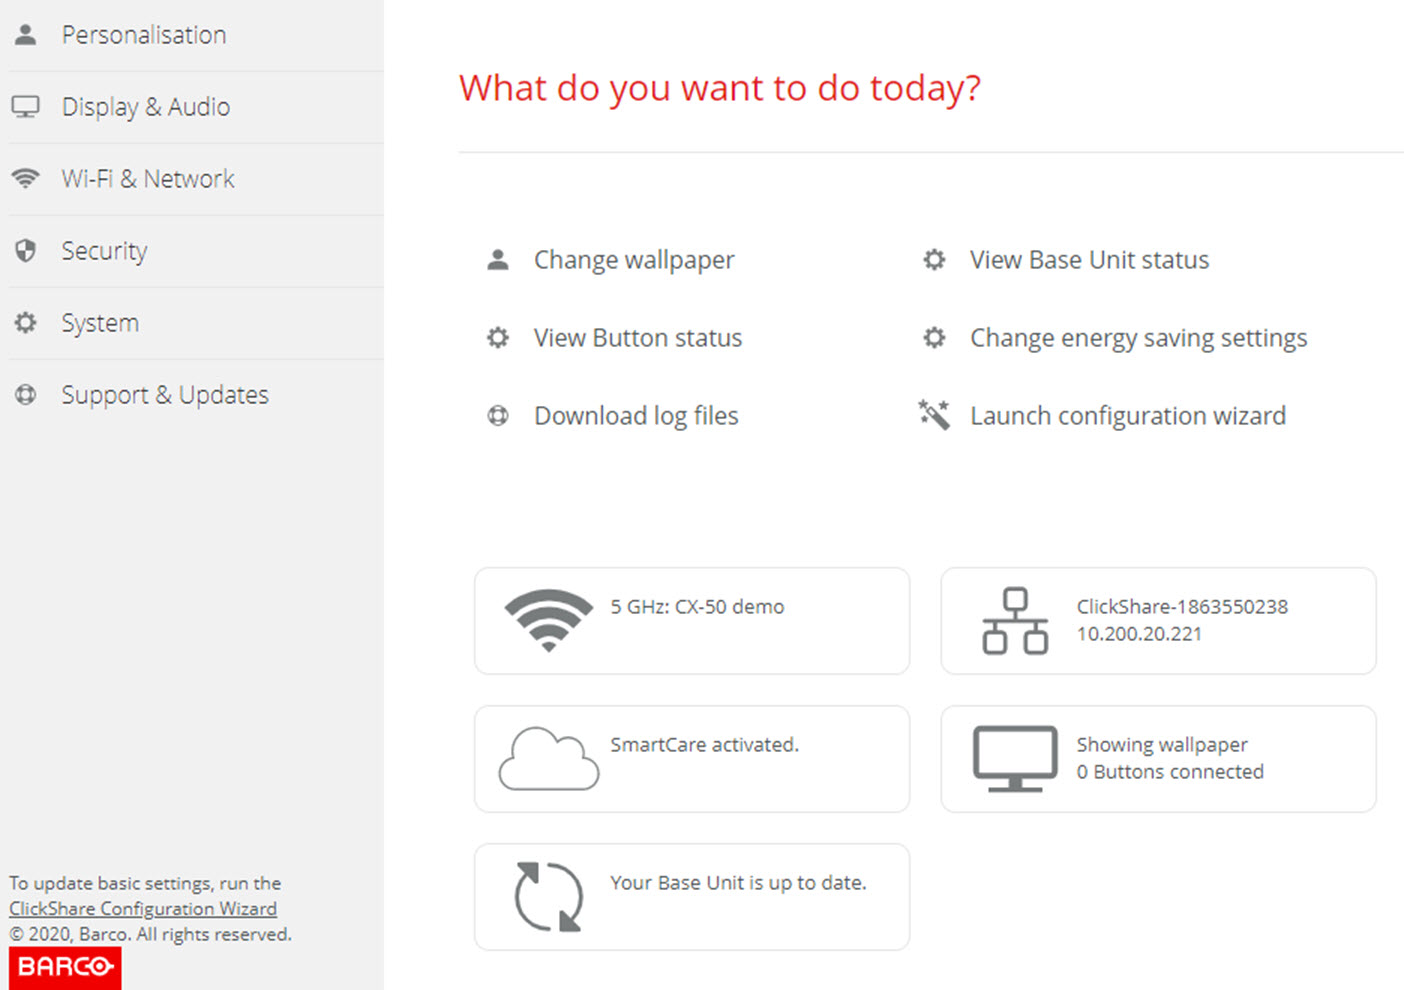
The Configurator opens.
Image 6–3Start screen
The language of the configurator can be changed on any page in the interface.
The screen is split up in 2 panes. Left pane with the selection buttons and a right pane to configure the selected function.
The startup screen itself shows:
the wired IP address
the wireless SSID
the number of Buttons connected
the system state
the SmartCare state
Each of these boxes are also direct links to the described function.
Note: If you cannot find the IP address (e.g. there is no screen available) you should connect to the Base Unit directly with your laptop via an Ethernet crossover cable and access the web interface using the fixed IP address 192.168.1.23. Make sure your own LAN adapter is set in the 192.168.1.x range.
To access the Configurator via a direct connection.
Connect the Base Unit to your laptop using an Ethernet cable.
On your laptop, open a browser.
Note: Supported browsers are Microsoft Edge, Firefox and Safari.
Enter the user name 'admin' and the password, read and accept the EULA and click OK.
By default the password is set to 'admin'.
The configurator opens. The wired IP address is given on the startup page.
Note: Older laptops might not support the 5 GHz Frequency Band. If your Base Unit is set to that frequency range, those devices will not be able to connect to the Base Unit via the wireless network.
Overview of functions
Group
Function
Personalization
On-Screen ID
Wallpaper
Configuration Files
Display & Audio
Display & Audio
Wi-Fi & Network
Wi-Fi Settings
LAN Settings
Services
Security
Security levels
Passwords
System
Base Unit Status
Date & Time
Energy Savers
Buttons
Support & Updates
Firmware
Troubleshoot
When a setting is changed, always click Save changes to store the changes.