Depending on the installation the projector can be mounted in different ways, the different configurations are:
Front / Table (F/T)
Front / Ceiling (F/C) (upside down)
Front / Ceiling (F/C) (table position)
Rear / Table (R/T)
Rear / Ceiling (R/C) (upside down)
Rear / Ceiling (R/C) (table position)
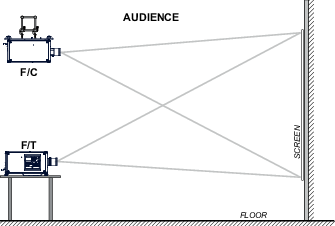
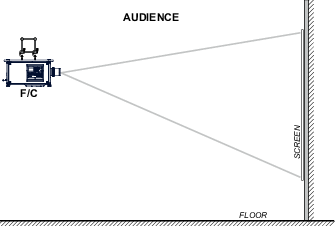
Front projection
The projector is installed, either in a table mount or ceiling mount configuration, at the same side of the screen as the audience.
Image 2–4Front projectionImage 2–5Front projection, Ceiling mounted, in table position
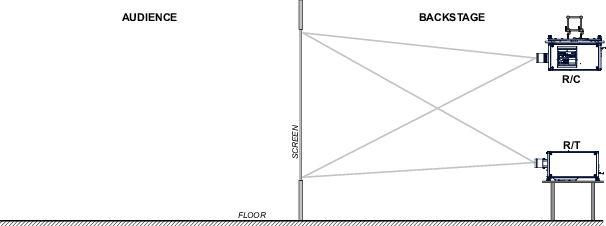
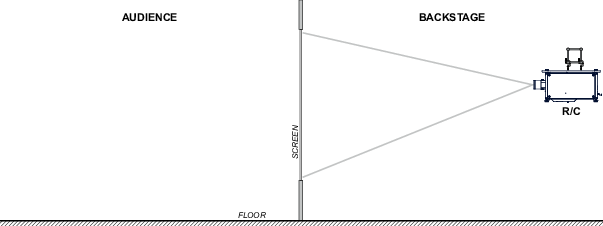
Rear projection
The projector is installed, either in a table mount or ceiling mount configuration, at the other side of the screen opposite the audience.
Image 2–6Rear projectionImage 2–7Rear projection, ceiling mounted in table position
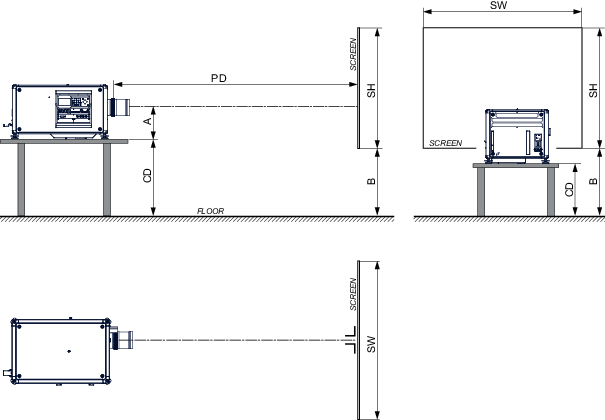
Positioning the projector
Image 2–8Positioning projector
The projector should be installed at right angles (horizontally and vertically) to the screen at a distance PD. Note the distance (A) between lens centre and table surface is slightly variable. This distance (A) is nominal 35 cm in case all feet are turned in completely and the vertical lens shift is set to zero (0).
On axis / off axis projection
The position of the projector with reference to the screen may also be different depending on the installation. Basically the projector can be positioned in On-Axis or Off-Axis configuration. On-Axis configuration means that the projector is positioned so as to have the centre of the lens coinciding with the centre of the screen. Off-Axis projection is obtained by shifting the lens up, down, left or right. Several parameters can be calculated determining the position in any installation.
Formula to calculate the distance CD for On-Axis projection: CD = SH/2 + B - A
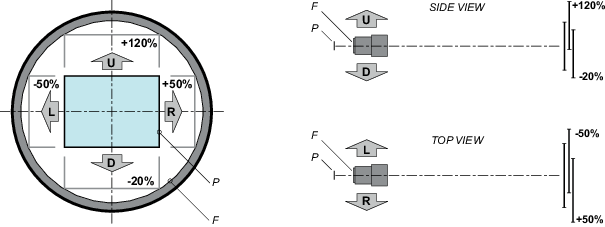
Shift range
The lens can be shifted with respect to the DMD (P) which result in a shifted image on the screen (Off-Axis). A 100% shift means that the centre point of the projected image is shifted by half the screen size. In other words, the centre point of the projected image falls together with the outline of the image in an On-Axis projection. Due to mechanical and optical limitations it's recommended to keep the shift values within the field of view (F) as illustrated below. Within these shift ranges the projector and lens perform excellently. Configuring the projector outside these shift ranges will result in a slight decline of image quality.
Image 2–9Vertical and horizontal shift range
P
DMD.
F
Field of view.
Note: It is mechanical possible to shift outside the recommended field of view, but it will result in a decline of image quality depending on the used lens and the zoom position of the used lens. Furthermore, shifting too much in both directions will result in a blurred image corner.
Tip: Best image quality is projected in the On-Axis configuration.
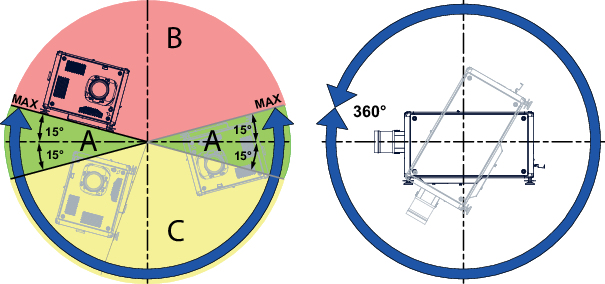
Horizontal and vertical projector tilt ranges
The projector can be rotated and mounted at any vertical angle. In other words, you can tilt the lens side of the projector as much as desired for your application.
Side to side tilt, however, must not exceed ±15°. This limit ensures that the lamp in the projector operates properly and safely. More tilting within area C is allowed but lamp flicker can happen.
Image 2–10
A
Tilting allowed without problems
B
No tilting allowed in this area
C
Tilting allowed but lamp flicker possible
Note: Projector lamp will not start up when out of tilt range due to build-in tilt sensor.