4.6 Suspension of the projector with rigging clamps
Rigging points and rigging clamps
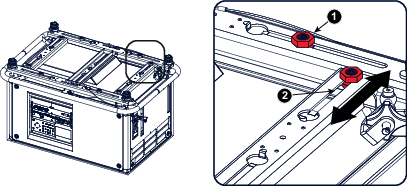
When a carrying handle is mounted at the bottom side of the projector, eight slots are available to mount rigging clamps. Four slots are longitudinally (1) oriented and four slots are transversely (2) oriented. Each slot contains a rigging point of which the position in the slot can be adjusted depending on the size of the truss installation. The rigging clamps can be attached to those rigging points, which allows an easy and fast physical setup of the projector in a hanging configuration.
Image 4–40Rigging points
Required tools
Open end spanner 24 mm
Open end spanner 17 mm
Required parts
4 rigging clamps
How to install and use the rigging clamps
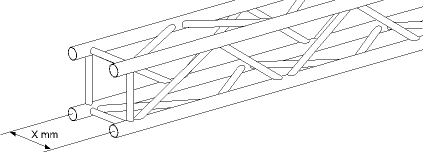
Measure the distance, center tube as reference, between the two used support bars of the truss.
Image 4–41Truss, example
Turn the projector upside down and slide the rigging points on there place in the slots, according the measured distance and secure this position. To release the nuts of the rigging points use a 24 mm open ended spanner. Ensure that the rigging points are symmetrically lined up, so that the projector will hang in balance.
Warning: Be careful while working with heavy loads.
Warning: Always secure the rigging points after adjustment.
Image 4–42Rigging points, distance
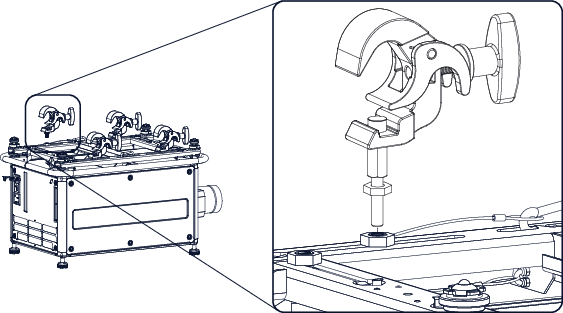
Turn in the rigging clamps into the rigging points using a 17 mm open ended spanner and secure the rigging clamps by turning the safety nut on the rigging clamp against the rigging point using a 17 mm open ended spanner.
Image 4–43Mount rigging clamps
Warning: Always use four (4) rigging points, equally spread, to suspend the projector.
Place all four rigging clamps in open position.
Place the projector (upside down) under the truss installation and lower the truss until the support bars of the truss are nearby the rigging clamps mounted on the projector.
Image 4–44Mount to truss
Lift up the projector and hook the four rigging clamps over the support bars of the truss.
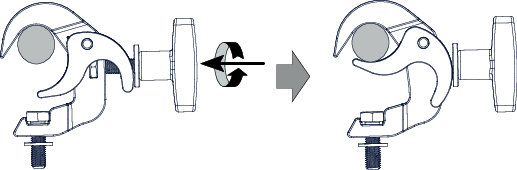
Lock all four rigging clamps by turning the fixation handle clockwise.
Image 4–45Clamp fixation
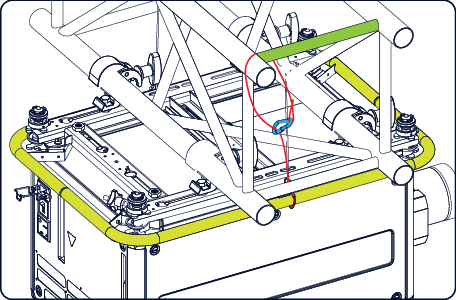
Install the 2 safety cables, one on both sides of the carrying handle, and around the truss.
Mount the 2 safety cables around the carry handle (push the hook through the loop and then around the truss so that there is not to much play (maximum 20 cm). If necessary turn the cable a few times around the truss before clasping the safety hook around the cable.
Image 4–46Security cables
Lift up the truss with the attached projector to the desired height.
Note: Mount the 2 safety cables in such a way that when something goes wrong, the projector cannot fall more than 20 cm. If necessary, turn the cables a few times around the truss to obtain this maximum distance.