13.14.8 Black level adjustment

Why black level adjustment

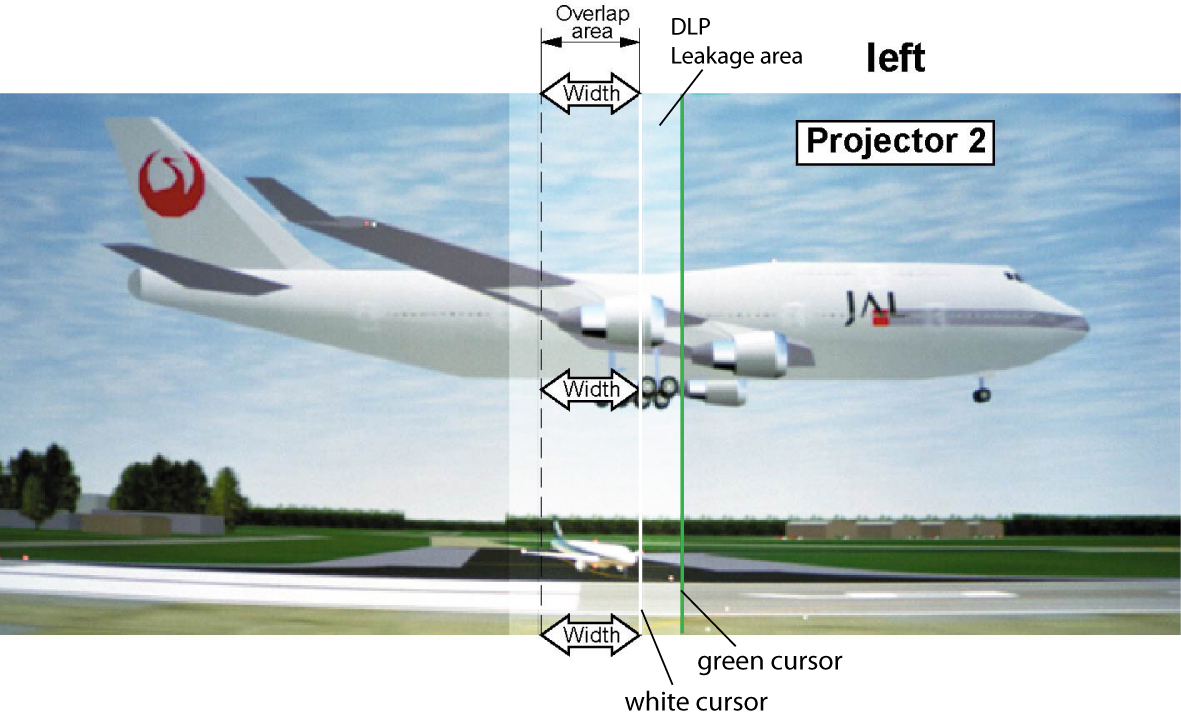
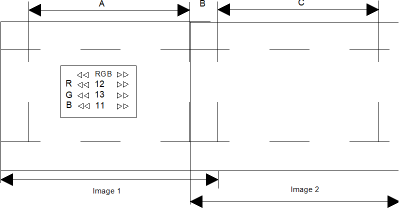
For dark images, the overlap zone will be brighter then the rest of the images. Typically for DLP projectors, next to the overlap zone, a brighter area is recognized. This area is known as a DLP leakage area. This area must also be exclude for the black level adjustment. Therefore we can rise the black level of the remaining image (excluding the overlap zone and the DLP leakage area).

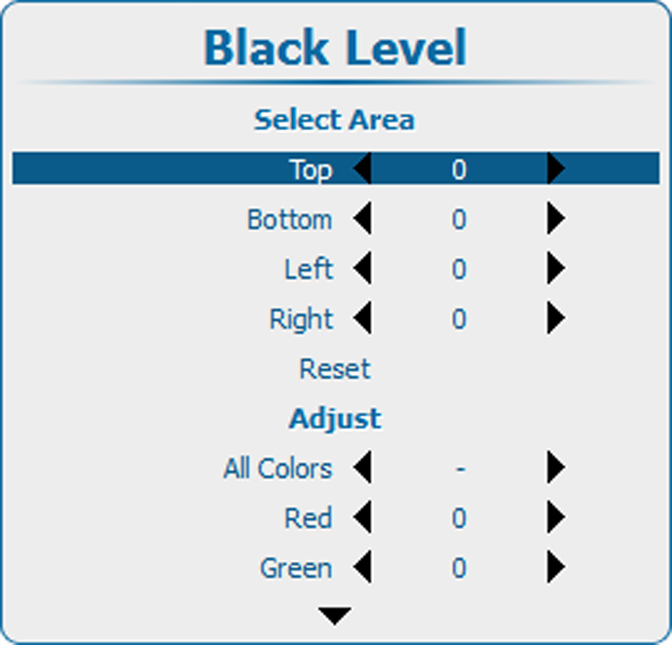
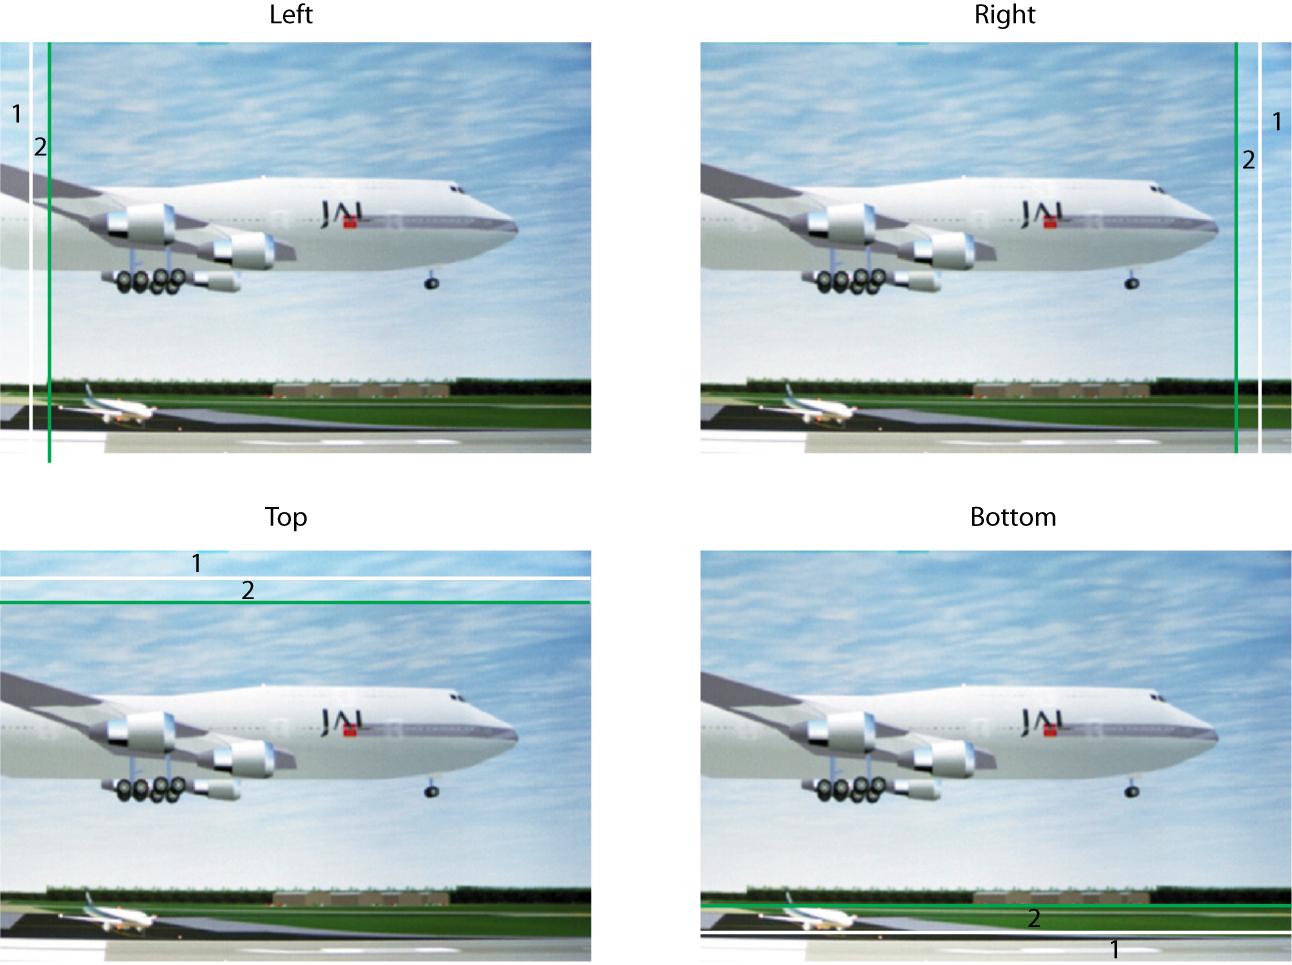
First, the width of the leakage area must be set. The white cursor line indicates the border of the overlap area. The green cursor line indicates the current installed DLP leakage area border and starts at the position of the white cursor line (no width installed). This green line can be moved to the border of the DLP leakage area with the cursor keys.

Image 13–143 DLP Leakage area set up
Tip: After the area is set, use TEXT key to remove the area border lines when adjusting the black level.
How to set the leakage area width
  1. Press Menu to activate the menus and select AlignmentScenergixBlack level.

    Image 13–144 Main menu, alignment
    Image 13–145 Alignment, Scenergix
    Image 13–146 Scenergix, Black level
  2. Press ENTER to select the Black Level adjustments.

    Image 13–147 Black level, area
  3. Use the ▲ or ▼ key to select one of the four size adjustments.

    Use the or key to move the green border line to the desired position.

    Image 13–148 DLP leakage area
    1
    Overlap area
    2
    DLP Leakage area
Note: Use the Reset item to reset all area values.
How to adjust
  1. Press Menu to activate the menus and select AlignmentScenergixBlack level.

    Image 13–149 Main menu, alignment
    Image 13–150 Alignment, Scenergix
    Image 13–151 Scenergix, Black level
  2. Press ENTER to select and use the ▲ or ▼ key to select a color to adjust or select All colors to adjust all colors at the same time.

    Image 13–152 Black level, adjust
  3. Adjust the black level of area A until the black level of area A, B and C are equal. Use the Adjust function Red, Green and Blue in the Black level menu.

    Image 13–153 Black level adjustment
Note: Use the Reset item to set all values back to zero.