Destination refers to the most downstream location in the chain, usually a screen. See the earlier Chapters for the definition of Destination.
When DEST is pressed it lights its blue LED and opens the syntax entry for numbers and modifiers as per above.
The contextual Buttons to the right of the numpad also light up and is populated with functionality that can be used in the syntax. These are:
Contextual Button
Display
Description
CD1
AUX
DEST + AUX # ENTER select the Aux #, just as clicking it in the GUI.
DEST + AUX 1 + 2 + 5 ENTER will select Aux 1, 2, and 5.
DEST + AUX - 2 ENTER will unselect Aux 2, but 1 and 5 stays selected
CD2
BG Input
0 is Matte and maps the WH1 Red, WH2 Green, WH 3 Blue
CD3
Group
DEST + Group # ENTER arms the Destinations in that particular group, just like clicking it in the GUI.
DEST + Group 1 + 3 + 5 ENTER arms Destination Groups 1, 3, and 5.
DEST + Group − 3 ENTER disarms Destinations in Group 3 while leaving destinations in Groups 1 and 5 armed.
CD4
Super Dest
DEST + Super Dest # ENTER arms that particular Super Destination (including the destinations that compose it).
DEST + Super Dest 1 + 2 + 4 ENTER arms Super Destinations 1, 2, and 4.
DEST + Super Dest -2 ENTER disarms Super Destination 2 while leaving Super Destinations 1 and 4 still armed.
CD5
Super Aux
DEST + Super Aux # ENTER arms that particular Super Aux (Including the AUXes that compose it).
DEST + Super Aux 1 Thru 3 ENTER arms Super Auxes 1, 2, and 3.
DEST + Super Aux - 3 ENTER disarms Super Aux 3.
CD6
Empty
CD7
BG Toggle
Activate Toggle mode on selected destinations BG on/off .
CD8
Trans Curve
will toggle between Linear / S-curve / Log / Exp.
CD9
Empty
CD10
Empty
CD11
Freeze PGM
Freezes Program in selected Destinations including Sources and Backgrounds.
CD12
Empty
Layer
Image 12–7
Layer refers to a layer that can hold live video. See the earlier Chapters for the definition of Layer.
When Layer is pressed it lights its blue LED and opens the syntax entry for numbers and modifiers as per below:
LAYER # ENTER will select LAYER #, just as clicking it in the GUI.
LAYER 1 + 3 + 5 ENTER will select LAYER 1, 3 and 5 just as clicking it in the GUI with Multiple Select on.
LAYER – 3 ENTER deselects LAYER 3, while LAYERS 1 and 5 stay selected.
LAYER CLEAR removes all currently selected layers from Preview and unlocked Program.
The contextual Buttons to the right of the numpad also light up and are populated with functionality that can be used in the syntax. These are:
Contextual Button
Display
Description
CD1
PIP
Selects selected Layer as PIP, indicates that by color Green backlight.
CD2
KEY
Selects selected Layer as KEY, indicates that by color Red backlight.
CD3
Super Layer
LAYER + Super Layer # ENTER selects Super Layer #, just as in the GUI.
LAYER + Super Layer 1 + 4 + 6 ENTER selects Super Layers 1, 4, and 6, just like clicking on them in the GUI with Multiple Select turned on.
LAYER + Super Layer –1 ENTER deselects Super Layer 1 and Super Layers 4 and 6 stay selected.
LAYER + Super Layer + CLEAR clears all selected Super Layers from their respective Destinations.
CD4
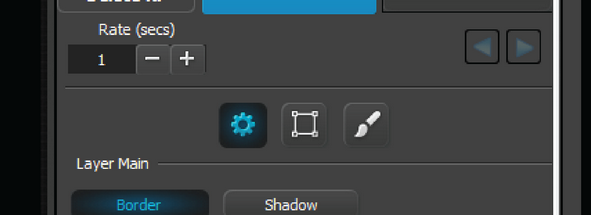
Layer Main
Thumbnail like GUI “Sprocket”.
Selected layer Adjustment area is indicated by light blue backlight.
Selects and open the Layer Main area:
CD5
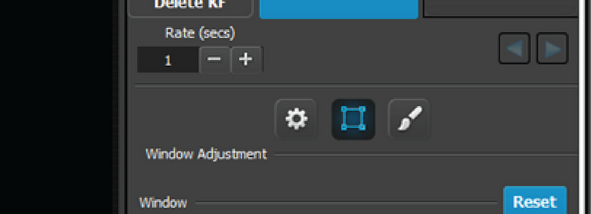
Layer Window
Thumbnail like GUI “Box”
Selected layer Adjustment area is indicated by light blue backlight
Selects and open the Window Adjustment area:
CD6
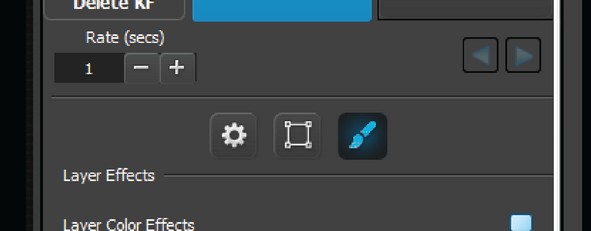
Layer Effects
Thumbnail like GUI “Brush”
Selected layer Adjustment area is indicated by light blue backlight
Selects and open the Layer Effects area:
CD7
Empty
Empty
CD8
Border ON/OFF
Toggles Border setting of selected layer ON vs OFF.
CD9
Shadow ON/OFF
Toggles Shadow setting of selected layer ON vs OFF.
CD10
Reset
Same as Reset in GUI
CD11
Full H
Same as in GUI
CD12
Full V
Same as in GUI
PAGE 2 via PG Up (Page 1 via PG Down respectively) :
Contextual Button
Display
Description
CD1
Add Keyframe
Adds Keyframe to selected Layers.
CD2
Delete Keyframe
Deletes Keyframe of selected Layers.
Layer functions are mapped as below:
WH 1
H Pos
WH 2
V Pos
WH 3
Layer size (Keep AR whether unlocked or not.)
Arrow Buttons
Image 12–8
The standard function is moving a layer just as in EMTS now.
When the Barco Eye Button is pressed and held the arrow buttons will allow for Z-Order alignment, selected layers will move one Z-order up or down according to the arrow indication- Left arrow is top most Z-order Right arrow is bottom most Z-order.
Source
Image 12–9
Source refer to an source of image or video such as a Source file, Still store and Destination. See the earlier Chapters for the definition of Source.
When Source is pressed it lights its blue LED and opens the syntax entry for numbers and modifiers as per above and in detail below:
SOURCE # ENTER will add Source file # to the selected layer or add a layer, just as dragging it in the GUI.
SOURCE 1 THRU 4 ENTER will add Source file 1 to the Z-order first selected layer and continue to add source files 2 – 4 to Z-order layers 2 – 4 or add as many layers needed until no layers are available.
SOURCE 1 + 5 + 88 ENTER will add Source file 1 to the Z-order first selected layer and continue to add source files 5 and 88 to Z-order layers 2 – 3 or add as many layers needed until no layers are available.
Note: SOURCE syntax support the . (dot) as indicating a source file like 88.5
Note: For live input sources, Source is the actual source file, not the input in number.
The contextual Buttons to the right of the numpad also light up and is populated with functionality that can be used in the syntax. These are:
Contextual Button
Display
Description
CD1
RESET Size
Once pressed Resets the Sizing Adjustments of the source in the selected Layer, just as clicking the Blue Reset icon button in the GUI.
If multiple layer are selected, no source files sizing is Reset.
CD2
Create Source (file)
Creates new source file just like the plus button in the GUI
CD3
SAVE Source
Saves the source file
CD4
Source Adjust
Opens the Adjust of the selected source on the Sprocket page.
CD5
Color Adjust
Opens the Adjust of the Color correction of the selected source on the Brush page
CD6
Empty
CD7
Freeze Input
Will freeze the INPUT of the selected source file. If the selected source IS frozen it will be un-frozen.
CD8
Bind
Binds Source file to User key per syntax.
SOURCE # (is source file) BIND # (is user key number) ENTER
CD9
Empty
CD10
Empty
CD11
Empty
CD12
Empty
Wheels for Source Adjust (Sprocket)
WH1
Source H Size (AR lock must be unlocked to adjust seaparately from Source V Size)
WH2
Source V Size (AR lock must be unlocked to adjust seaparately from Source H Size)
WH3
Source H Pos
WH4
Source V Pos
WH5
Source Aspect Ratio (Selects from drop down list)
Wheels for Color Adjust (Brush)
WH1
Contrast Overall
WH2
Brightness Overall
WH3
Gamma
WH4
Hue
WH5
Saturation
Device
Image 12–10
At present, this key has no functionality assigned.
User Key
Image 12–11
User Keys are building blocks of settings for the Layers. See the earlier Chapters for the definition of user Keys.
When User Key is pressed it lights its blue LED and opens the syntax entry for Record and Recall of user keys.
Recording of a Preset is done in conjunction with the Save PVW and Save PGM Buttons like below:
USERKEY # ENTER will recall userkey # to all selected layers.
USERKEY 5 + 11 + 7 ENTER will add userkey 5 to the Z-order first selected layer and continue to add userkey 11 and 7 to Z-order layers 2 – 3
To record userkeys you can have only one Layer selected. Recording a userkey is done via the below syntax:
Image 12–12
SAVE PVW USERKEY # ENTER will save the currently selected layer properties in Preview into the selected number. If the number exists it will be overwritten with the current settings/enables.
SAVE PGM USERKEY # ENTER will save the currently selected layer properties in Program into the selected number. If the number exists it will be overwritten with the current settings/enables.
USERKEY ENTER saves next available userkey.
The contextual Buttons to the right of the numpad also light up and are populated with functionality that can be used in the syntax. These are:
CD1 -11
is the Enables and toggles on off
CD12
is All / None as toggle function
Note: Enables of the User Keys are described in an earlier chapter.
Preset
Image 12–13
Preset refers to Presets stored in Event Master Toolset. See the earlier Chapters for the definition of Presets.
When Preset is pressed it lights its blue LED and opens the syntax entry for Record and Recall of user keys.
Recording of a Preset is done in conjunction with the Save PVW and Save PGM Buttons like below:
PRESET # ENTER will recall preset #
PRESET 5 + 11 + 7 ENTER recall these presets in order, 5 being recalled first in a stack on fashion, information is added but not replaced.
Recording a preset is done via the below syntax:
SAVE PVW PRESET # ENTER will save the currently selected destination(s) into the selected number. If the number is already in use, the preset will be overwritten with the current composition on Preview for the selected destination(s).
SAVE PVW PRESET ENTER without a # saves next available preset.
The contextual Buttons to the right of the numpad also light up and are populated with functionality that can be used in the syntax. These are:
Contextual Button
Display
Description
CD1
Lock / Unlock
Locks or unlocks the chosen preset(s), using the numpad.
CD2
Renumber
Renumber the Selected preset
CD3
Lock All
Locks all Presets so that they cannot be deleted or edited.
CD4
Unlock All
Unlocks all Presets so that they can be deleted or overwritten.
CD5
Complete/Relative Toggle
Displays the current type of Preset to be saved. The choice is either Complete (default) or Relative, and CD5 will display the active choice.
Example:
PRESET 45 Renumber 55 ENTER will renumber Preset 45 to 55.
Special Function with Modifiers with Preset recall and Record:
+ numpad will increase selection by one.
- numpad will decrease selection by one.
Cue
Image 12–14
Cue refers to Cues stored in Event Master Toolset. A Cue can be placed into standby, waiting for the operator to press the Play button to start the Cue. The syntax is CUE + # + ENTER, then press Play to start the Cue.
Time
Image 12–15
Time refers to the timing parameter of the selected Top Functions. This button will allow entering time for different functions.
Dest sets Transition Time of the Destination, and Layer sets the Transition Time of the Layer in frames based on the System Native Rate.
Syntax for TIME is:
DEST # TIME # ENTER will set the Transition time of # frames to Destinations # and add Destination # to any other selected Destinations for further actions.
DEST 1 + 5 TIME 60 ENTER will set the Transition time of 60 to Destinations 1 and 5, and add Destination 1 and 5 to any other selected Desalinations for further actions.
LAYER 1 + 4 TIME 120 ENTER will set the Layer Transition time of 120 to Layer 1 and 4, and add Destinations 1 and 4 to any other selected Destinations for further actions.