14.18 Solid-State Memory

Flow chart
Image 14–48
Note: Before you proceed removing the Solid State Memory you need to remove the Bottom Panel as outlined in the related procedure.
Note: The solid-state memory can also be replaced after the System Power board is removed from the unit.
Note: For E2 Gen 2 and S3 Q7 CPU the solid-state memory is integrated with the CPU module.
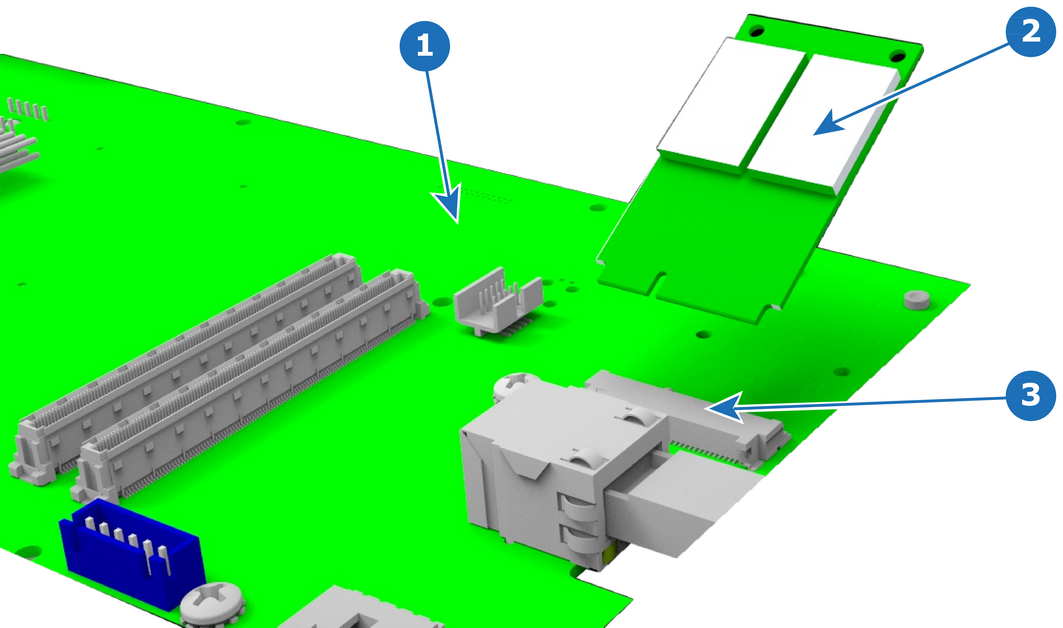
Overview
Image 14–49
1
System Power board
2
Solid State Memory card
3
Socket
Concerned parts
Solid State Memory
Necessary tools

1 x Phillips Screwdriver #2

How to remove the Solid State Memory
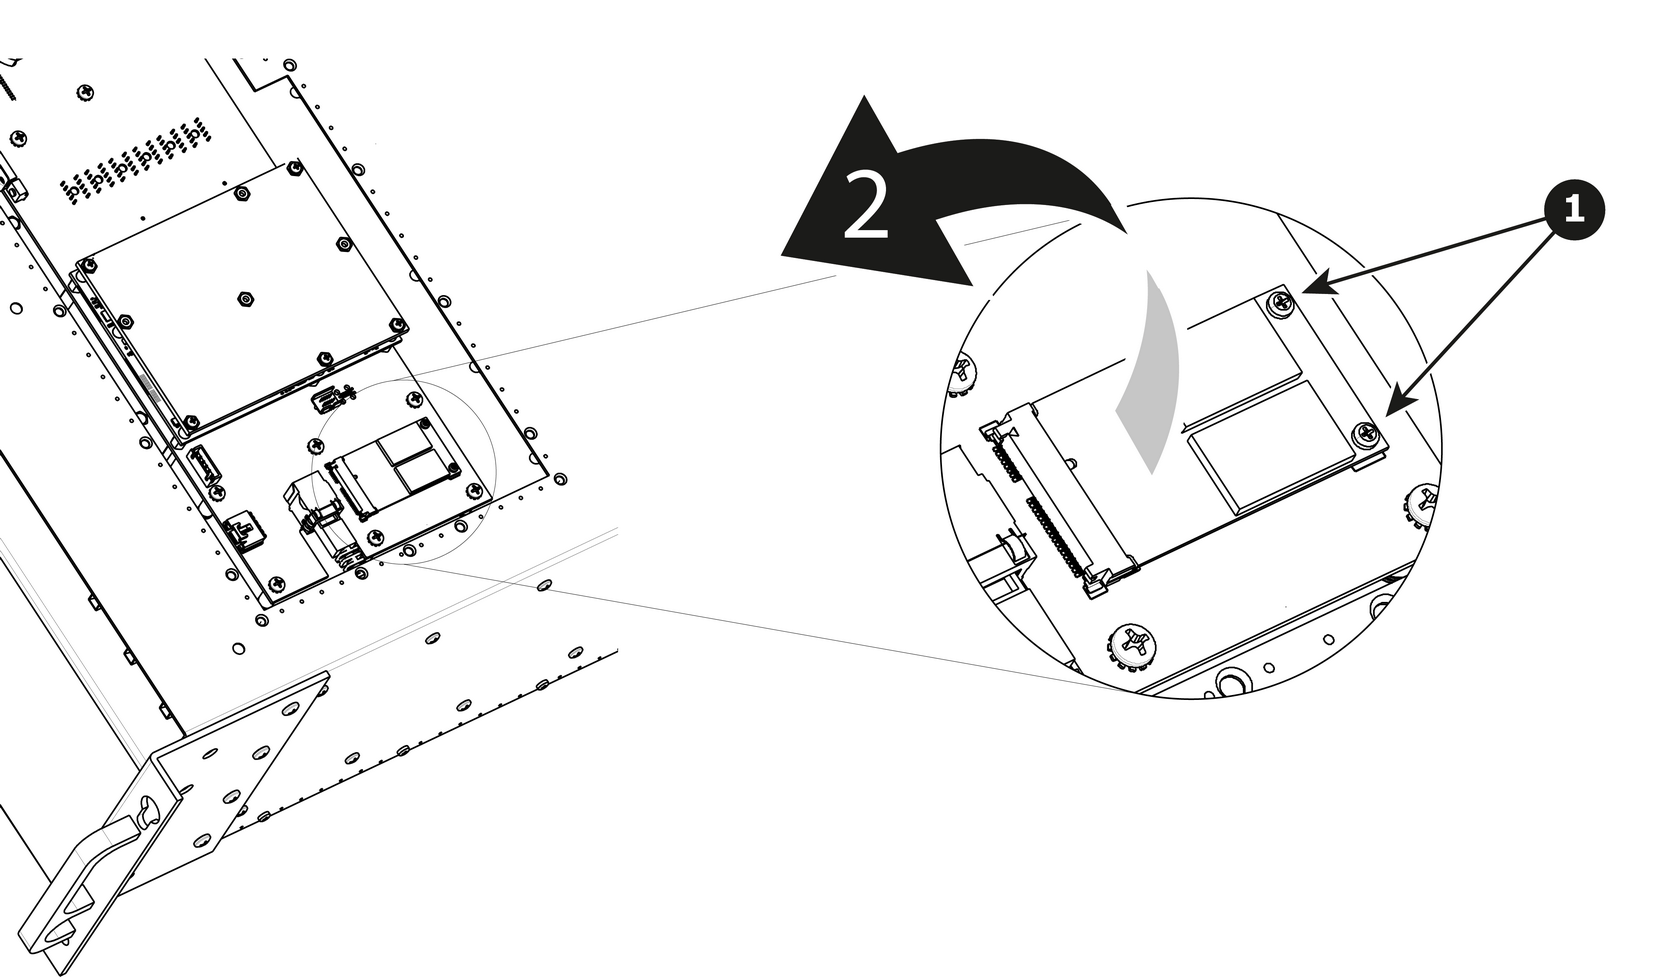
  1. Remove the 2 screws that hold the memory card.
  2. Carefully remove the memory card from the socket.

    Image 14–50
How to install the Solid State Memory

To install the Solid State Memory follow the same procedure in the reverse order.