16.11 Motherboard Fansink

Flow chart
Image 16–22 Motherboard fansink
Overview

Because the fansink pins must be removed from the underside of the motherboard, the motherboard must be removed from the chassis before the fansink can be removed or replaced.
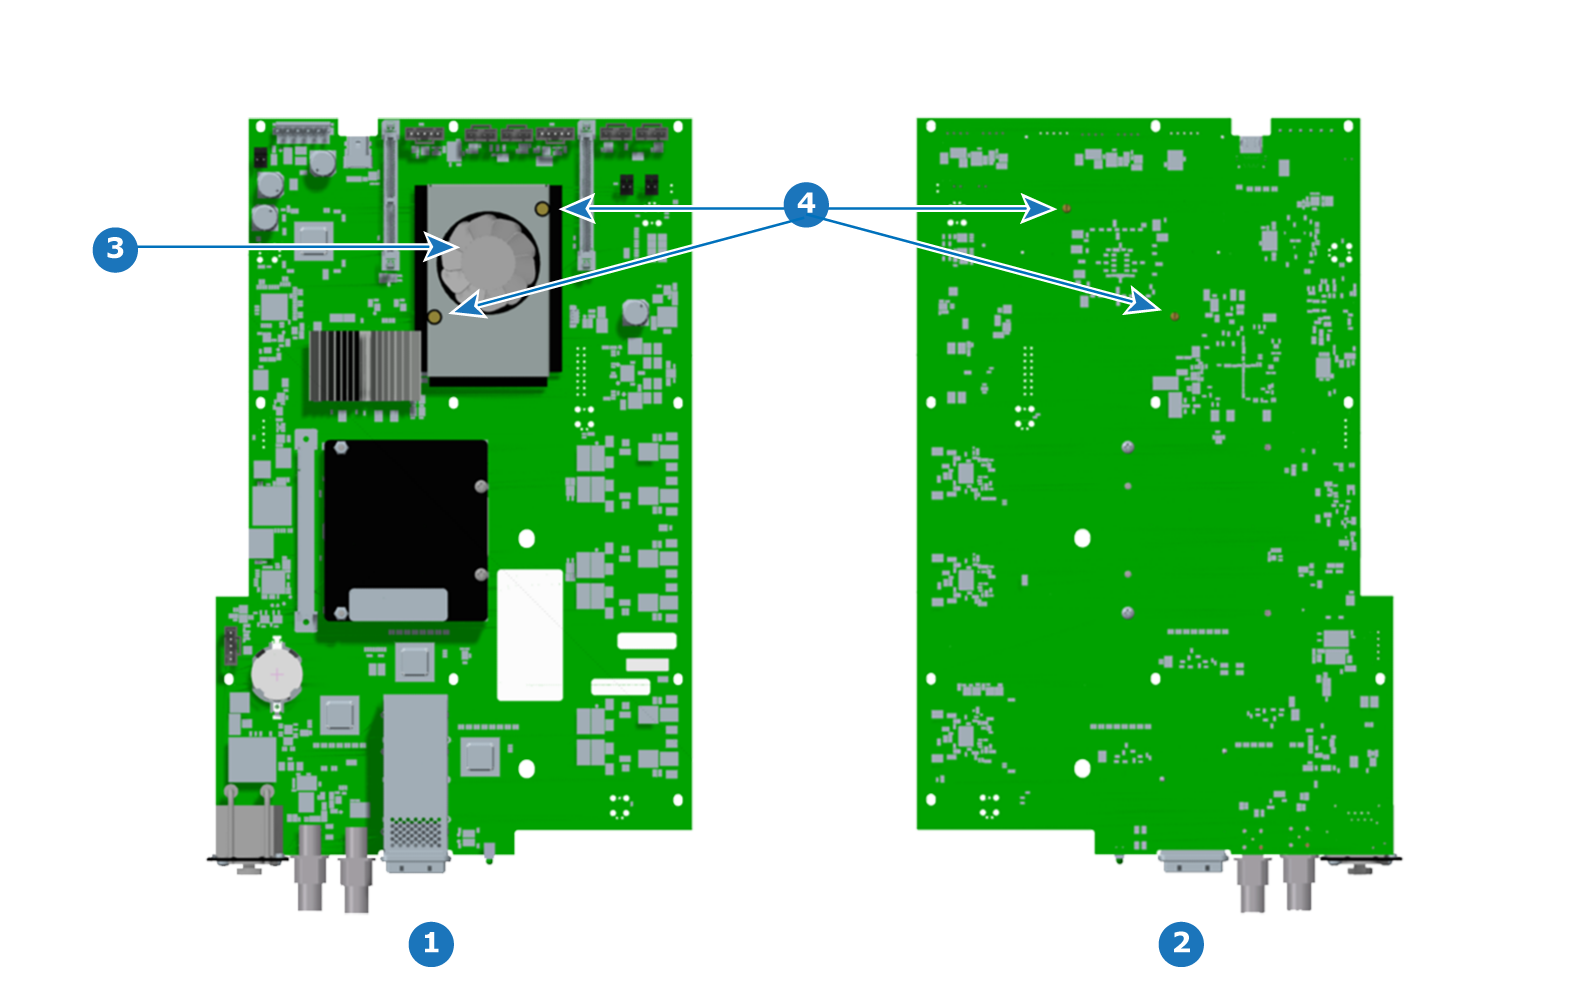
Image 16–23 Motherboard fansink components
1
Motherboard—topside view
2
Motherboard—underside view
3
Motherboard fansink
4
Fansink pins
Concerned parts
Motherboard fansink
Fansink kit
EX motherboard
Necessary tools

None.

How to remove the motherboard fansink
  1. Remove the top cover.
  2. Remove the EX motherboard.
  3. Turn the motherboard underside up.
  4. Push the fansink pins in, so that they pass through the motherboard but do not separate from the fansink.
  5. Turn the motherboard topside up, and remove the motherboard fansink, together with the fansink pins.
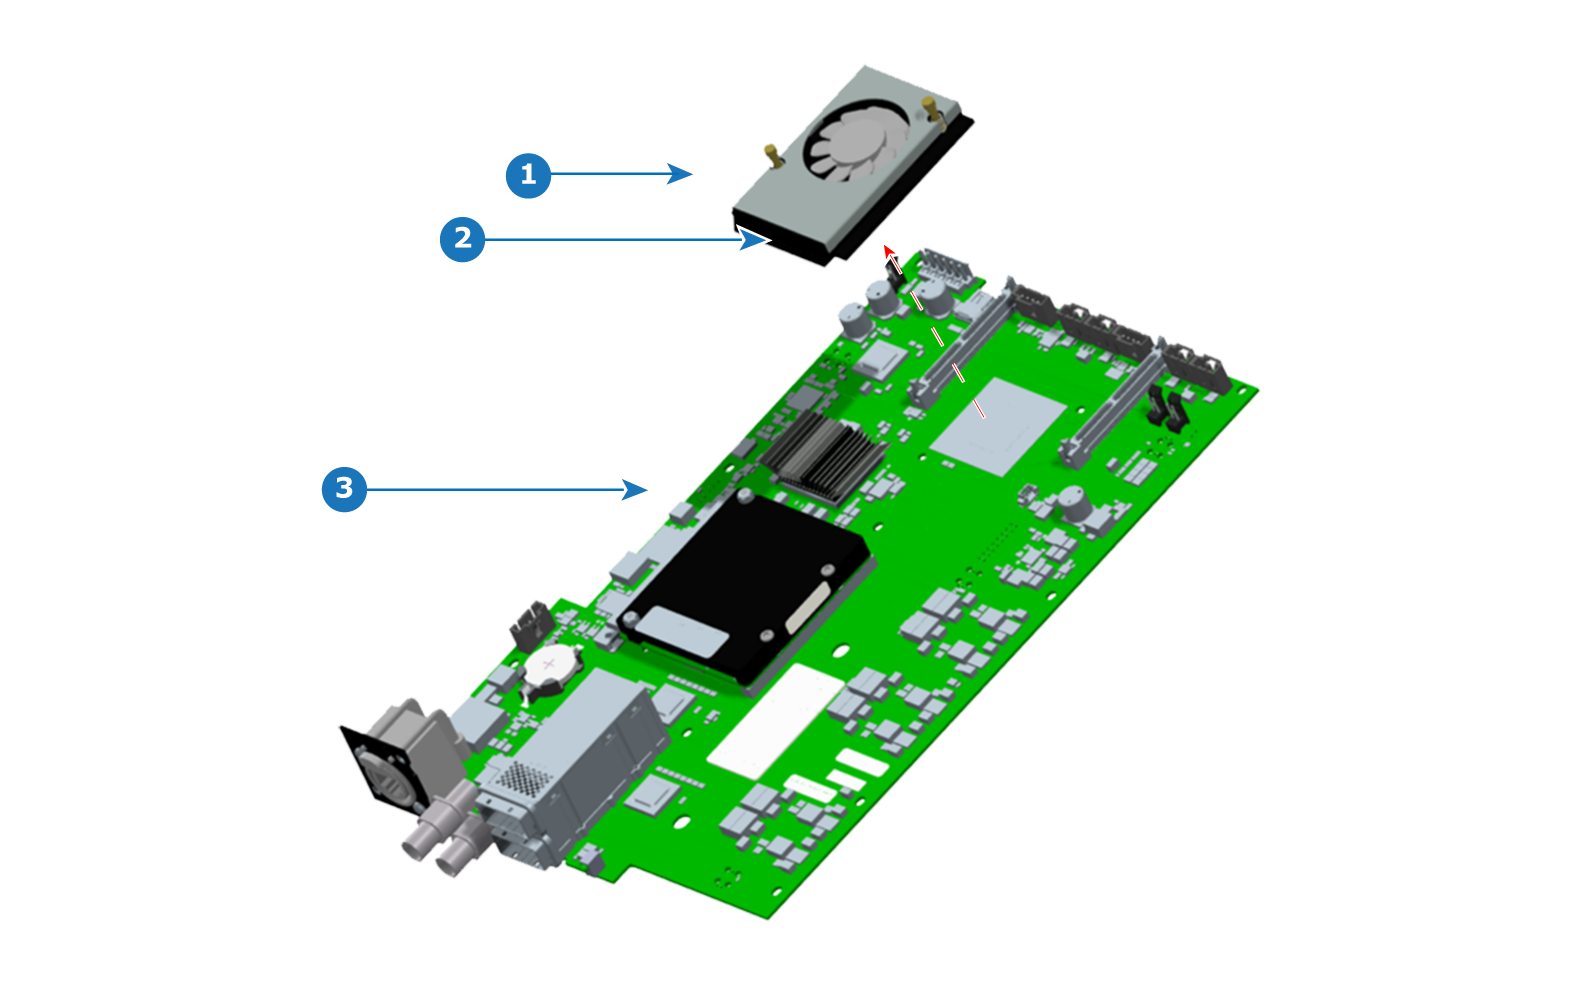
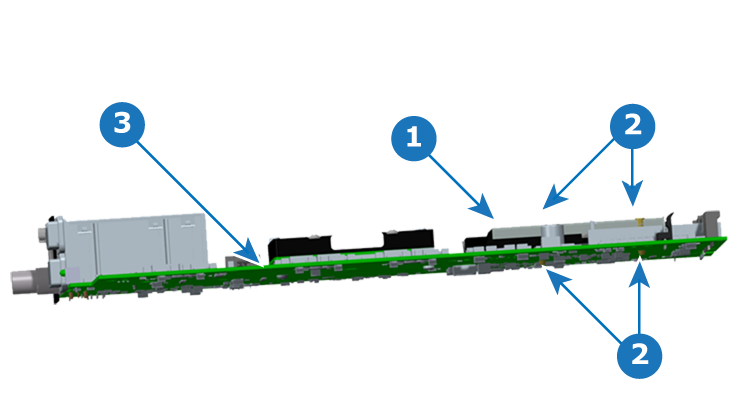
    Image 16–24 Removal of motherboard fan
    1
    Motherboard fansink and pins
    2
    Open fins on the fansink
    3
    Motherboard
How to install the motherboard fansink

CAUTION: Do not reuse a fansink, once it has been removed from the motherboard. The thermal compound will no longer be properly located, and the compression of the pins during removal will prevent them from fastening properly to the motherboard. Use the fansink replacement kit.

To install a replacement fansink on the EX motherboard, follow these steps.

  1. Align the fansink pins over the pin holes in the motherboard.
  2. Place the replacement fansink on the EX motherboard.

    Note: The open fins on the fan sink should point toward the CPU section as shown.
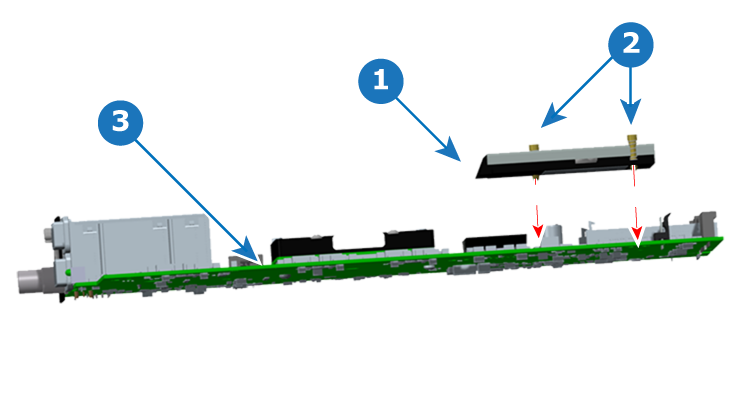
  3. Push the fansink pins in, so that the tops of the pins are flush with the top of the fansink.
Image 16–25 Motherboard fansink pins
1
Fansink
2
Fansink pins
3
Motherboard
Image 16–26 Motherboard fansink installed
1
Fansink
2
Fansink pins
3
Motherboard