
14.20 CPU Module

Flow chart
Image 14–55
Note: Before you proceed removing the CPU module you need to remove the Bottom Panel as outlined in the related procedure.
Overview
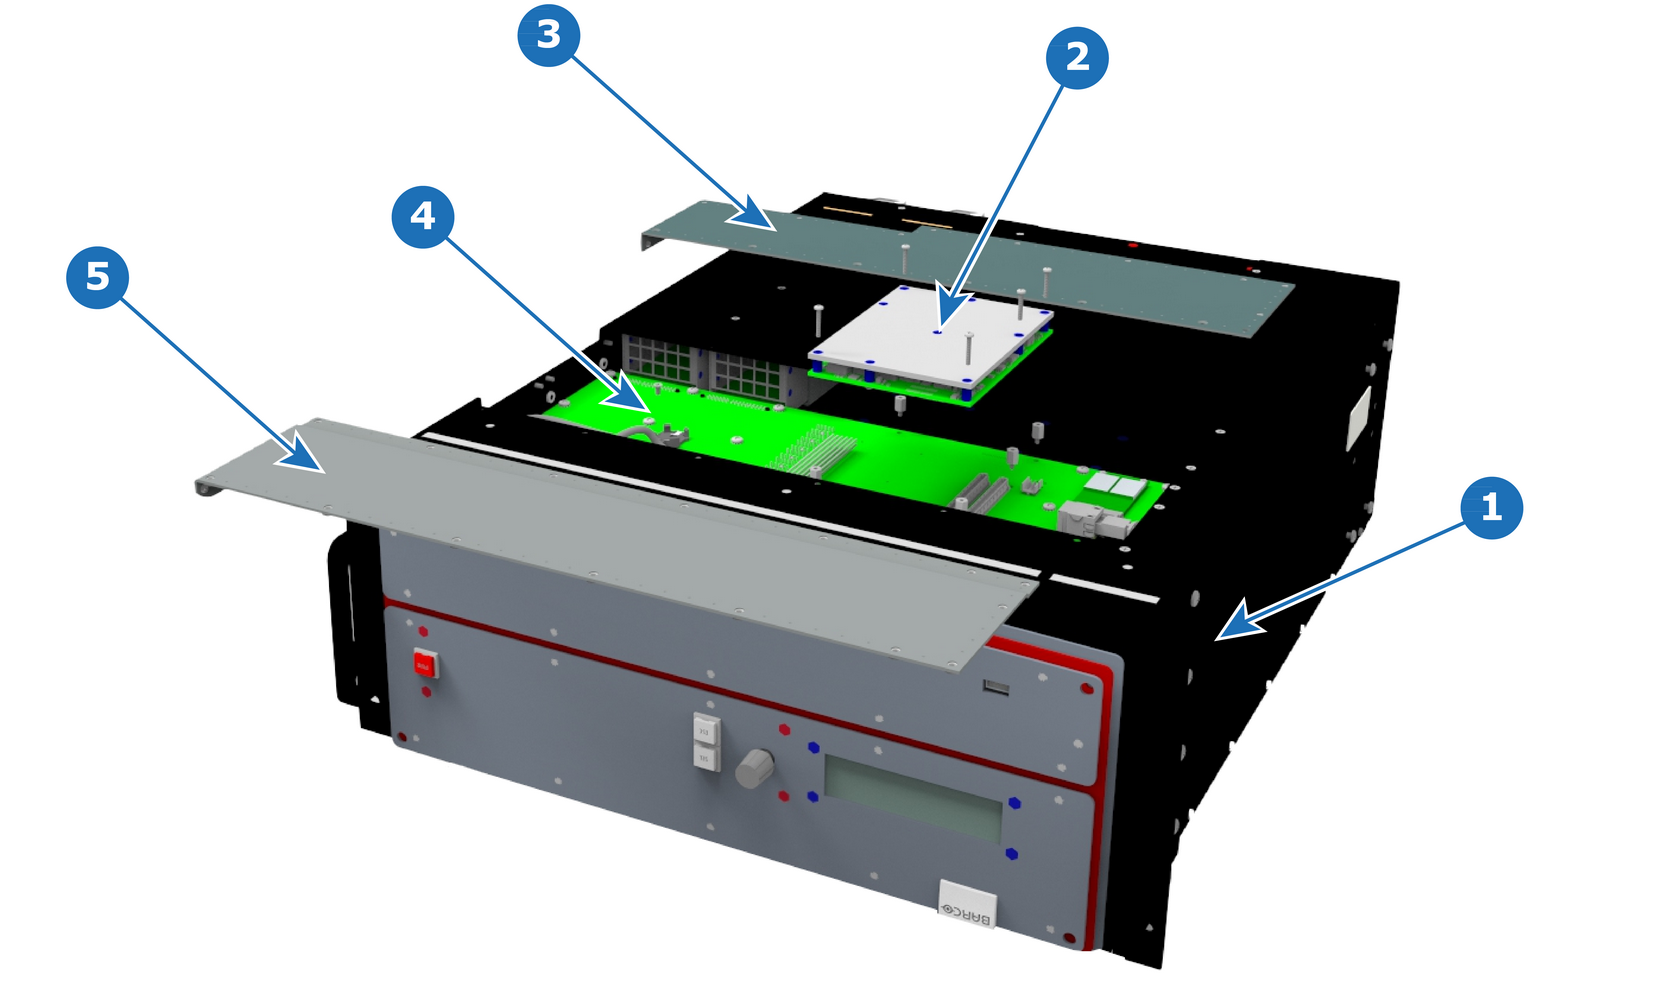
Image 14–56 CPU module – E2 Gen 1
1
Chassis
2
CPU Module
3
Bottom Panel Part 1
4
System Card.
5
Bottom Panel Part 2
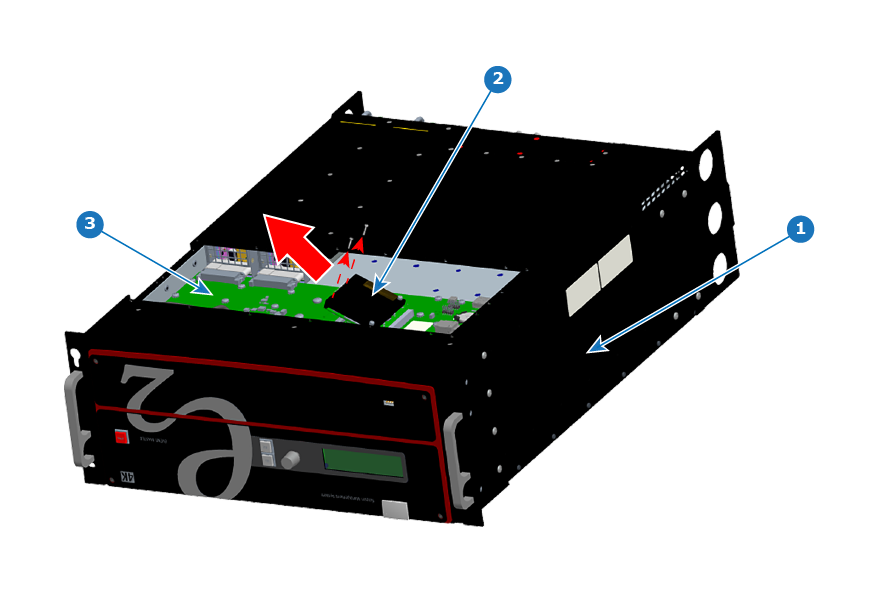
Image 14–57 CPU module – E2 Gen 2
1
Chassis
2
CPU Module
3
System card
Concerned parts
CPU module
Necessary tools

1 x Phillips Screwdriver #2

How to remove the E2 Gen 1 CPU module
  1. Remove the five screws that attach CPU module to the system card.
  2. Carefully remove the CPU module by lifting it up.
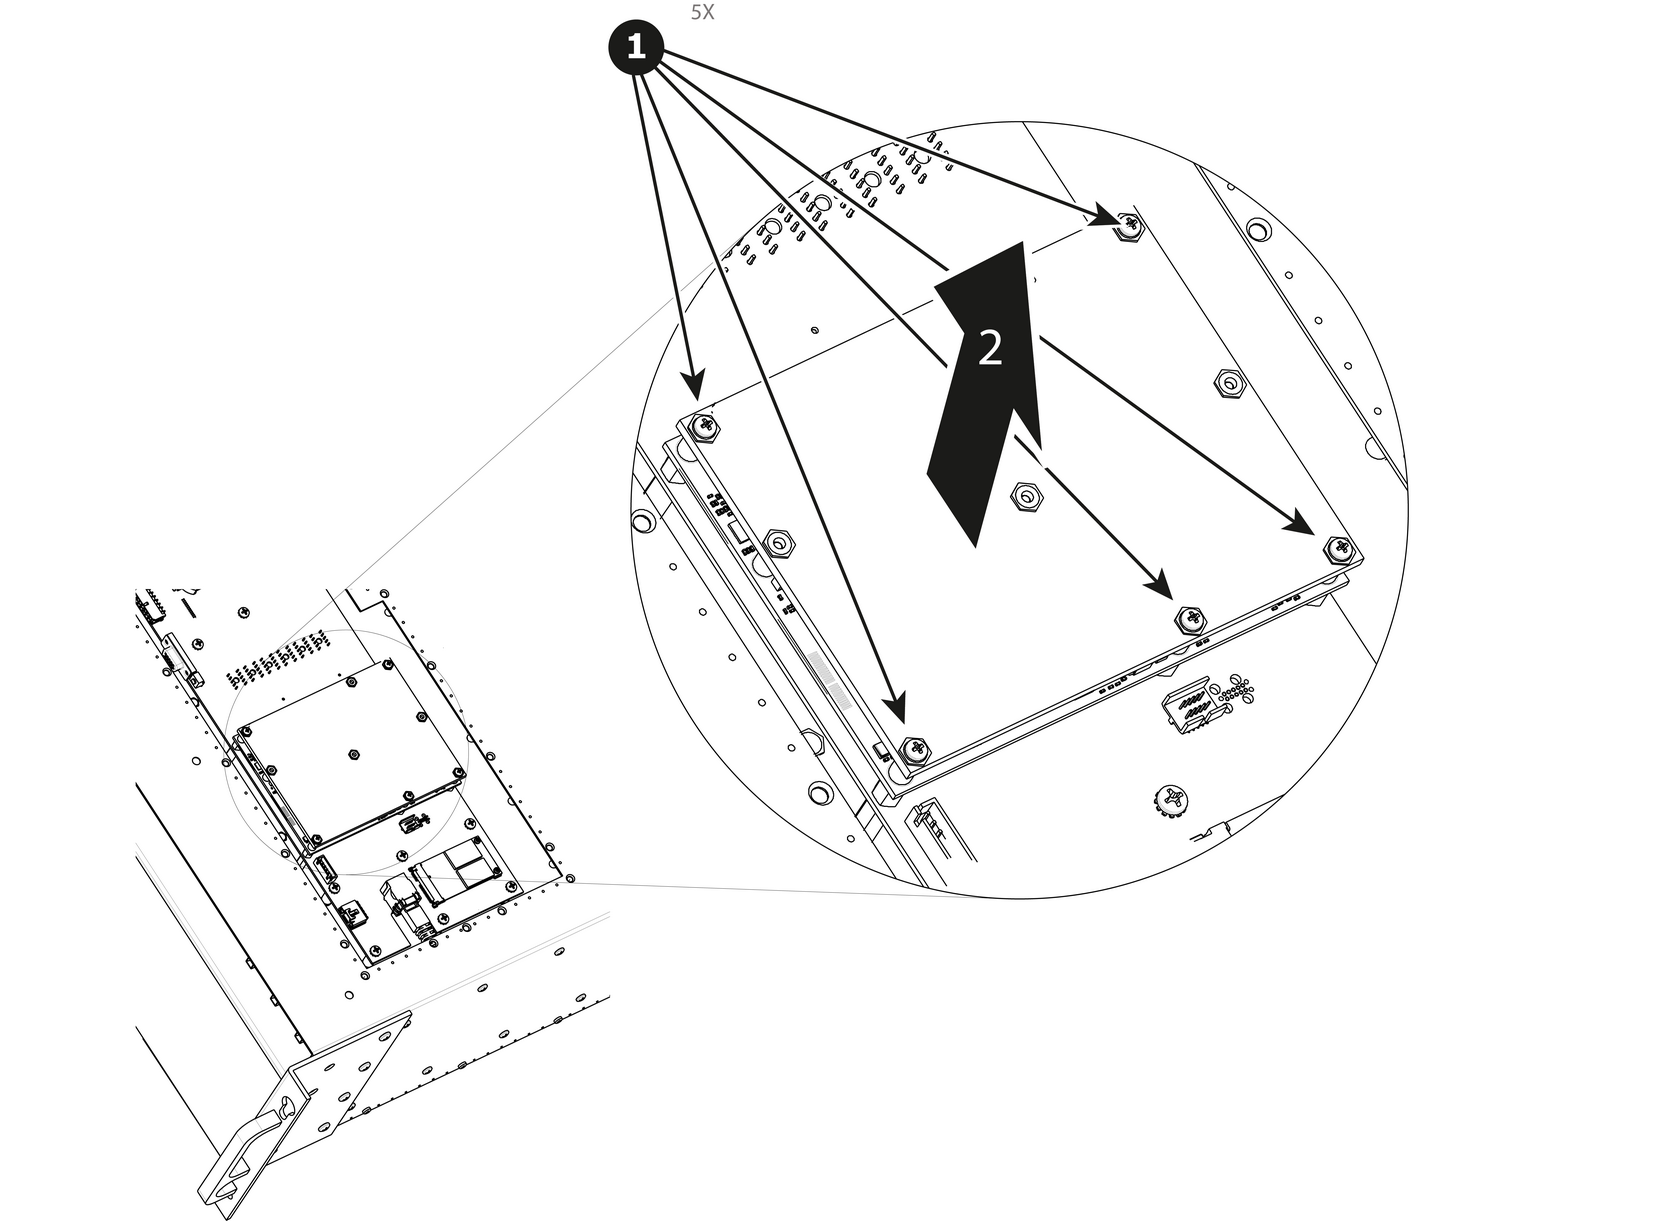
    Image 14–58 CPU module removal – E2 Gen 1
How to remove the E2 Gen 2 CPU module
  1. Remove the two screws from the left-hand side of the CPU module.
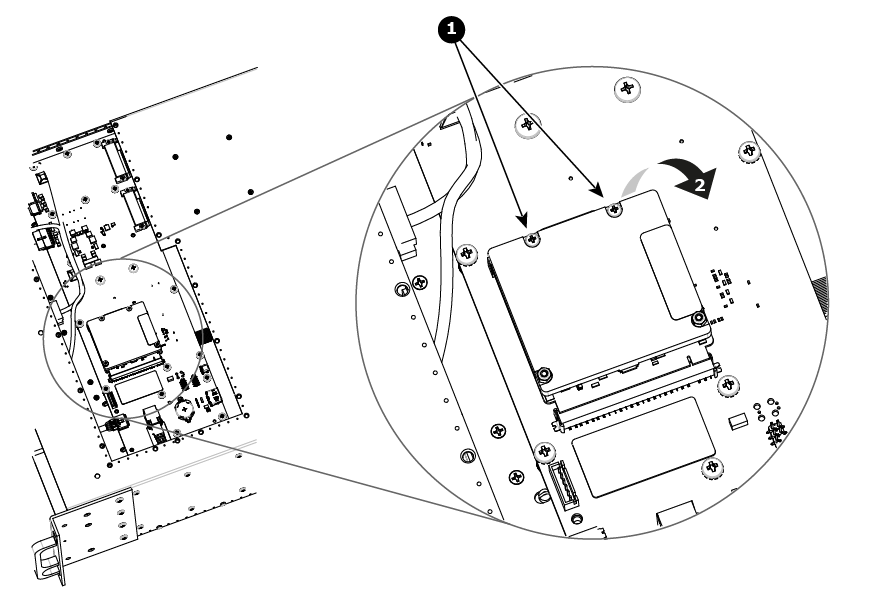
    Image 14–59 CPU module removal – E2 Gen 2
  2. Lift the freed edge of the CPU module, and pull it gently from the CPU-module connector on the motherboard.
  3. Remove the CPU module from the chassis.
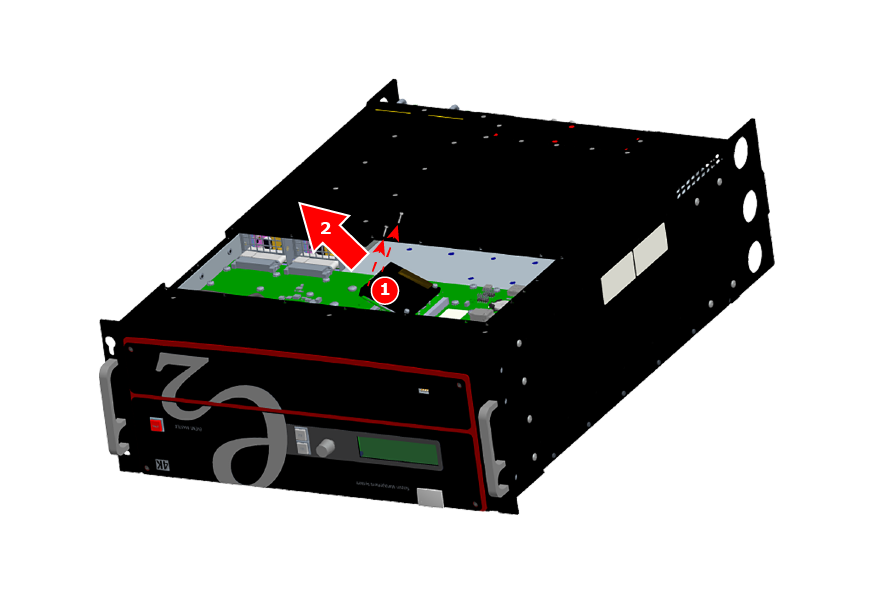
    Image 14–60 Removing the E2 Gen 2 CPU module
How to install the CPU module

To install the CPU module follow the same procedure in the reverse order.