3.9 Rack-Mount Procedure

General

The chassis of the Event master devices (E2, S3 series, and EX) are designed to be rack mounted. The devices are supplied with front rackmount hardware.

Please note the following important points:

Note: Rack-mount procedure is different depending the Event master device type (E2 or S3).
Caution: At a minimum, an E2 chassis weighs 31 kg (68 lbs) and a S3 chassis weighs 24 kg (53 lbs). To avoid injury, it is recommended that two people rack mount these chassis.
How to install E2 in a rack

Use the following steps to rack mount the E2:

  1. The E2 is shipped with side rails included in the shipping case and not installed onto the chassis. These side rails, when they are properly installed and adjusted, assist with the distribution of chassis (and cable) weight within your rack. Use the following steps to properly adjust the side rails:

    1. Measure and install the two supplied mounting brackets on your rear rack rails.

      Image 3–12
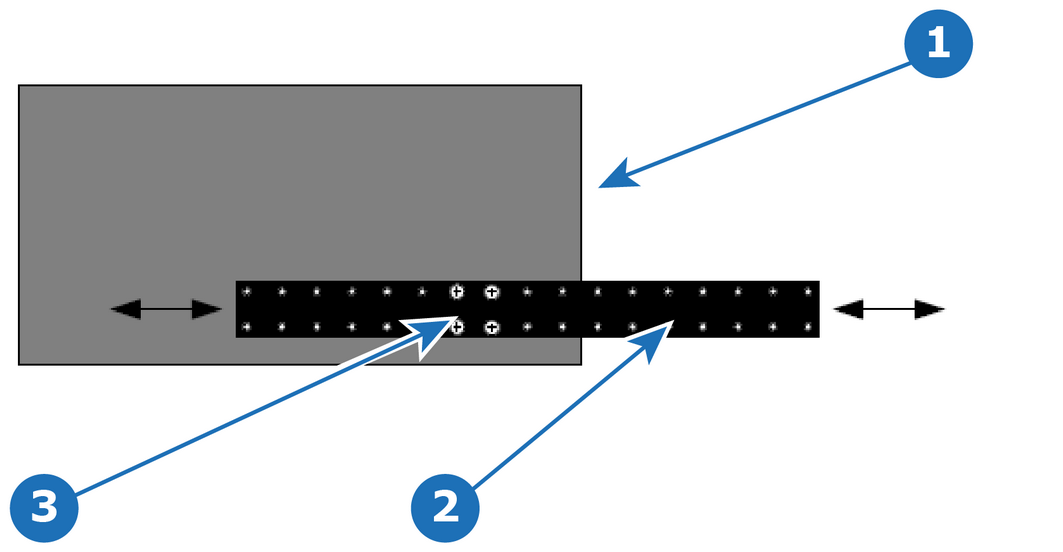
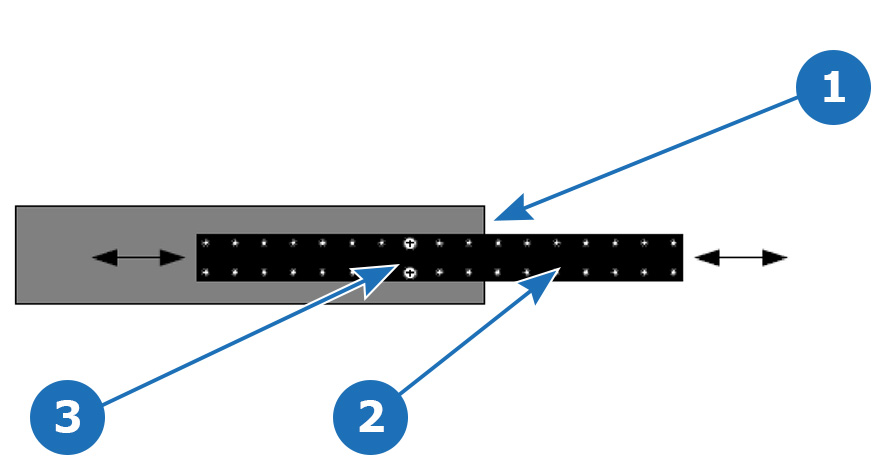
    2. Measure the distance between the front and rear rack rails. Remove the four mounting screws that secure each side rail to the E2, and then adjust the spacing of each side rail as necessary.

      Image 3–13
      1
      Chassis rear
      2
      Side rail
      3
      Mounting screws
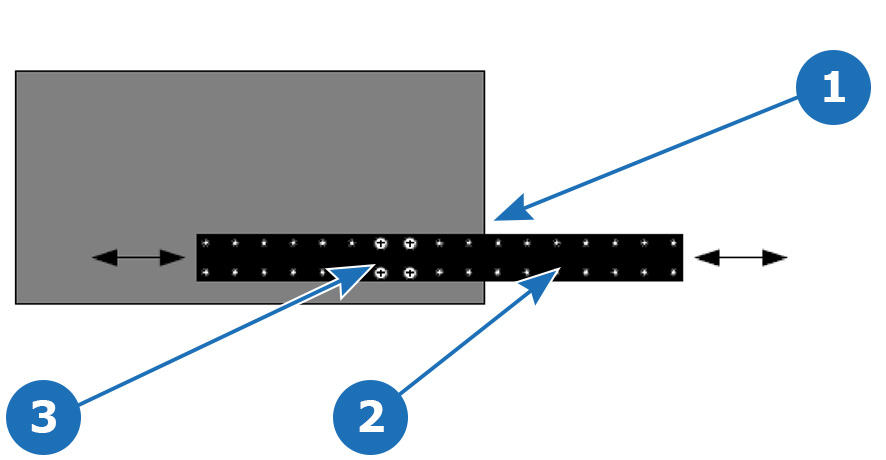
    3. Re-install the mounting screws. When properly adjusted, the end of each side rail will protrude through the slot in the rear mounting bracket, once the chassis is rack mounted.

      Image 3–14

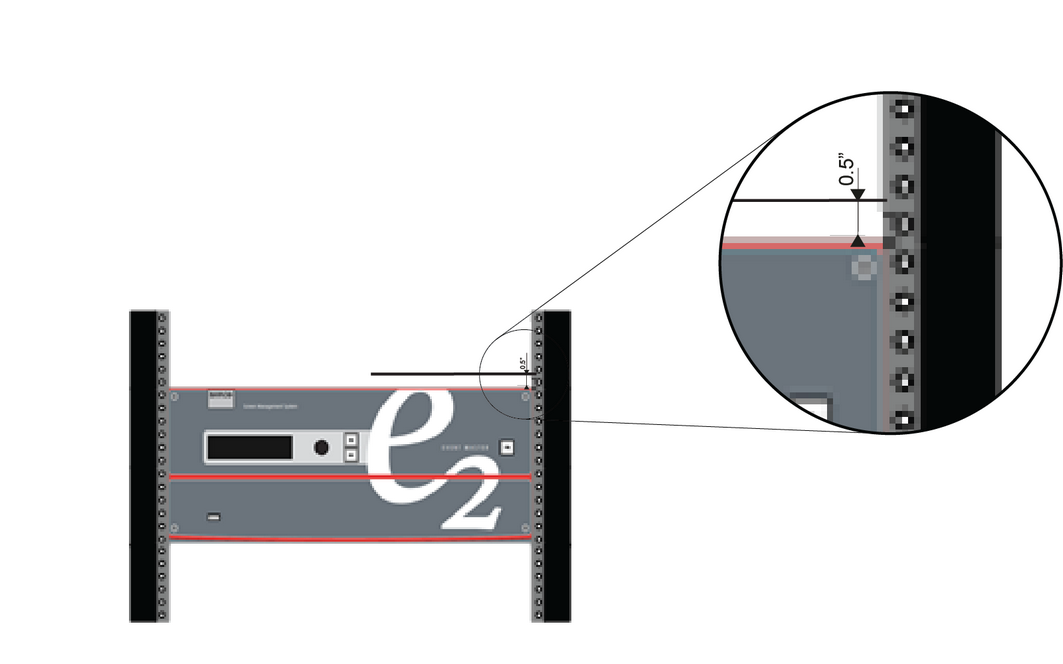
      To take advantage of this feature, ensure that there is at least 1/2” of clearance above the chassis.

      Image 3–15
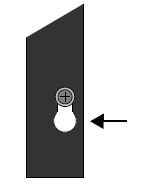
  2. For the E2’s two keyhole slots, measure and install two rack screws in your equipment rack’s front rails. Allow each screw to protrude approximately 3/4” from the surface of the rails.
  3. Lift the chassis, and while supporting it, slide the side rails through the slots in the rear mounting brackets.
  4. While continuing to support the chassis, slide the screws (in the front rails) through the two keyholes, and let the chassis settle up into the keyhole slots.
  5. Tighten the two lower screws, then install and tighten the two uppers screws in the rack rail.
How to install S3 or EX in a rack

Use the following steps to rack mount the S3 or the EX:

  1. S3 and EX units are shipped with side rails included in the shipping case and not installed onto the chassis. These side rails, when they are properly installed and adjusted, assist with the distribution of chassis (and cable) weight within your rack. Use the following steps to properly adjust the side rails:

    1. Measure and install the two supplied mounting brackets on your rear rack rails.

      Image 3–16
    2. Measure the distance between the front and rear rack rails. Remove the mounting screws that secure each side rail to the chassis, and then adjust the spacing of each side rail as necessary. The S3 uses four mounting screws on each side rail; the EX uses two mounting screws on each side rail.

      Image 3–17 S3–4K series side rail and mounting screws
      1
      Chassis rear
      2
      Side rail
      3
      Mounting screws
      Image 3–18 EX expansion box side rail and mounting screws
      1
      Chassis rear
      2
      Side rail
      3
      Mounting screws
    3. Re-install the mounting screws. When properly adjusted, the end of each side rail will protrude through the slot in the rear mounting bracket, once the chassis is rack mounted.
  2. Lift the chassis, and while supporting it, slide the side rails through the slots in the rear mounting brackets.
  3. While continuing to support the chassis, install and tighten the two lower screws.
  4. Finally, install and tighten the two uppers screws in the rack rail.