
15.26 Side support plate

Flow chart
Image 15–64
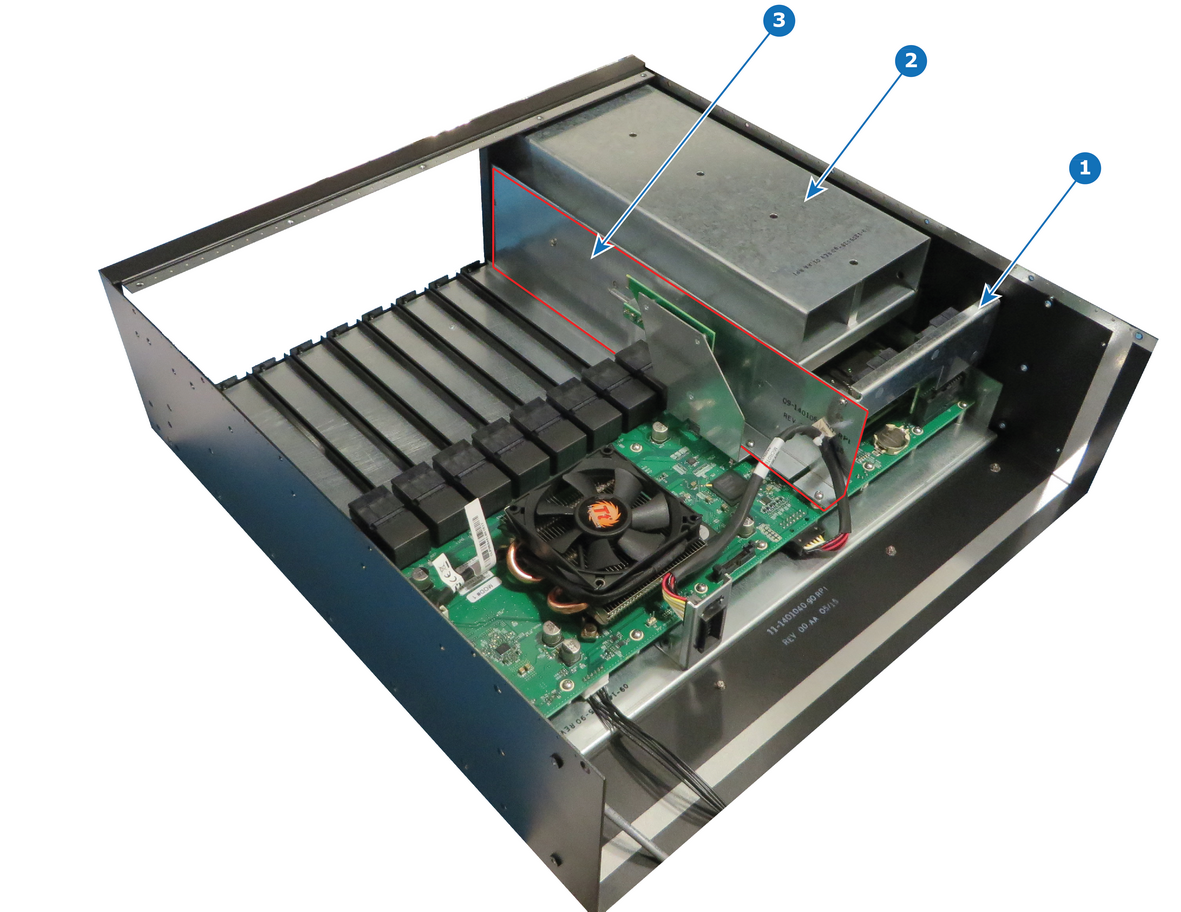
Overview
Image 15–65
1
Power Interposer
2
Power supply guide
3
Side Support Plate
Necessary tools

1 x Phillips Screwdriver #2

How to remove Side Support Plate
  1. Remove the two pan head SEMS screws (6-32x0.25 — Stainless steel) that attach the Side Support Plate to the Motherboard Mount.
  2. Remove the three pan head SEMS screws (4-40x0.25 — Stainless steel) that attach the Side Support Plate to the Motherboard Mount.
  3. Move forward the Side Support Plate (this item is align with the Motherboard Mount via key holes), and gently pull the Side Support Plate away from the unit.
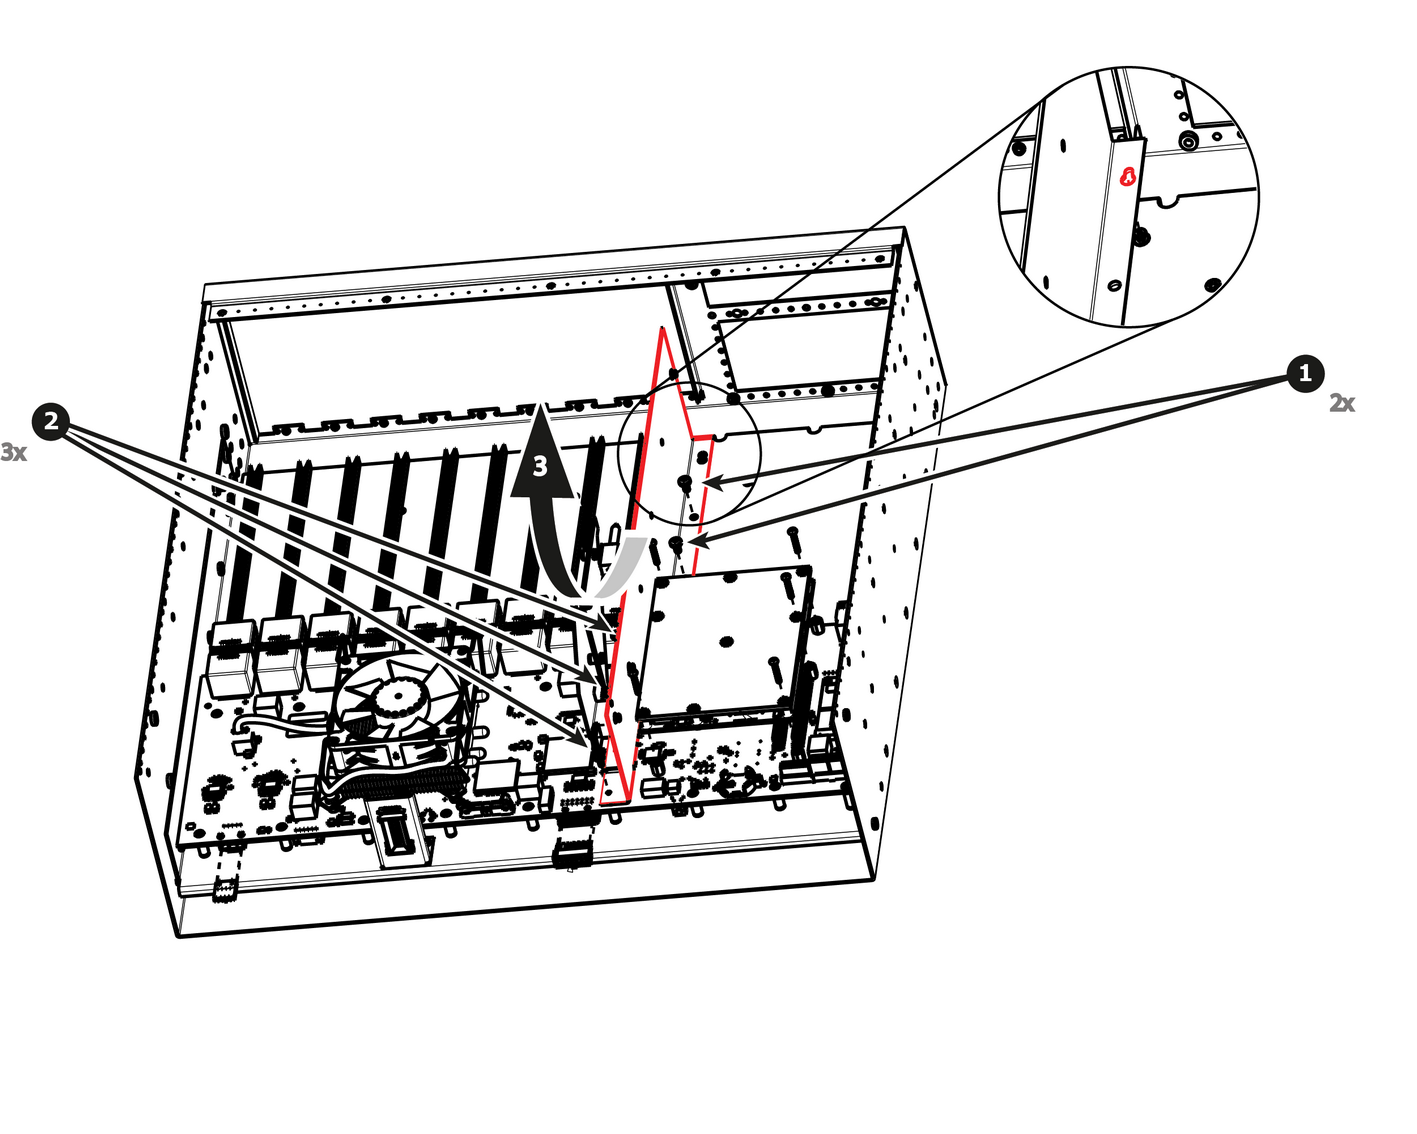
    Image 15–66
    Note: It could be necessary to release the cable tie that maintain the fan power cable in place.
How to install Side Support Plate

To install the Side Support Plate follow the same procedure in the reverse order.

Note: There are key holes cut into the bottom of the Side Support Plate which will make installation much easier. See detail on the previous drawing.