General
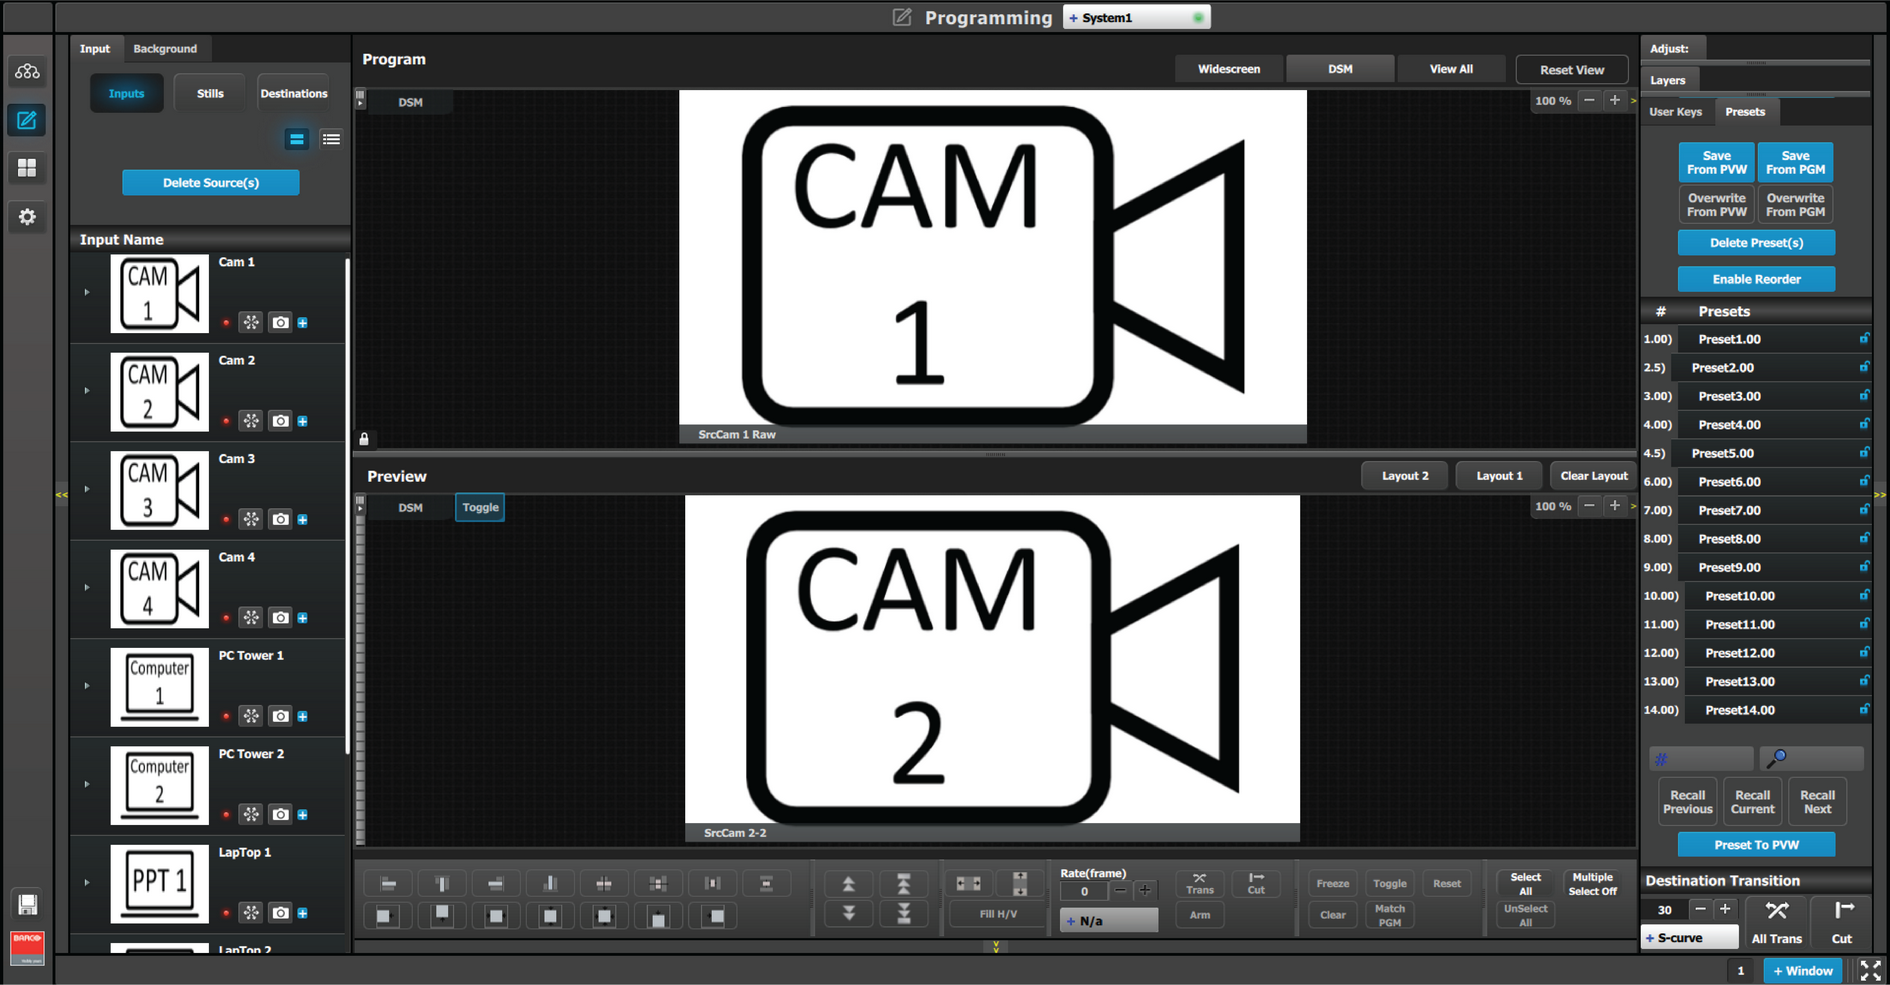
The middle of the Programming Page is the Programming diagram area where the Program, Preview and AUX screens are composed.

The middle of the Programming Page is the Programming diagram area where the Program, Preview and AUX screens are composed.
Each Program/Preview screen can be viewed individually or all of the screens can be shown simultaneously by selecting the corresponding tab on the top of the Program window.
The top left corner of each destination view has a label that shows the name of the destination.
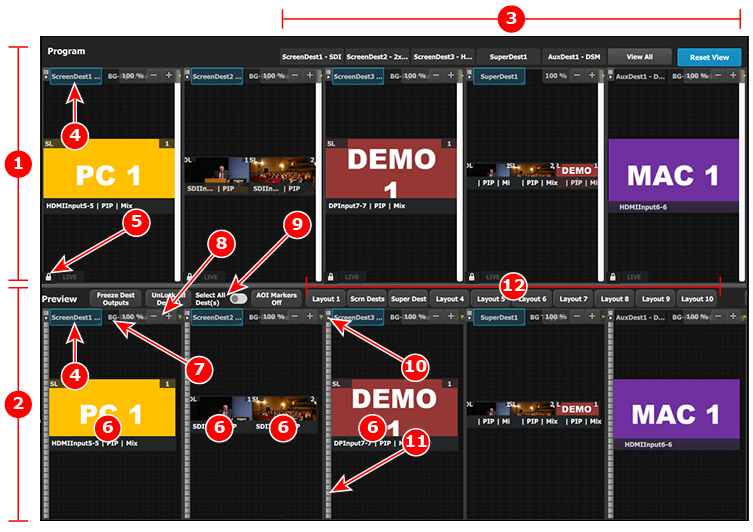
| 1 | Program canvas. |
| 2 | Preview canvas, where the program is composed before it is transitioned to Program. |
| 3 | Click the Destination View tab to isolate that Destination for viewing it by itself inside the workspace. To view all of the Destinations again, select the "View All" Destination tab. |
| 4 | The Destination Selection tab can be clicked to arm a Destination to become part of the next transition. |
| 5 | The Lock icon indicates whether or not the Destination’s Program (PGM) is locked. When locked, the Program screen can only change after a Mix or Cut transition. When the Program screen is unlocked, the user can click on a layer that is on Program and move or resize it. The user can also assign a different Source into that layer or adjust the background. |
| 6 | Selected sources are dropped in the layers defined in the Preview screen. A layer can be placed anywhere in the preview area. |
| 7 | The BG Input tab shows the current Background source assigned to the destination. Clicking this tab allows the user to adjust the settings for the destination’s Background source. |
| 8 | Users can zoom in / out of the workspace area, from 25% to 150%, in 25% increments. |
| 9 | “Select All” Destinations allows the user to quickly select or unselect all Destinations for a Transition. |
| 10 | A small arrow on the left-hand side of Destination name expands or collapses the Destination View. |
| 11 | Users can manually control the transition by clicking on the bar or by clicking-and-dragging the mouse. |
| 12 | Layout tabs allow for user assignable layouts of Destinations in the Programming menu. Drag and drop one or more individual Destination View tabs onto a Layout tab; select the Layout tab; and the workspace area displays only the Destinations assigned to the layout. To view all of the Destinations again, select the "View All" Destination tab. You may rename a Layout tab by double-clicking it and typing the new name. |
Users can drag layers to the preview screen as long as the layer is not on program. In the example below, since no source has been assigned to the layer, the layer will be black and default to a square shape.
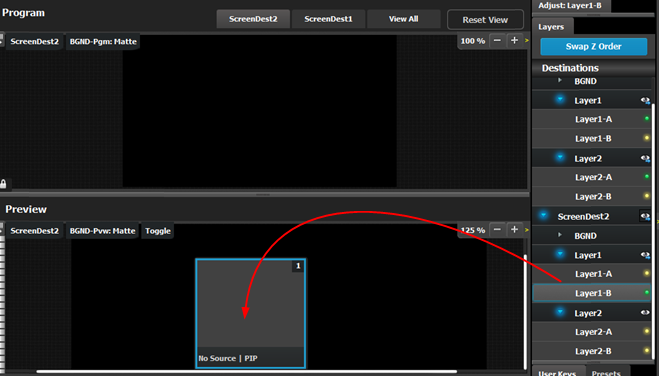
Next a source from the Input panel on the left hand side can be dragged into the layer.
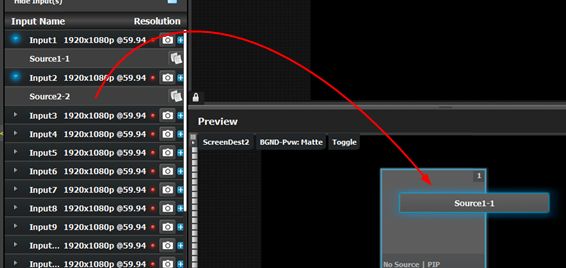
Alternatively, an Input or a source can be dragged into the Preview screen directly as long as there are available layers.
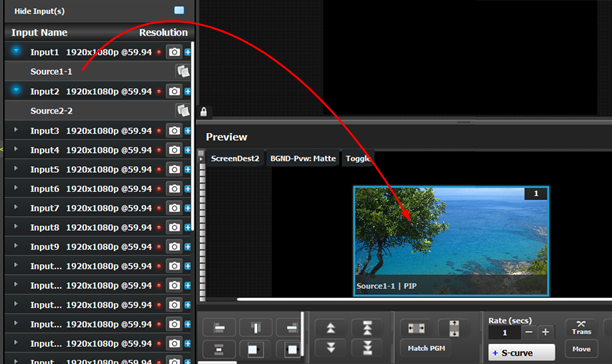
If the available layer is already in Preview, then the source will immediately be assigned to that layer. The layer will be resized automatically to match the source aspect ratio.
If a layer is available but it hasn’t been placed into the preview screen, then the software will automatically place the layer in the position where the Source was dropped and allocate the lowest unassigned layer to the source. The source and layer must also comply with the sizing rule that is explained next.
Rules for assigning Sources into layers
The size of the layer scaler mode has to be greater or equal to the size of the source. For example, if the source is a 2K input, the layer scaler mode needs to be Single Link (SL) or more. If the source is 4K and the layer is only a SL layer, then the source can’t be placed into the Layer. If the Source is a 2K input and the layer is a 4K layer, the source can be placed into the Layer.
Scaler mode for layers are set in the Configuration Page, towards the bottom.
The layer priority (z-order) is based by the order they are added in destination menu. The layers that are added first have the lowest priority. For example; layer1 is lower priority than layer2. Layer2 is lower priority than layer3.
A layer can be individually frozen by selecting it and clicking the freeze button in the bottom of the workspace menu.
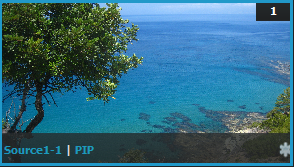 | Note: When a layer is frozen, the outline and the text become blue and an icon of a snow flake appears in the bottom right hand corner. Also note that a frozen source will not show the same indication. |
Users can also click and drag on a layer to move it around inside the Preview screen. A layer can also be moved with the keyboard’s arrow keys.
Size adjustments can be performed by clicking and dragging the vertical edges, horizontal edges, or any corner of the layer. Any size adjustment maintains the aspect ratio.
These operations can also be performed on multiple layers. Activate Multiple Select to “Multiple Select On” below the workspace to the right. Now each layer can be selected or unselected with a click or touch input.
Selected layers are highlighted with a blue border.
Assigning inputs/sources to AUX destinations works the same way as in the screen destinations within the constraints of the AUX destinations. Only one input can be assigned to each AUX destination and it is always at full screen by default. Assigning a new input to the destination, overrides the previous input.
Scaler mode for Auxes are set in the Configuration Page, towards the bottom