General
The EC-200/EC-210 introduces a new way of programming a Video controller in parallel with a more traditional way. In order to understand what is possible a small session on philosophy is in order.

The EC-200/EC-210 introduces a new way of programming a Video controller in parallel with a more traditional way. In order to understand what is possible a small session on philosophy is in order.
The use of a control system is typically divided in the following major tasks:
Configuration and Setup of Unit and System.
The Configuration menu is available on the touchscreen monitors. The actions to configure the system, however, are performed with trackball (mouse) or touch and drag operations on the touchscreen, rather than by using control surface buttons.
Programming creation/edit.
Execution playback/live control-edit.

There are two main parts in the EC-200/EC-210 controller. The Left side is dedicated to the industry’s feedback on many buttons and Encore like presentation switching. The Right side is inspired by some of the ideas from the lighting industry, which has a much longer tradition of managing large numbers of instruments. We will need this in order to effectively use our E2 and its family members, including other devices like projectors and playback devices.
Selection
By using the Numpad of the console we will allow for the selection of several parts of the system and once selected allow them to be manipulated (apply an action via function buttons).
The primary group of Function Buttons are located just above the Numpad.
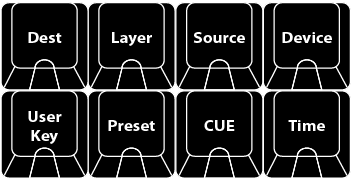
The following buttons are available:
| Button | Description |
| Dest | Destination refer to the most downstream location in the chain, usually a screen. |
| Layer | Layer refers to a layer that can hold live video (source). |
| Source | Source refers to an image source, such as a Source file, Still image, and more. |
| Device | Device refers to devices in an Event Master System. At present, this button has no functionality assigned. |
| Preset | Preset refers to Presets stored, as viewed in the Event Master Toolset. |
| User Key | User Keys are building blocks of settings for the Layers. |
| Time | Time refers to the timing parameter of the selected Top Functions (Destination or Layer). |
| Cue | Cue refers to Cues stored, as viewed in the Event Master Toolset. |
With these function buttons a syntax can be applied to make a selection that is then used for further action.
For example, a selection can be made like:
DEST 1 ENTER |  | This syntax will Select the Destination 1, just like clicking on the Tab in the destination. |
Further there are modifiers to the syntax:
DEST 1 + 3 ENTER |  | This syntax will select Destination 1 and 3. |
Or:
DEST 1 Thru 3 ENTER |  | This syntax will select Destinations 1 thru 3. |
You can probably see how efficient this is when you have lots of destinations.
Your modifiers are:
– , +, Thru to add or subtract from the selected function.
Numbering
Destination, Layer, Source, Cue, Preset, and Userkey all have a number and a name that are independent from each other. The Default name include the number, but does not need to remain in order to recall over syntax.
There are further functions that can be controlled with syntax like screens, layouts and such. This is further described below.
There are also a range of combined button presses that is meant to speed up the programming and control.
Contextual Buttons

The 12 Contextual Buttons to the left of the numpad are used to add situational functionality to the syntax. Certain button presses change the naming of the displays and the functions of the buttons. They are referred to as CD1 thru 12 per row from the top left.
Note that all possible syntax is not supported.
A few general rules: