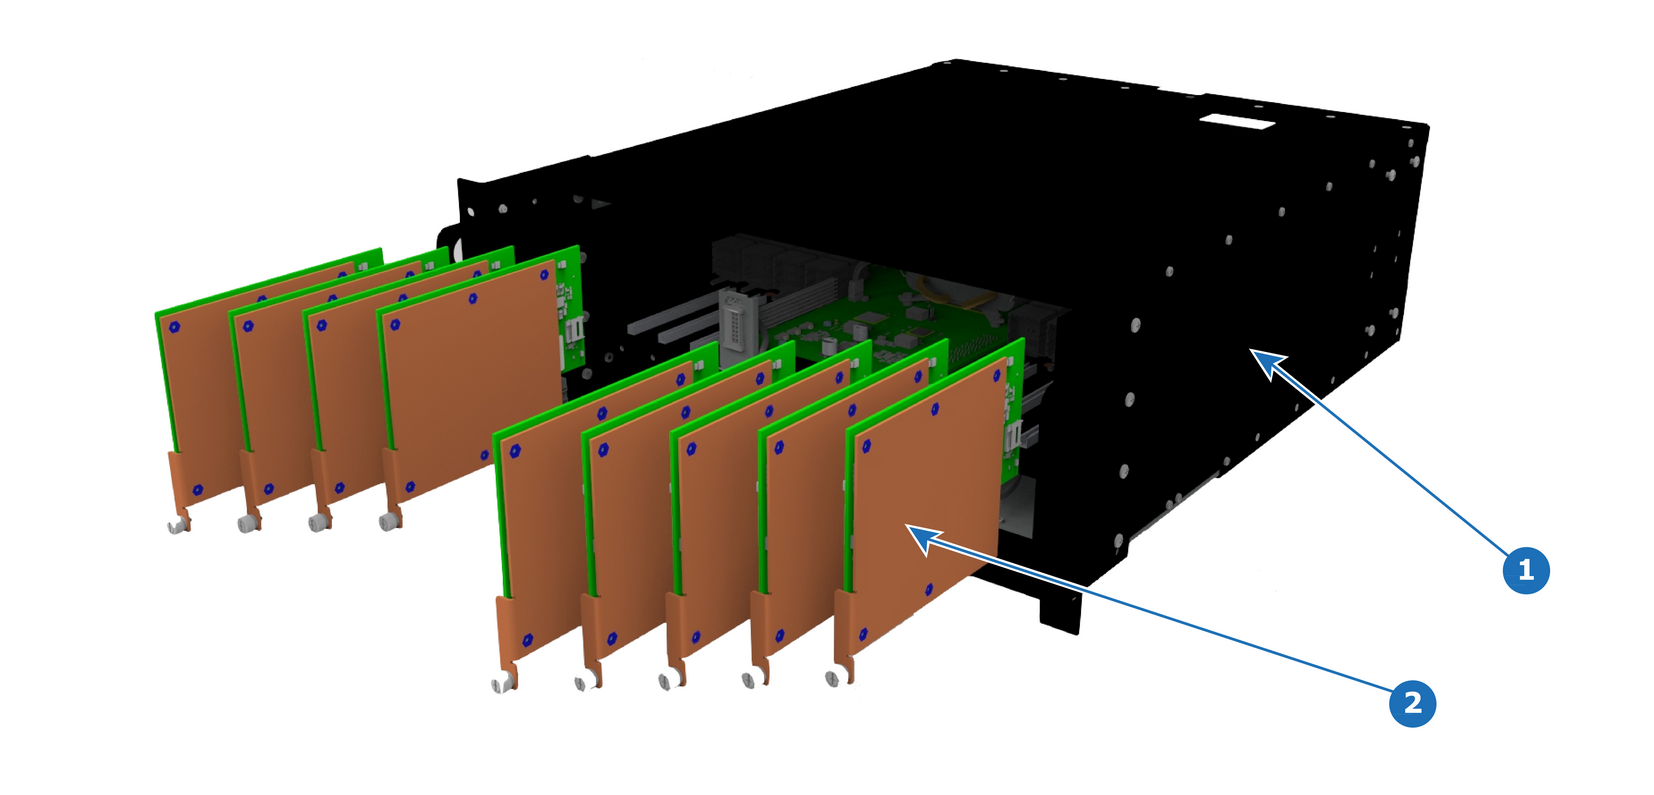
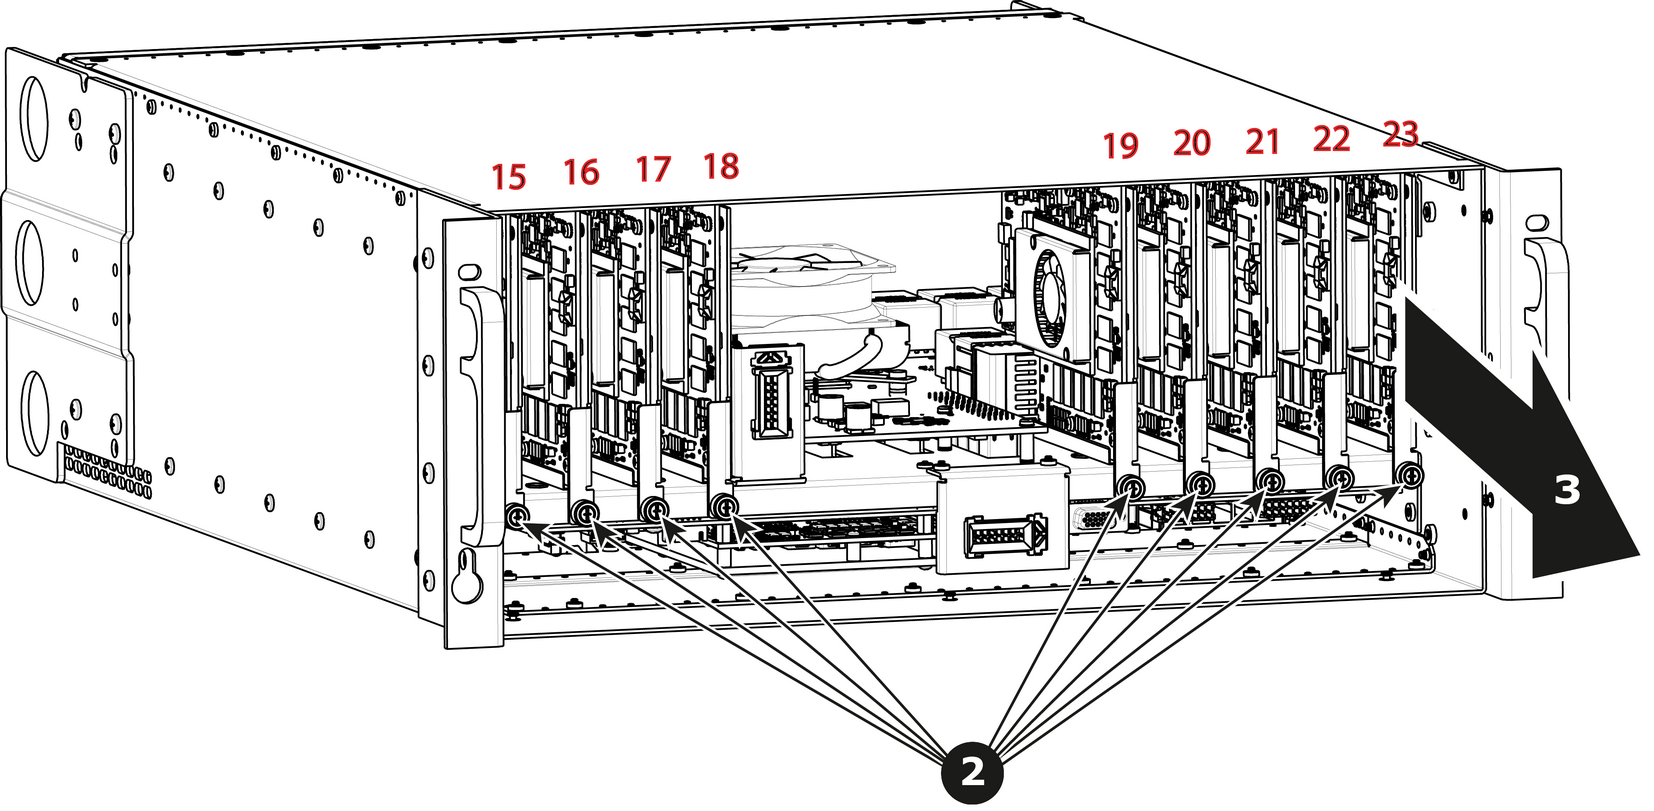
How to remove a VPU Card Locate the VPU you need to replace.Note: There are 9 VPU slots. The first slot on the left is slot 15 and the last slot on the most right position is 23. Loosen and unscrew the thumbscrew that is holding VPU card to the chassis.Pull the VPU out of its slot.Image 14–32