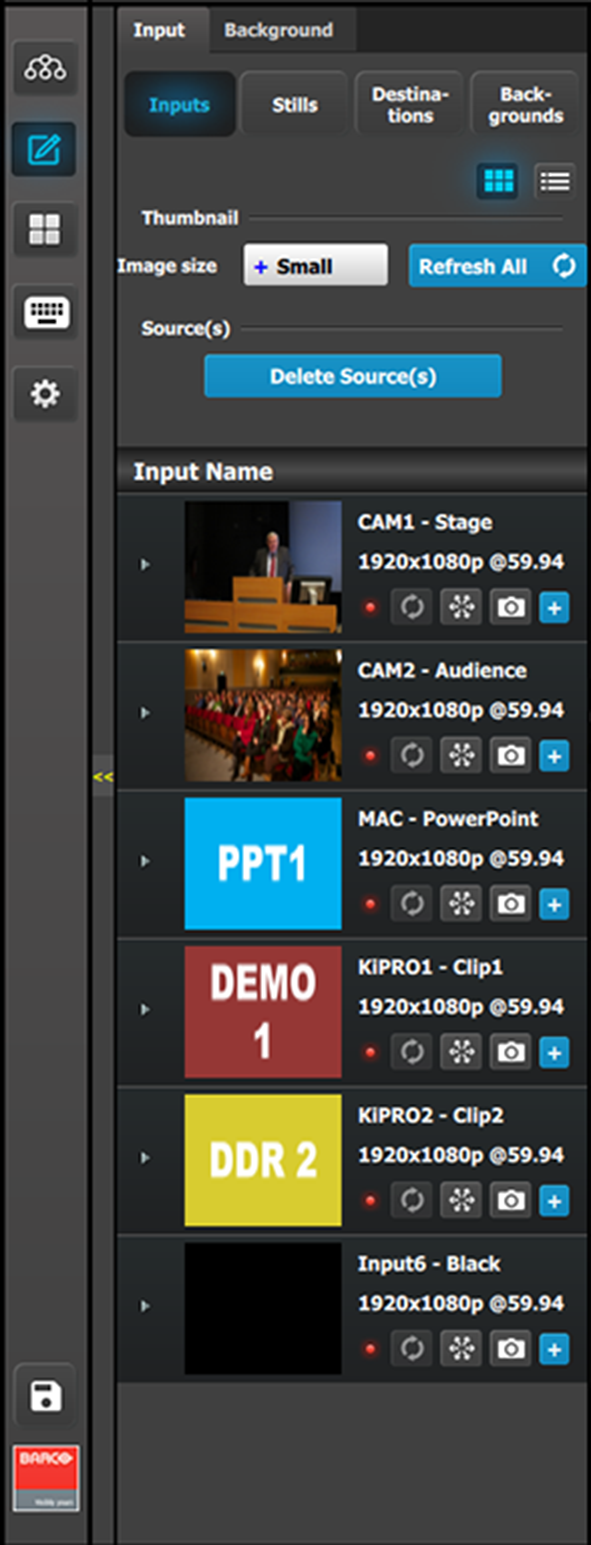
This part of the Programming page allows users to manage the available input resources. Sources are created and defined from the available Inputs that were defined on the System Configuration page.
Still Images, Inputs, and Native Backgrounds, as well as re-entered Screen Destinations and Background sources can be used as sources in layers and Aux Destinations.
About Sources and Inputs
Sources are defined from input signals. Multiple sources can be defined from the same input. After a source is defined, several attributes can be modified. These attributes may be, for example: color adjustments, crop, sharpness, and mask. By default, a source is automatically created for each Input. Up to 256 sources can be created form the same input. As with inputs, sources can be defined from multiple connectors, ex: 4K or DL DVI and as a single link or dual link.
Note: The multiviewer displays input signals not sources.
A few words about Inputs, Sources and Layers
Input
Definition: Any video signal connected to the Event Master series processor.
Features:
An input signal can be 2K (Single Link), Dual-Link or 4K (Ultra-HD) format.
Depending on the resolution and type of the input signal, multiple connectors may be required to connect an input signal to the Event Master series processor. The number of connectors required is listed in the table below.
2K
Resolutions up to 2048x1200@60
Dual Link
Resolutions up to 3840x1200@60
4K (Ultra HD)
Resolutions up to 4096x2160@60
SDI
1
2
4
DVI
1
1
2
HDMI 1.4a
1
1
2
DisplayPort 1.1a
1
1
2
HDMI 2.0
1
1
1
DisplayPort 1.2
1
1
1
Adjustments:
Name, Colorspace, Connector capacity, Auto Acquire, EDID, Contrast, Brightness, Gamma.
Adjustments to an input signal have an effect on all sources that are derived from the input signal
Source
Definition: A video signal created when an input is manipulated to create a desired look.
Features:
When an input is created, a source is automatically created with the same attributes as the input.
Multiple sources can be generated from the same input signal.
Any source can be dropped into any layer and any destination.
The same source can be used in multiple layers and multiple destinations.
It should be noted that if a source is used in multiple layers and a source is modified in one of the layers, it will not be automatically updated in the other layers. To update the source in the other layers, it needs to be deleted from these layers and re-inserted from the sources list.
Adjustments:
Name, Bind to User Key, Layer Aspect Ratio, Size, Position, Contrast, Brightness and Hue.
Layer
Definition: A layer is one image stacked on top of another or a background.
Features:
Each mixer layer has two layers, Preview and Program. For complete flexibility, each layer can be assigned to either PIP or Key functionality.
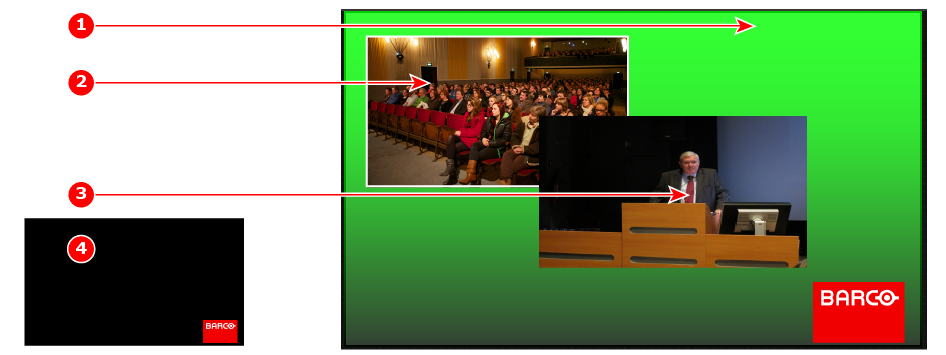
Image 6–64Layers overview
1
Background
2
Mixer Layer 1: Z-Order 1 (with border)
3
Mixer Layer 2: Z-Order 2
4
Key Layer: Luma
The mixing Background layer (BG) has the lowest visual priority. Any input or inputs can be used as a background. This layer visually appears behind all other PIPs and keys. The system can transition between any defined background sources.
On any mixing layer, a PIP layer appears over backgrounds and under other layers of higher visual priority.
PIP effects include mixes, smooth moves, resizing, adjustable aspect ratio, borders, mask and drop shadows.
On any mixer, a Key layer also appears over backgrounds and under other layers of higher visual priority. Key effects include luminance keys, split keys (cut and fill), and chroma keys.
The Cut + Fill Key can use PNGs with transparency. The system detects the transparency as the "Cut" signal and the non-transparent portion of the PNG as the "Fill" input. Any Still that has transparency is marked with a "T" indicator beside the name of the Still.
Adjustments:
Border, Shadow, Layer Size & Position, Source Size & Position and Mask.
Layer Effects
Strobe, Flip, Freeze, Layer Color Effects, Monochrome and Invert.
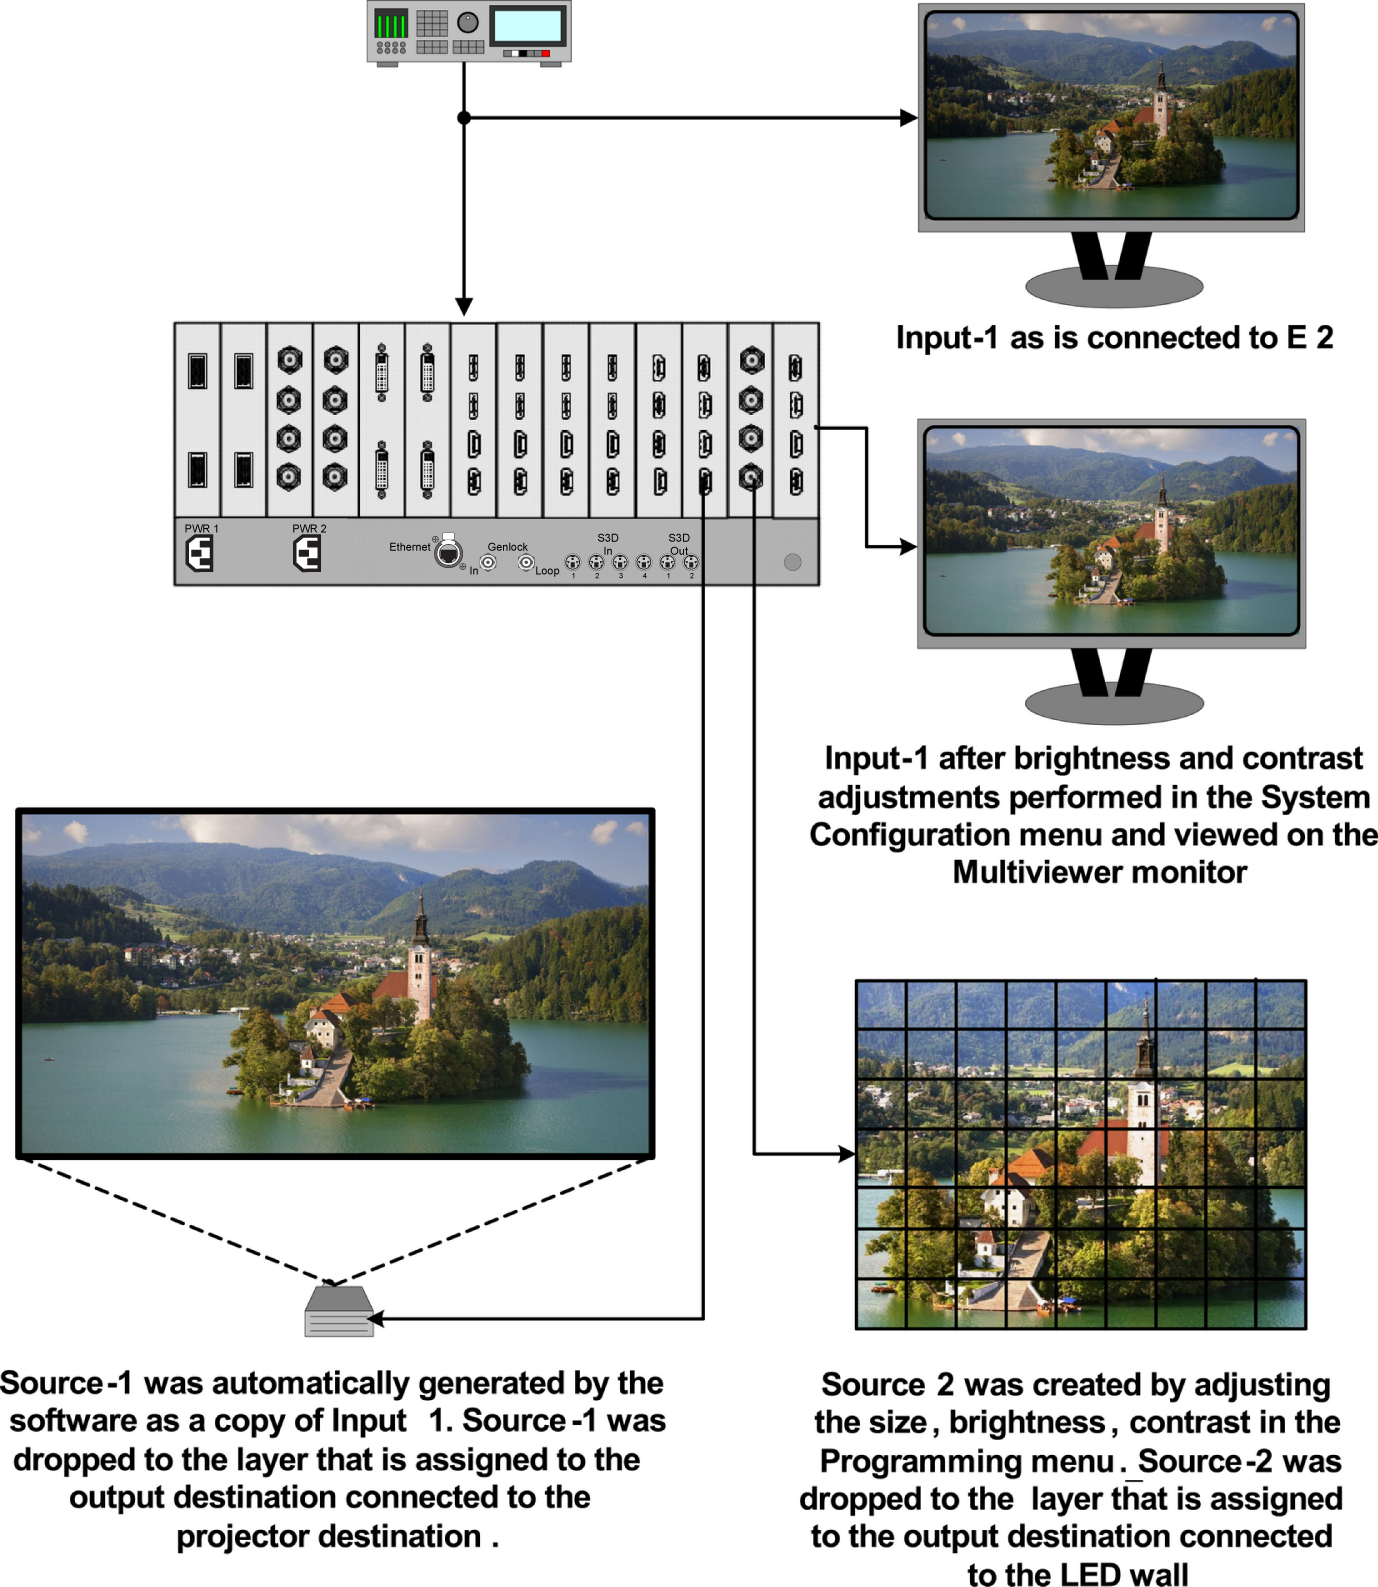
Input, Sources and layer example
Image 6–65
Source Area description
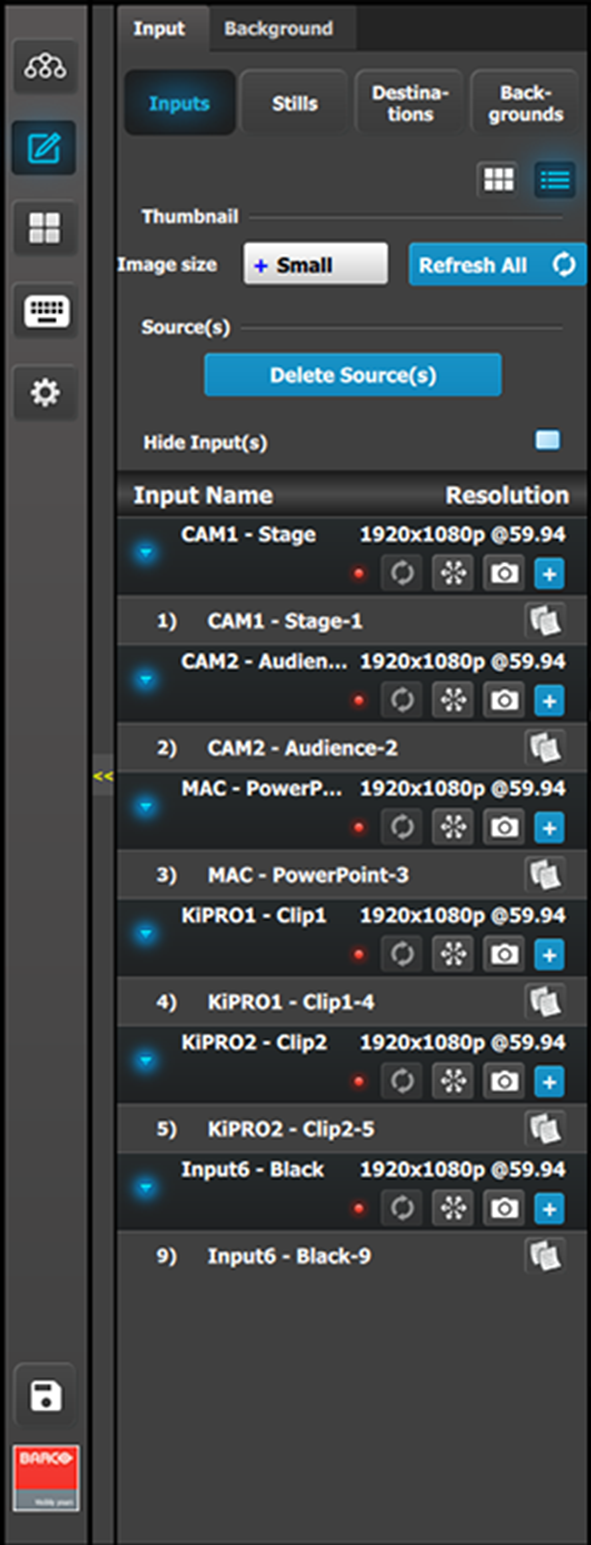
In this menu, Sources defined in the Configuration menu are assigned to destinations via drag and drop procedure. Each input has minimum one Source file, several can be created via copy original (Plus Icon) or copy file (Double Page Icon).
There are 2 tabs in this section:
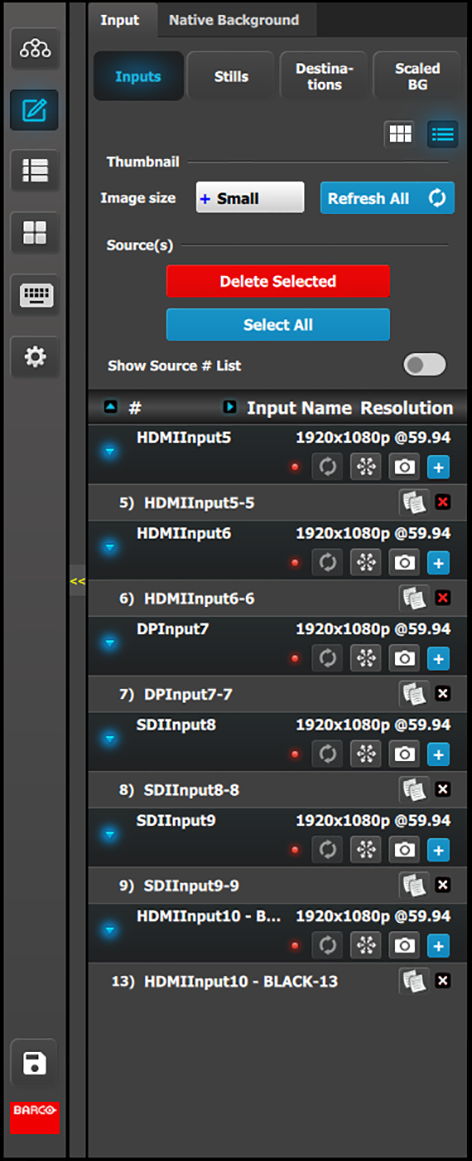
Source: Lists Inputs and Sources available in the system. Sources are listed after the input and can be viewed by clicking on the arrow next to the Input name. Stills, Backgrounds, and Destinations can also be used as sources.
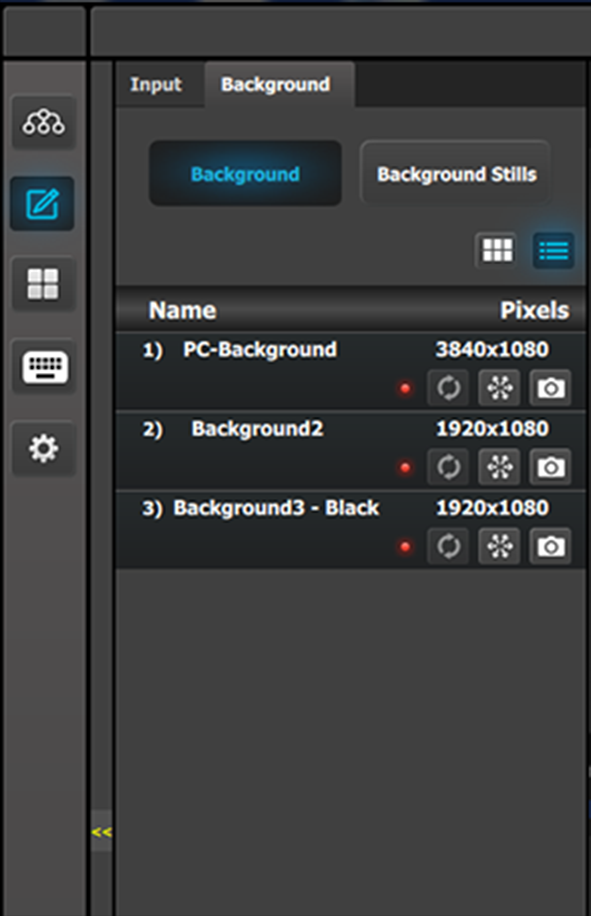
Native Background: Lists backgrounds and background still stores available for destinations.
For each of these lists two display modes are available. Toggle the view by clicking on appropriate icon:
List View
Thumbnail View
Inputs (List view)
Inputs (List view)
Resolution: This is the resolution of the Input signal.
The LED color indicates the status of the input:
Red: Sync is missing or invalid format.
Green: Sync is valid.
Refreshes the Input thumbnail (in Thumbnail View) from the Input source.
Freezes the Input.
Allows a snapshot to be taken and stored as a Still.
Adds Sources based on the inputs. A total of 256 are allowed per input.
Copies the Source into a new Source and adds it in the list.
Inputs (Thumbnail view)
Thumbnails can be added by clicking the refresh icon on the required input, or the "Refresh All" button. Thumbnails may also be manually uploaded to the EMTS by clicking on the thumbnail area while the list is in thumbnail view.
Inputs (Thumbnail view)
Behavior is similar to the List View mode (see above).
By clicking in thumbnail area images can be imported using the file picker menu. The picker can select pictures with the BMP, JPG or PNG format.
Stills (List view)
Stills (List view)
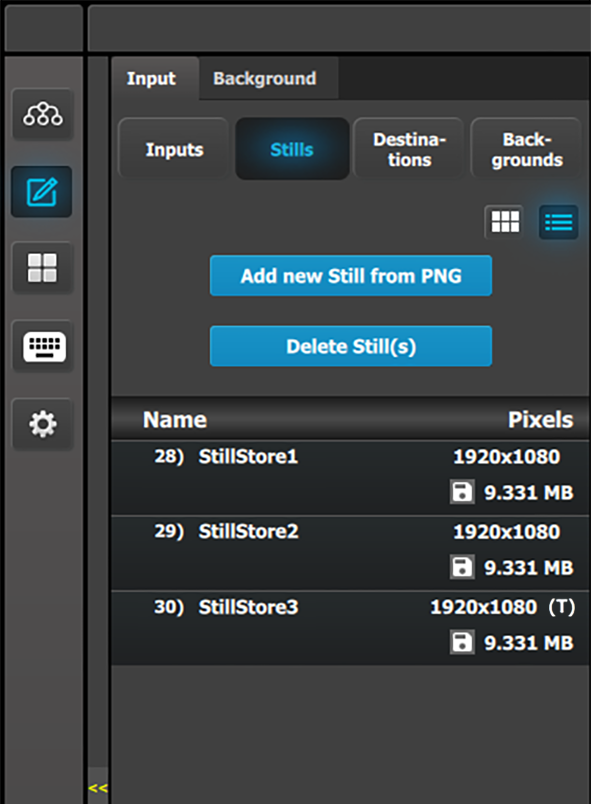
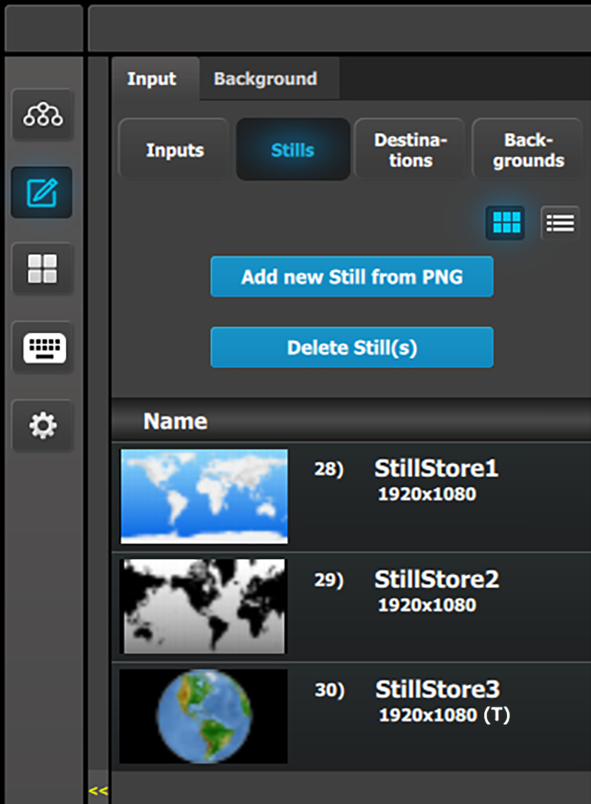
Stills can be captured from non-HDCP encrypted inputs, or they can be added from external source of the GUI computer in the PNG format.
A PNG with a transparency is marked in the Stills list with a (T).
Name that can be changed by double click action and then the resolution of the Stillstore.
[Disk Icon] indicates the amount of storage space, in MegaBytes that the still image is using. Approximately 100 HD Stillstores are possible. Higher resolution images use more memory per image, resulting in fewer still images being available on the system.
Stills (Thumbnail view)
The system automatically adds thumbnails once the live capture or file import has been processed.
Stills (Thumbnail view)
Behavior is similar to the List View mode (see above).
By clicking in thumbnail area images can be imported using the file picker menu. The picker can select pictures with the BMP, JPG or PNG format.
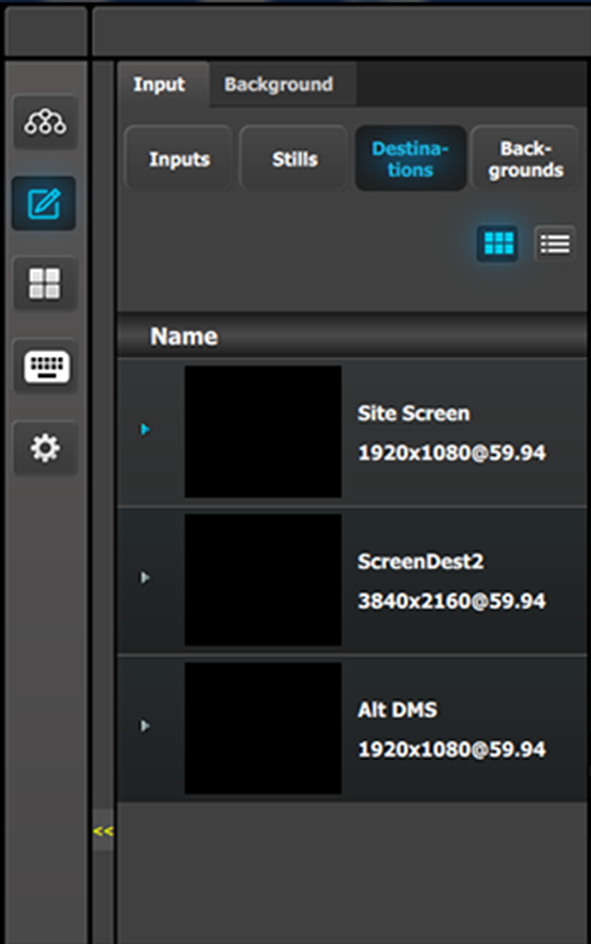
Destination
Destination (List view)
Destination (Thumbnail view)
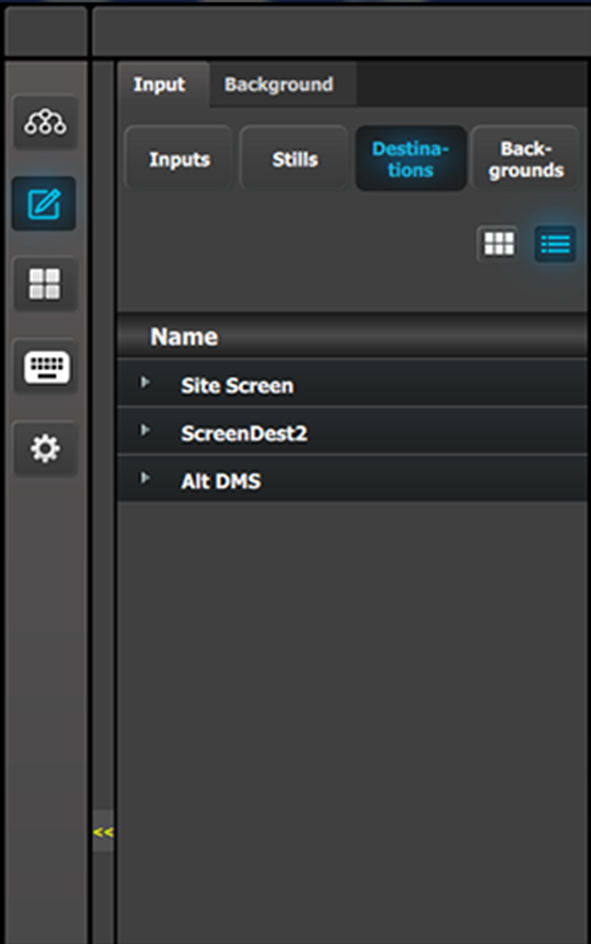
The Destinations can be used as a source in Layers provided they have the capacity to fit. Up to 2K resolutions on SL, up to 4096 x 1200 / 2560 x 1600 for DL and 4K / 8192 x 1200 for 4K Scaler Mode.
How to delete sources
The delete process is similar for all lists with more than one entry. To delete Sources the user need:
Click on the Delete Source(s) button.
The Delete Source(s) button turns in red and the delete icon (“x”) appears next to the copy icon on each element of the source list.
Image 6–66Delete Selected Input sources
Select the sources that you desire to delete and click the Delete Source(s) button.
The selected sources are removed.
How to hide Input names
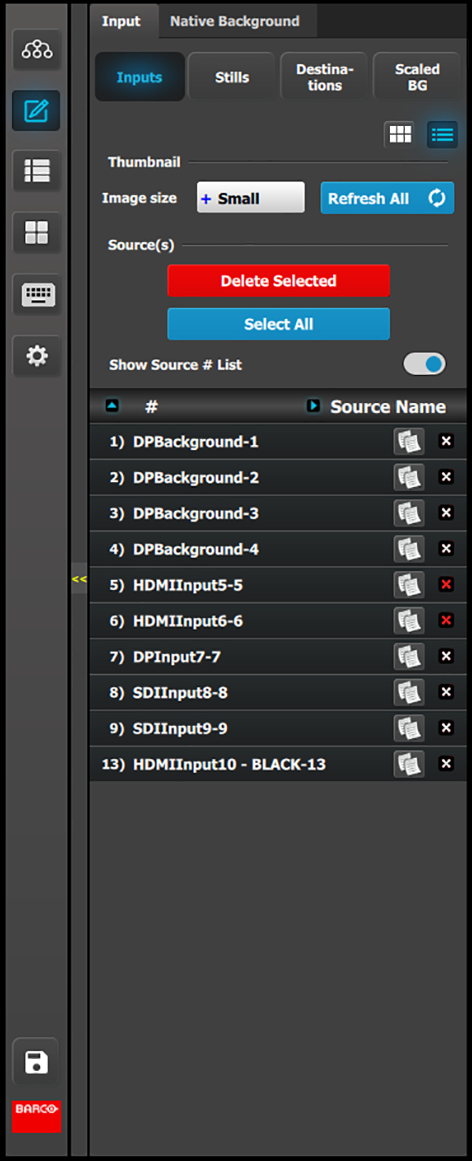
Because the inputs are usually named after their physical connector names, while sources are usually named for their intended usage. For this reason, we have the "Show Source # List" option available just above the list.
Check the Show Source # List toggle.
Sources are displayed without their associated Inputs.
Image 6–67 Source # List
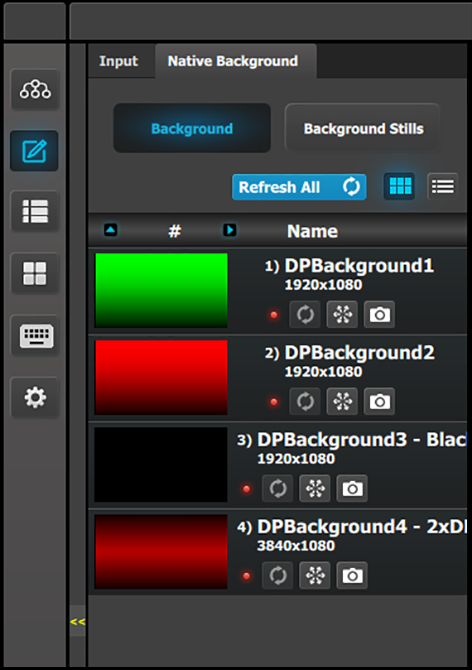
Native Background
In this menu, Backgrounds defined in the Configuration menu are assigned to destinations via drag and drop procedure.
Backgrounds and Destinations need to have the same resolution without the Destination’s eventual blend overlap(s). For example, if a background is defined as an input resolution of 3840 x 1080, the destination must also have the total resolution of 3840 x 1080.
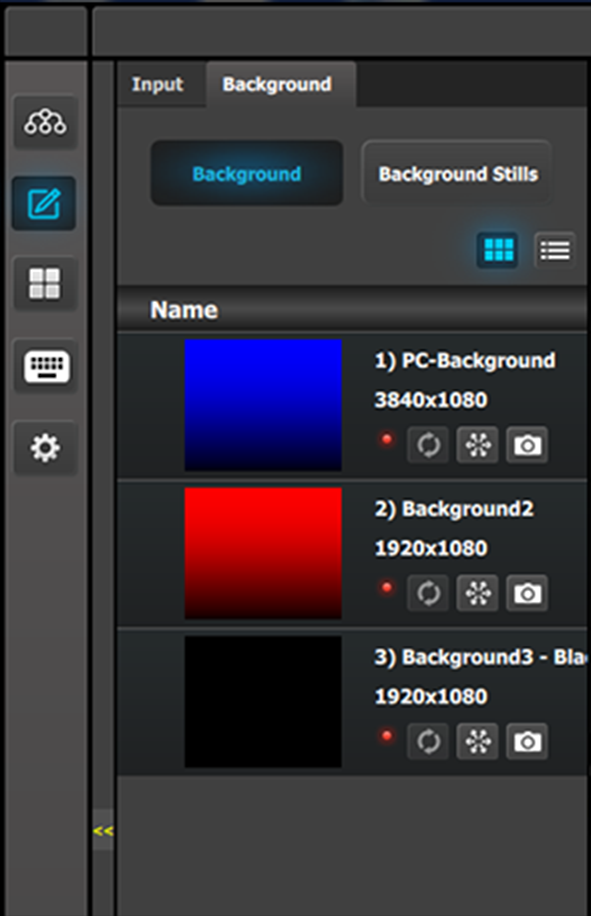
Background (List view)
Name: This is the Name of the Input as created in the Configuration of the system.
Resolution: This is the resolution of the Input signal.
The LED color indicates the status of the input:
Red: Sync is missing or invalid format.
Green: Sync is valid.
[Snowflake Icon] Will freeze the input.
[Camera Icon] Allows for a snapshot to be taken and store it as Still.
Thumbnails are added manually or may be refreshed from the Event Master series processor to the GUI.
Background (Thumbnail view)
Behavior is similar to the List View mode (see above).
By clicking in thumbnail area images can be imported using the file picker menu. The picker can select pictures with the BMP, JPG or PNG format.
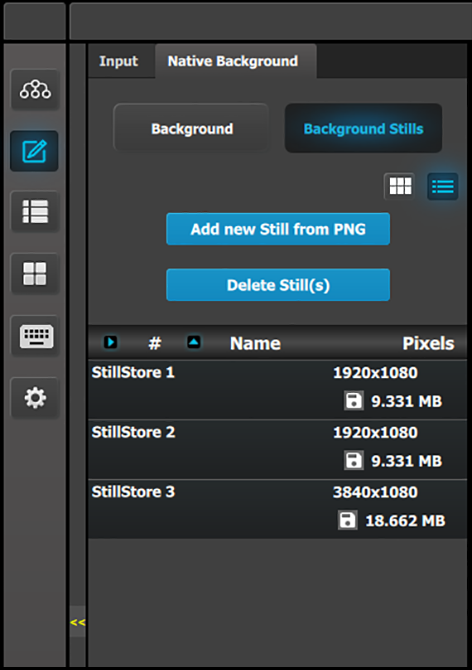
Background Stills
In this menu, Background Stills captured in the Background Source menu are assigned to destinations via drag and drop procedure.
Background Stills and Destinations need to have the same resolution including the Destinations eventual blend overlap. For example, if a background Stillstore is captured as 3500 x 1080, then the destination must also have the blend resolution of 3500 x 1080.
Background Stills (List view)
Name: This is the Name of the Stillstore as created. Name can be changed by double click action.
Resolution: This is the resolution of the Stillstore.
[Disk Icon]: Indicates the amount of storage space, in MegaBytes, that the still image is using. Approximately 100 HD Stillstores are possible. For higher resolutions the corresponding increase of memory is used.
Thumbnails are added manually or may be refreshed from the Event Master series processor to the GUI.
Background Stills (Thumbnail view)
Behavior is similar to the List View mode (see above).
By clicking in thumbnail area images can be imported using the file picker menu. The picker can select pictures with the BMP, JPG or PNG format.
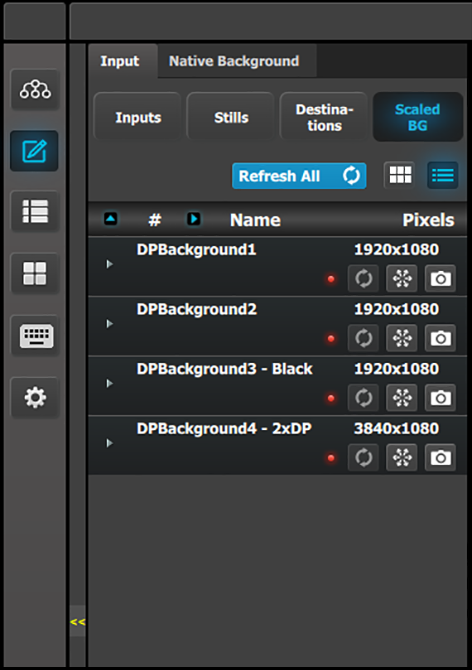
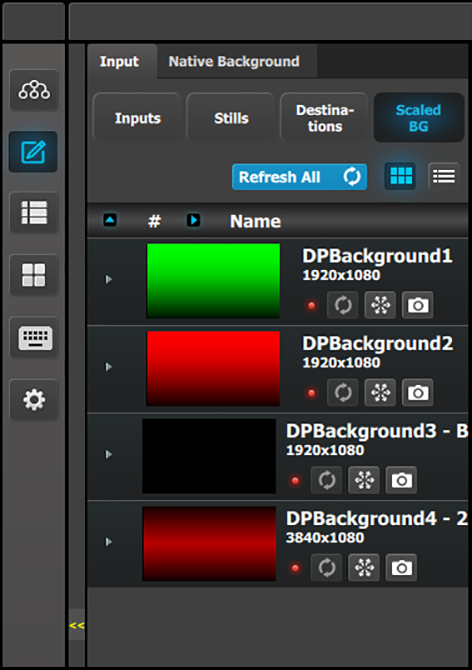
Input > Scaled BG
The Input tab has a Scaled BG subtab. This Input > Scaled BG subtab is similar to the Native Background > Background subtab, and it has both a List view and a Thumbnail view.
Input > Scaled BG (List view)
Name: This is the Name of the Input as created in the configuration of the system.
Resolution: This is the resolution of the Input signal.
The LED color indicates the status of the input:
Red: Sync is missing or invalid format.
Green: Sync is valid.
[Snowflake Icon] Freezes the input.
[Camera icon] Allows for a snapshot to be taken and stored as a Still.
Input > Scaled BG (Thumbnail view)
Behavior is similar to the List view mode (see above).
Backgrounds as Inputs
The Input > Scaled BG subtab allows the Event Master series processor to use Backgrounds as Inputs. This subtab can be used on any E2 or S3 processor, but it is especially useful on a limited-resource processor, such as an S3–4K Jr. processor. An Input defined as a Background can now be used as a Background, or as a source on an AUX Destination or Screen Destination layer.
To use a Background as an Input, follow this procedure.
Go to the Programming menu.
Go to the Input tab of the Resources area, and then go to the Scaled BG subtab of the Input tab.
Drag a Background from the list on the Sacled BG subtab and drop it on any Screen or AUX Destination in the Programming Diagram area that has at least one layer assigned to it.
If no layer is assigned to the Destination, you will have to go to the Native Background tab and drag and drop the Background from the Background subtab.
Note: Using a Background as an Input incurs an extra frame of delay. Use normal Inputs if this delay is unacceptable.
Note: Sources dropped into a Layer must be dropped from the Input tab, while sources dropped into a Native Background must be dropped from the Native Background tab.




 Refreshes the Input thumbnail (in Thumbnail View) from the Input source.
 Freezes the Input.
 Allows a snapshot to be taken and stored as a Still.
 Adds Sources based on the inputs. A total of 256 are allowed per input.
 Copies the Source into a new Source and adds it in the list.