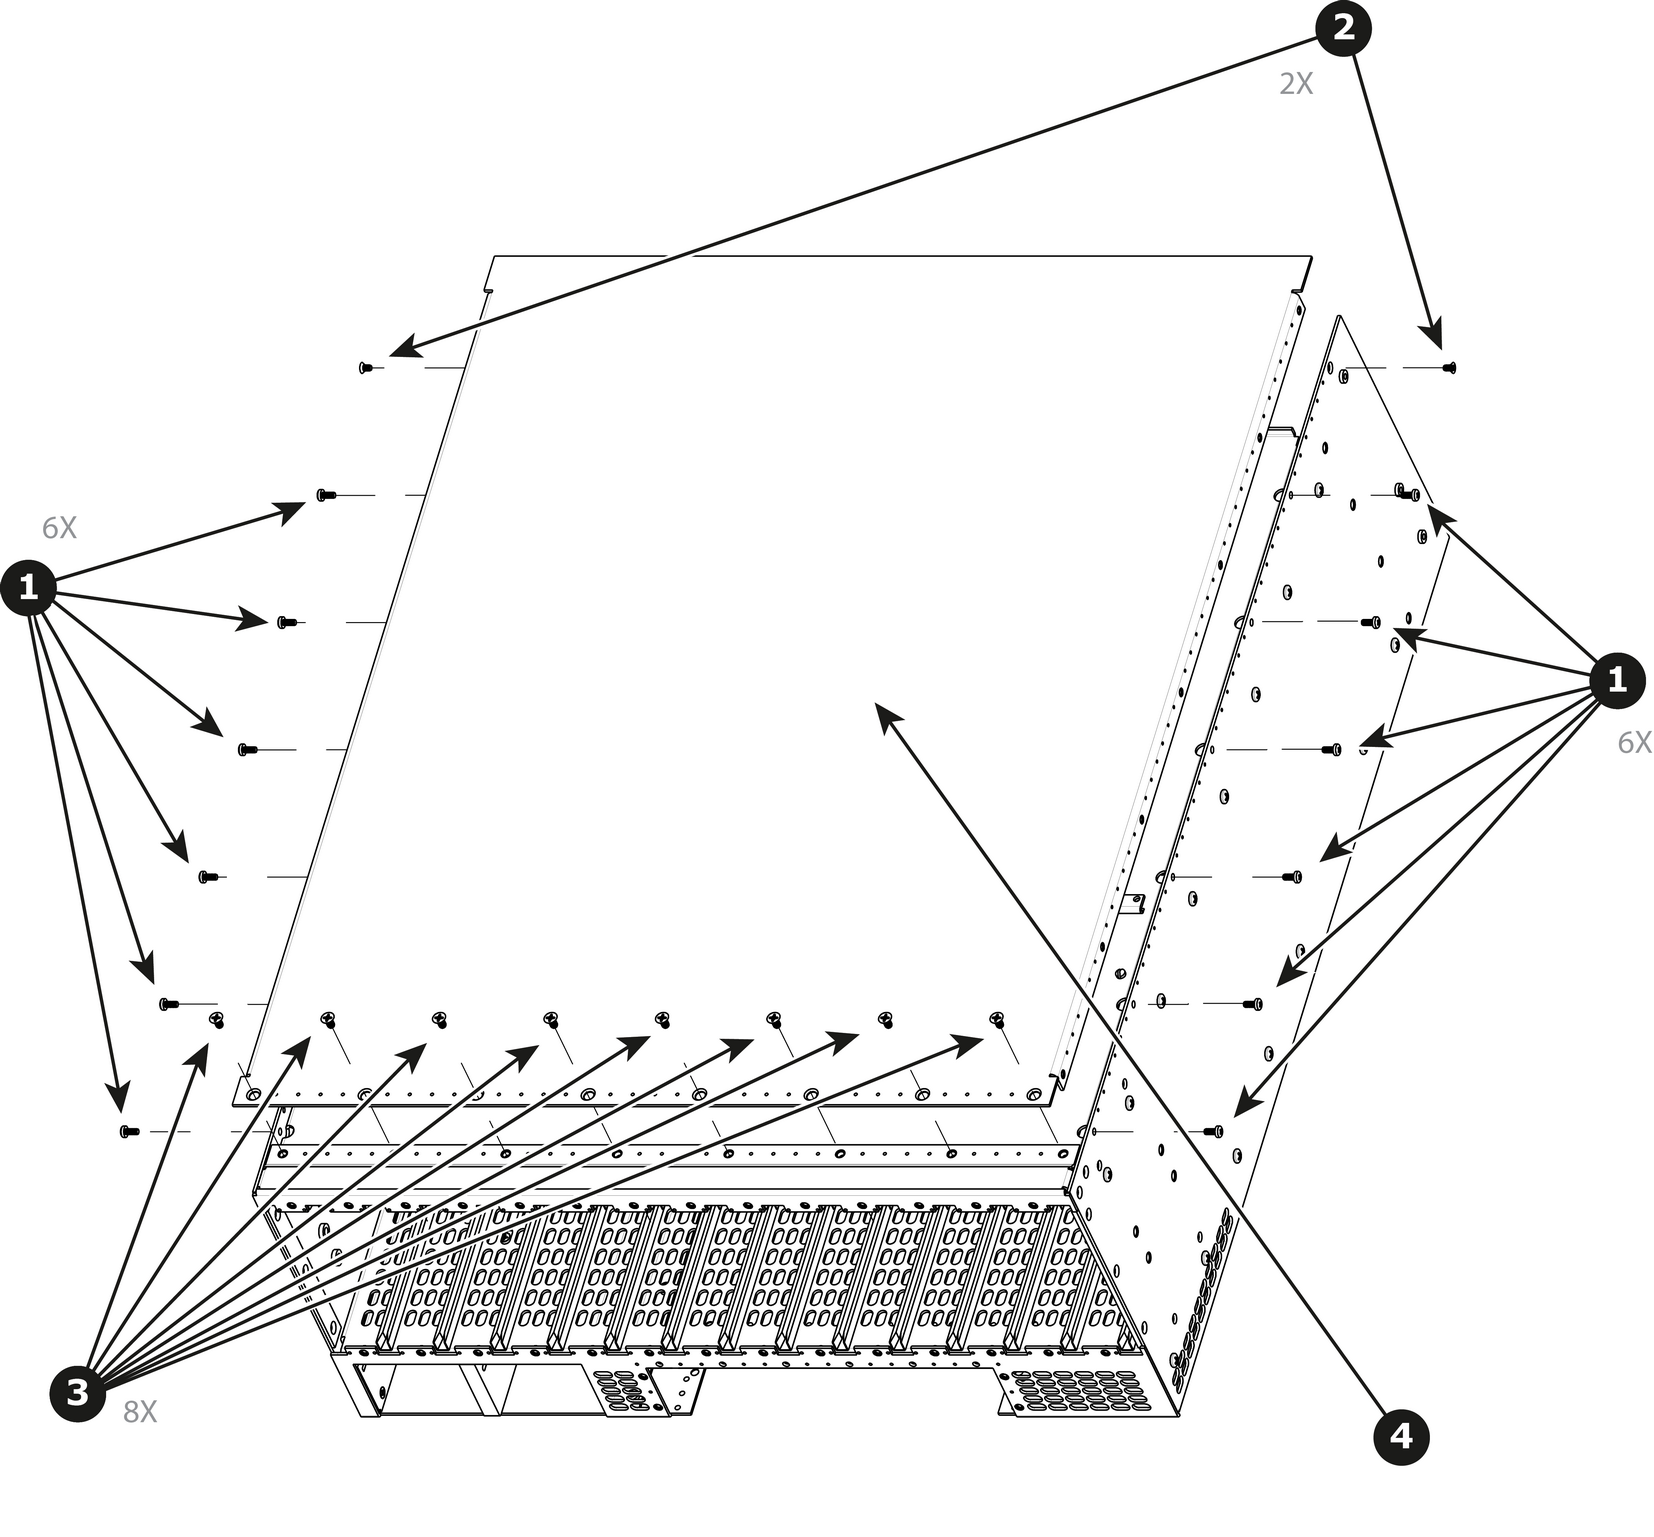
How to remove Top CoverRemove the 12 screws from the two sides (6 in each side, 4-40x0.25) that are located towards the top side of the unit.Remove the two (2) screws (4-40x0.25) located closer to the rear end of the unit. These are flat head screws.Remove the 8 screws (6-32x0.25) located on the top at the back of the chassis.Remove the cover by gently pulling it away from the E2Image 14–110