15.9 3RU Fan Tray

Flow chart
Image 15–15
Concerned parts
3RU Fan Tray
Necessary tools

1 x Phillips Screwdriver #2 (optional).

How to remove the 3RU Fan Tray
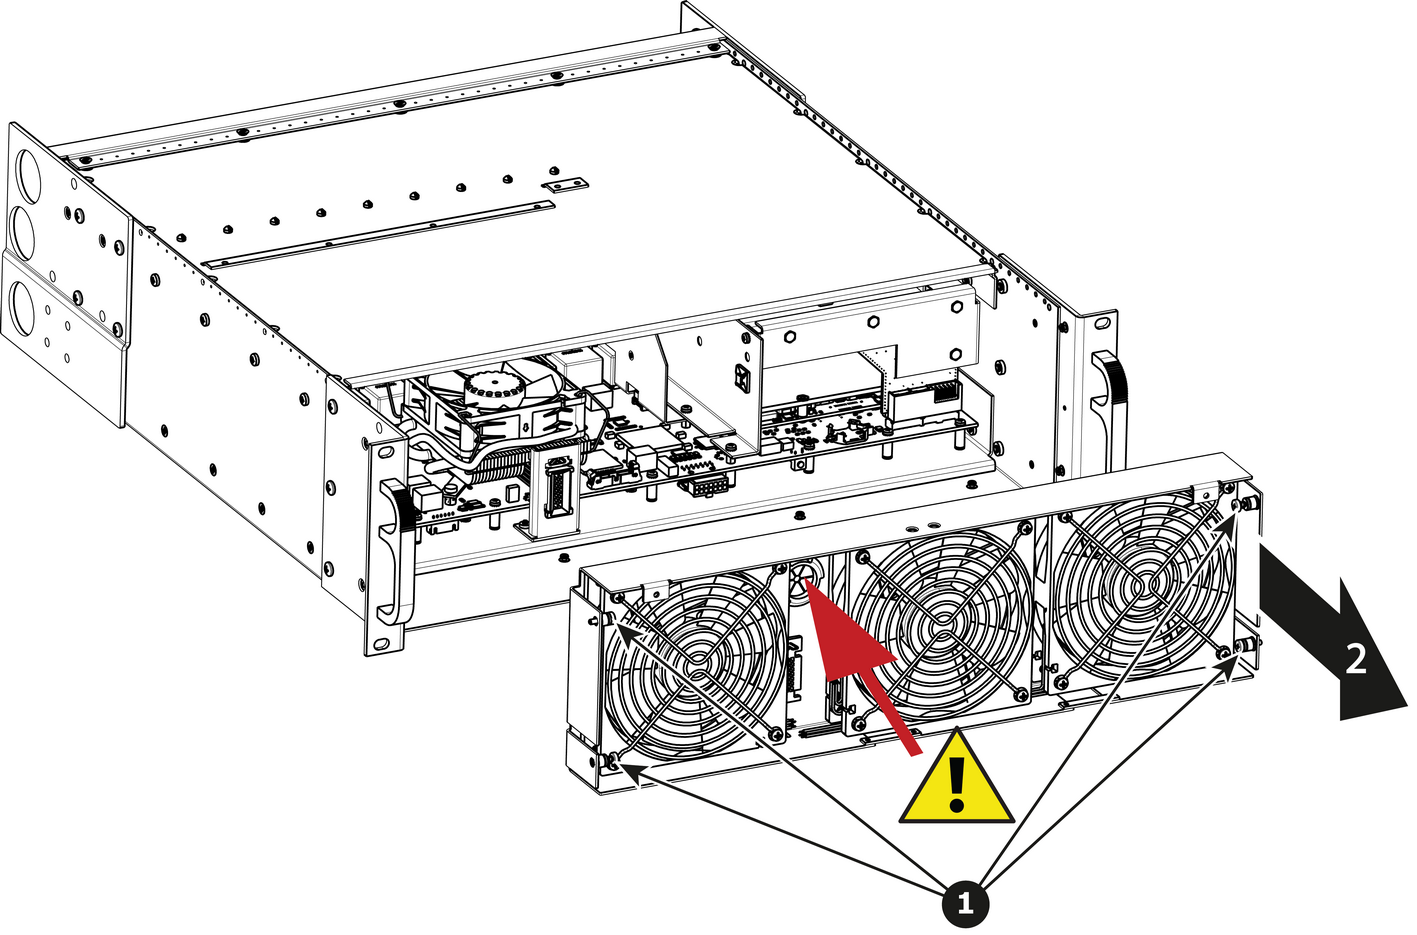
  1. Loosen and unscrew the 4 thumbscrews holding the 3RU fan tray to the chassis.

    Note: You may need a screwdriver if the thumbscrews are very tight.
  2. Pull the tray out.

    Note: You need to tilt the tray and maneuver it to go around the dimples located on the side of the chassis.
    Image 15–16
    Caution: Before you completely remove it from the unit carefully push the USB and Front panel cables through the grommet located between the two fans at left hand side.
How to install the 3RU Fan Tray

Follow the same procedure in the reverse order and in addition perform the following:

  1. Pass the USB and VFD cable through the grommet.
  2. Make sure that the front panel flat cable (keyboard cable) goes through the slot located on the bottom side.
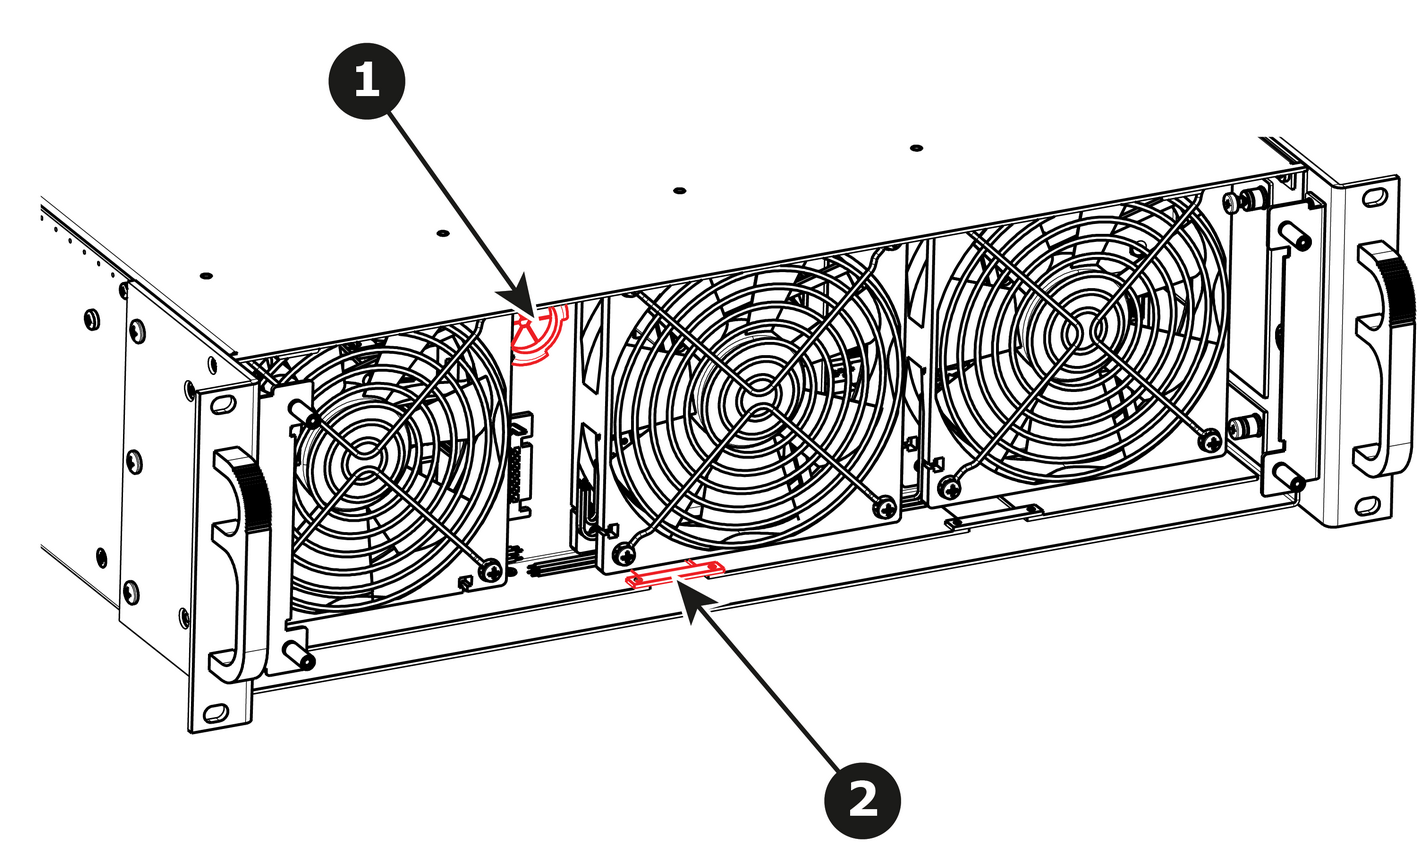
    Image 15–17
  3. Line up the connector behind the fan tray and the connector on the motherboard behind it and push so the two connectors mate.