8.6 Tilted Brightness

What is tilted brightness uniformity correction?

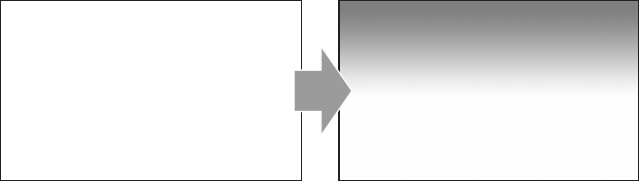
Projectors in the events and simulation market can be installed at any angle possible. However, this can result in the lens being positioned in an angle (horizontal or vertical) towards the projection surface.

Due to this, one side of the projected surface can become brighter than the other (left vs right side, top vs bottom side or both). While a slight difference in brightness might not be that noticeable in a single-projector setup, when having your projector installed in a multi-projector setup brightness differences can possibly ruin immersion..

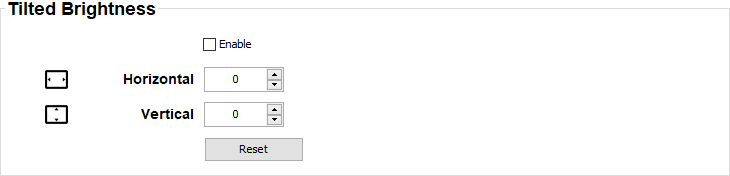
The Tilted brightness uniformity pane allows you to correct the projected image. Using this menu you can make the side(s) of the projected image closest to the screen less bright, so that every side of the projected image looks equally bright.

How is the correction applied?

The Tilted brightness uniformity menu has two sliders that applies a “darkness gradient” over the horizontal and/or vertical axis. This is applied as follows:

Image 8–8 Example of a (maximum) negative horizontal correction being applied on the projected image.
Image 8–9 Example of a (maximum) negative vertical correction being applied to the projected image.
Image 8–10 Example of a maximum negative correction on both horizontal and vertical axes to the projected image.
How to configure
  1. While in the Input tab, go to the Tilted Brightness pane.

    Image 8–11 Example of the tilted brightness pane
  2. Select the Enable check box.
  3. Fill in the desired amount of horizontal correction (positive or negative), or use the arrow keys to navigate to the desired number.
  4. Fill in the desired amount of vertical correction (positive or negative), or use the arrow keys to navigate to the desired number.