5.5.3.1 Set up a serial connection

Note: Only possible when Projector Toolset runs on a Microsoft Windows platform.
Physical connection

Before a serial connection can be made, connect a serial cable from PC to the RS232IN connector of the projector.

RS232
An Electronic Industries Association (EIA) serial digital interface standard specifying the characteristics of the communication path between two devices using either D-SUB 9 pins or D-SUB 25 pins connectors. This standard is used for relatively short-range communications and does not specify balanced control lines. RS-232 is a serial control standard with a set number of conductors, data rate, word length and type of connector to be used. The standard specifies component connection standards with regard to computer interface. It is also called RS-232-C, which is the third version of the RS-232 standard, and is functionally identical to the CCITT V.24 standard. Logical '0' is > + 3V, Logical '1' is < - 3V. The range between -3V and +3V is the transition zone.
Required parts

Straight serial cable

Software connection
  1. Select the Connection properties tab (a).

    Image 5–8 Set up a serial connection

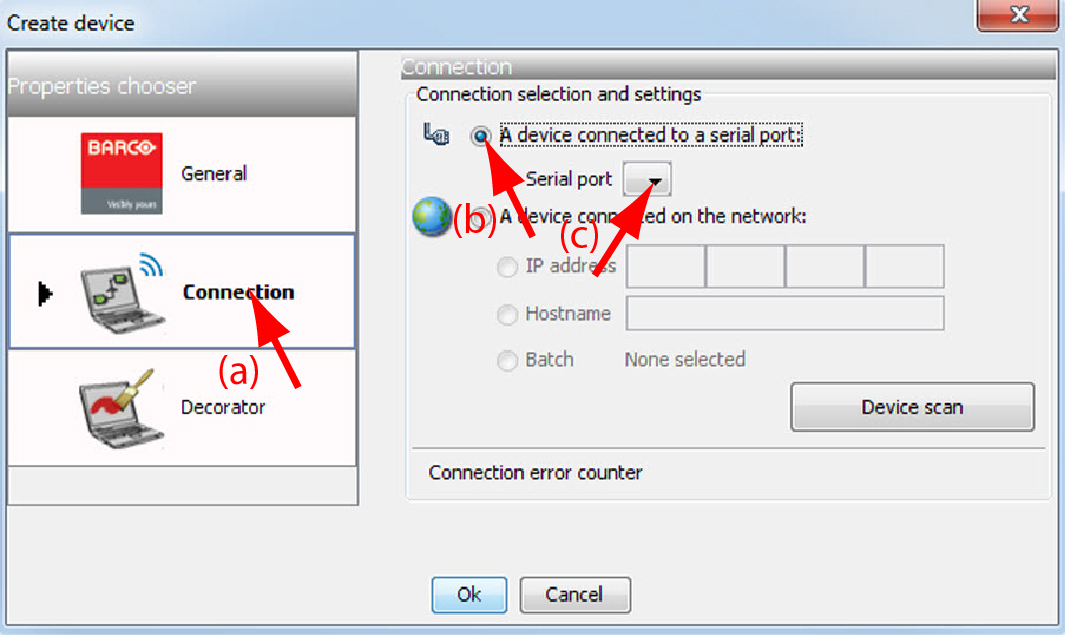
    The right pane changes to the connection setup page.

  2. Click on the radio button next to A projector connected to a serial port to select the serial connection (b).
  3. Select the serial port of your PC connected with the projector. Click on the drop down box and select the corresponding port (c).
  4. Click OK to make the connection.