13.2.4 Corner adjustment

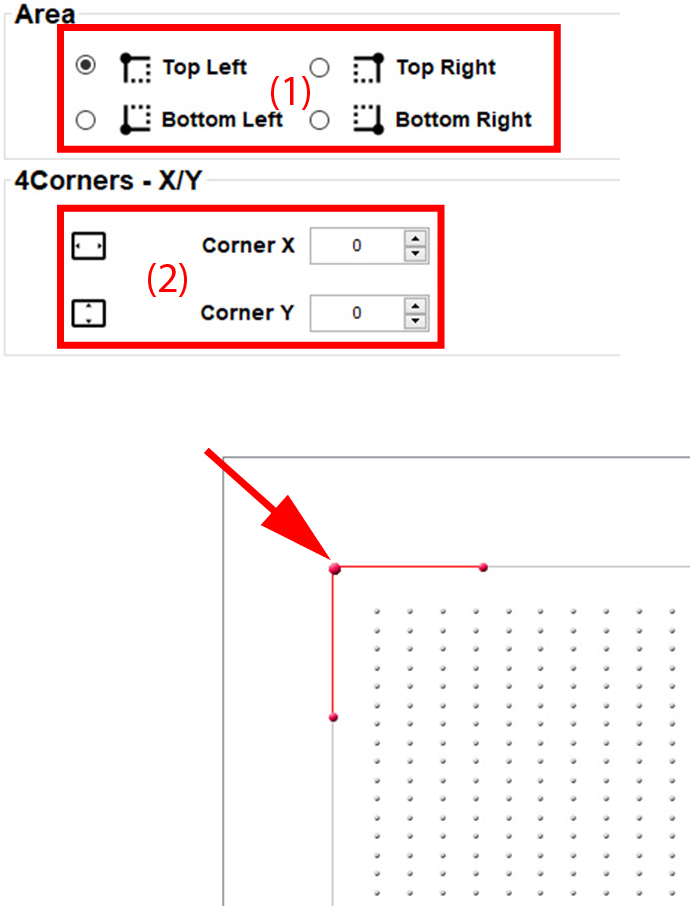
About 4 Corners adjustment

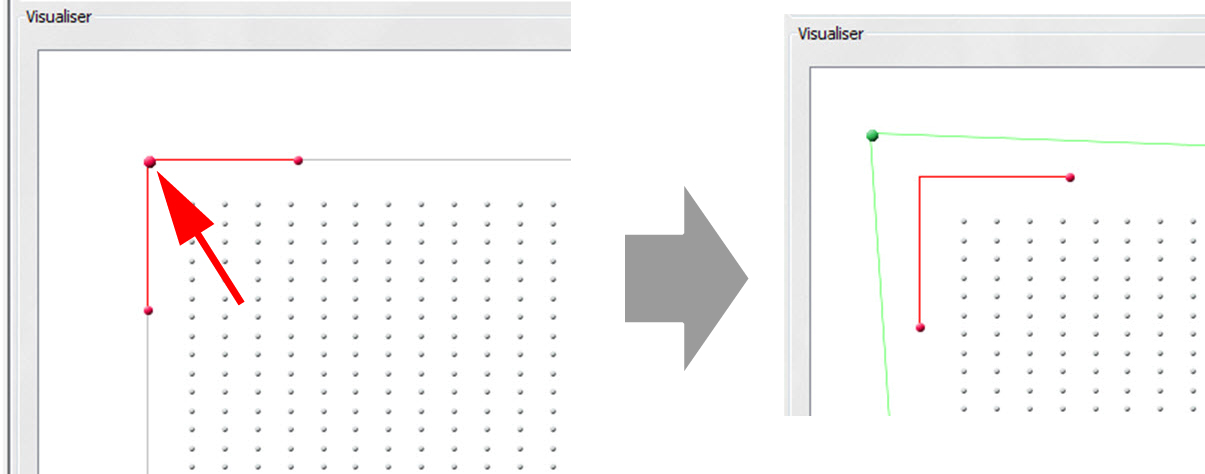
4 corner adjustment is typically used when the mechanical installation of the projector prevents it from pointing perpendicularly at the screen. For example, you can overshoot the screen and use 4 corner adjustment to pull your projected image corners back into the screen.
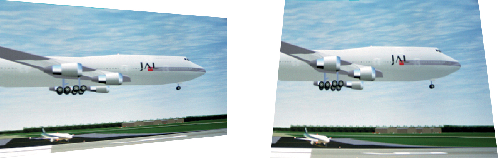
Some examples:

Image 13–6 4 corner adjustment
How to adjust the 4 corners using the coordinates
  1. Select the corner to adjust (1) . Click on the radio button in front of the corner to adjust.

    Image 13–7 Corner adjustment

    The following selections are possible:

    • Top left
    • Bottom left
    • Top right
    • Bottom right
  2. Go to 4Corners X/Y pane and enter the desired value for Corner X and Corner Y (2).

    or

    click on the up down control until the corner is on the desired position.

    X direction means moving the corner in a horizontal way.

    Y direction means moving the corner in a vertical way.

    The result of this movement will be visible in the Visualiser pane.

How to adjust the corners using the Visualiser
  1. Click on a corner and drag it to the desired position.

    Image 13–8

    The warp screen will change to the new position. A green outline of the warp screen will be seen in the visualiser.

    The new coordinates will be indicated in the 4Corners - X/Y pane. The radio button of the adjusted corner in the Area pane will be selected.

    The following functions are available after the graph is selected first:

    • Mouse: select and drag a node to change corresponding angle and length values.
    • Keys:

      • Use LEFT/RIGHT arrows to select area.
      • Use CTRL+LEFT/RIGHT arrows to change length.
      • Use CTRL+UP/DOWN arrows to change angle.