Possibilities
To establish a Ethernet connection, the following ways are possible:
- Enter an IP address
- Enter a host name
- Scan the net work for the connected projectors
To establish a Ethernet connection, the following ways are possible:
Select the properties tab (a).
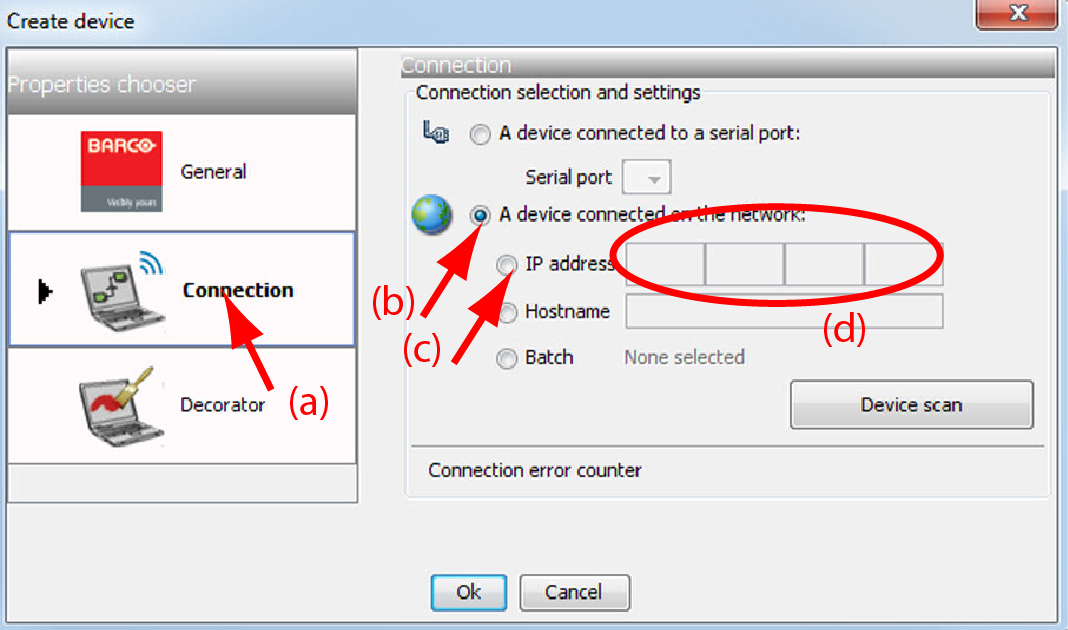
The right pane changes to the connection setup page.
Enter the IP address (d).
Select the properties tab (a).
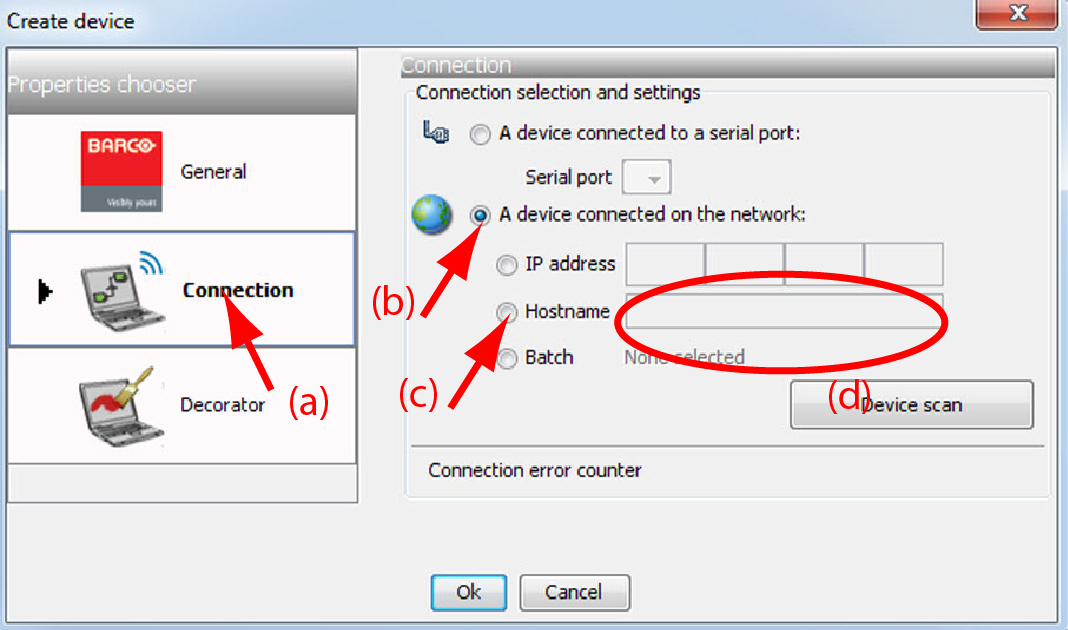
The right pane changes to the connection setup page.