When should it be done manually
When a new plug-in is downloaded, and the user has decided no to install it yet for some reason. He still has the possibility to install this plug-in manually.
When a new plug-in is downloaded, and the user has decided no to install it yet for some reason. He still has the possibility to install this plug-in manually.
Click Help on the menu and select .
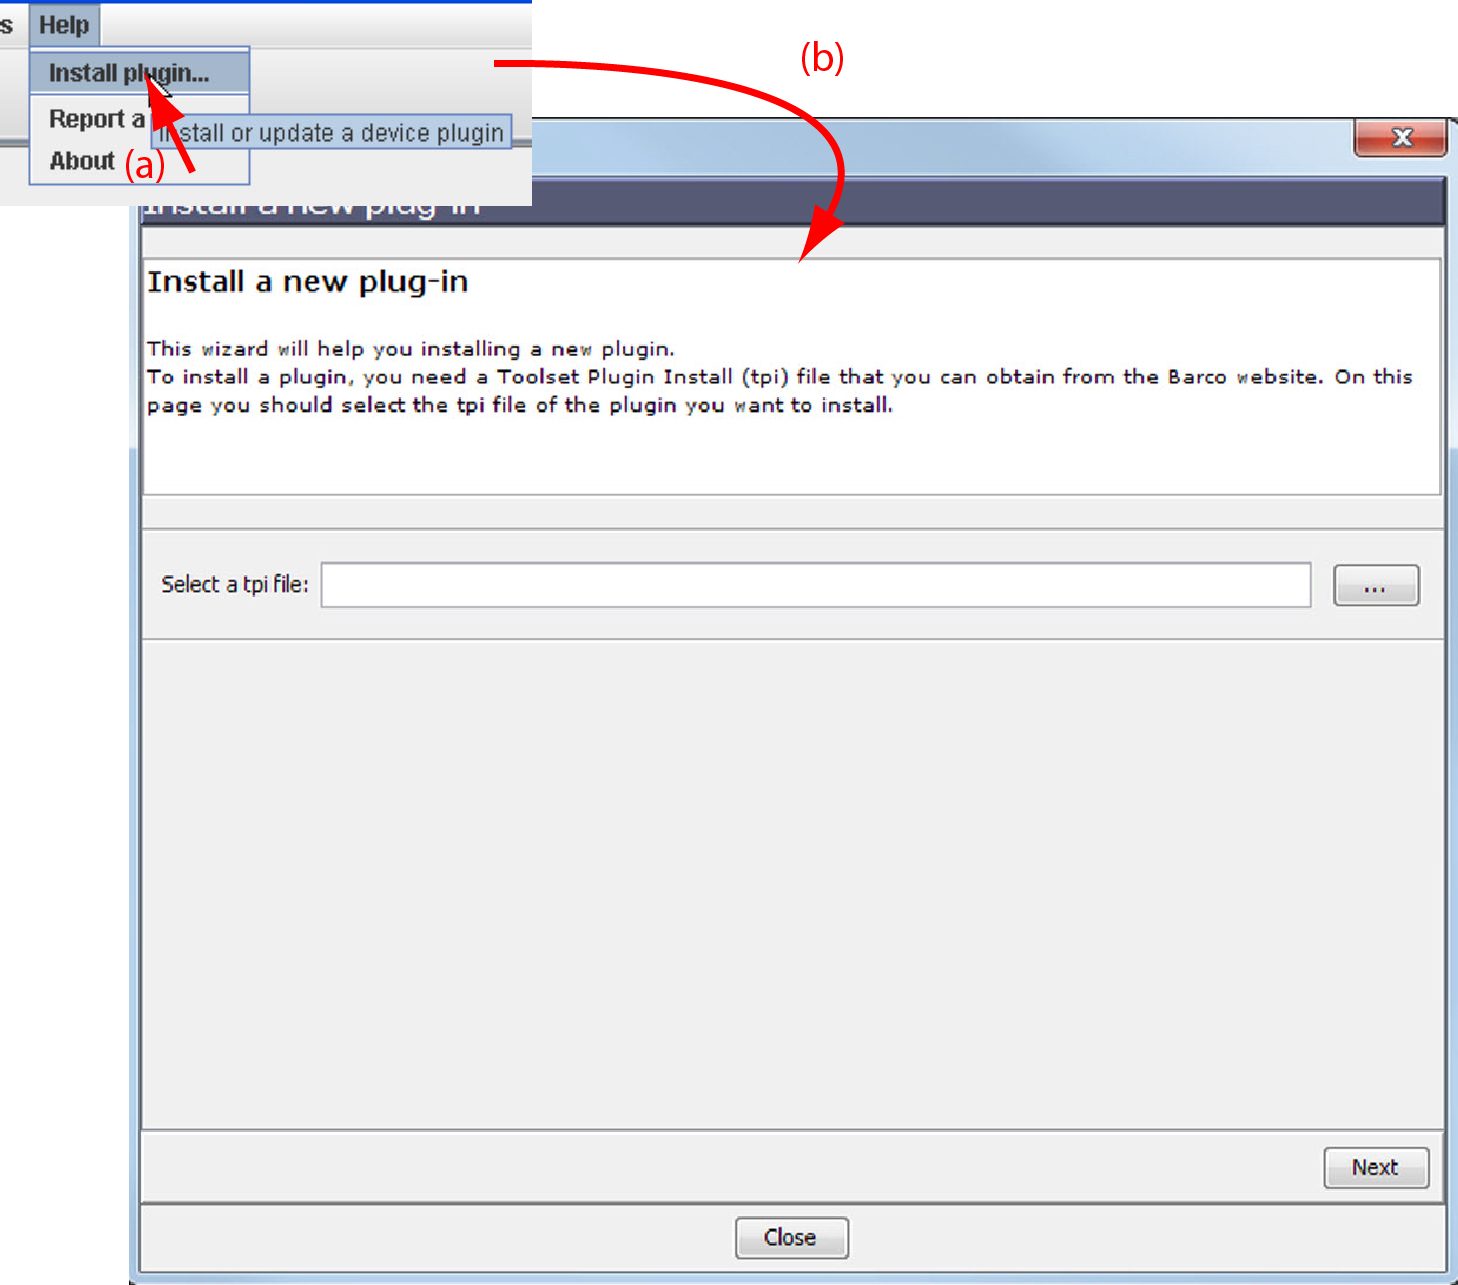
An dialog box opens.
If the path and file name is known, fill it out next to .
click on the Browse button (...).
An dialog box opens.
Browse to the desired plug-in file and click Open.
Plug-in files are .tpi files and are mostly located in the Plugins subdirectory of Projector Toolset's install directory.
The dialog is re-displayed with the complete path filled out.
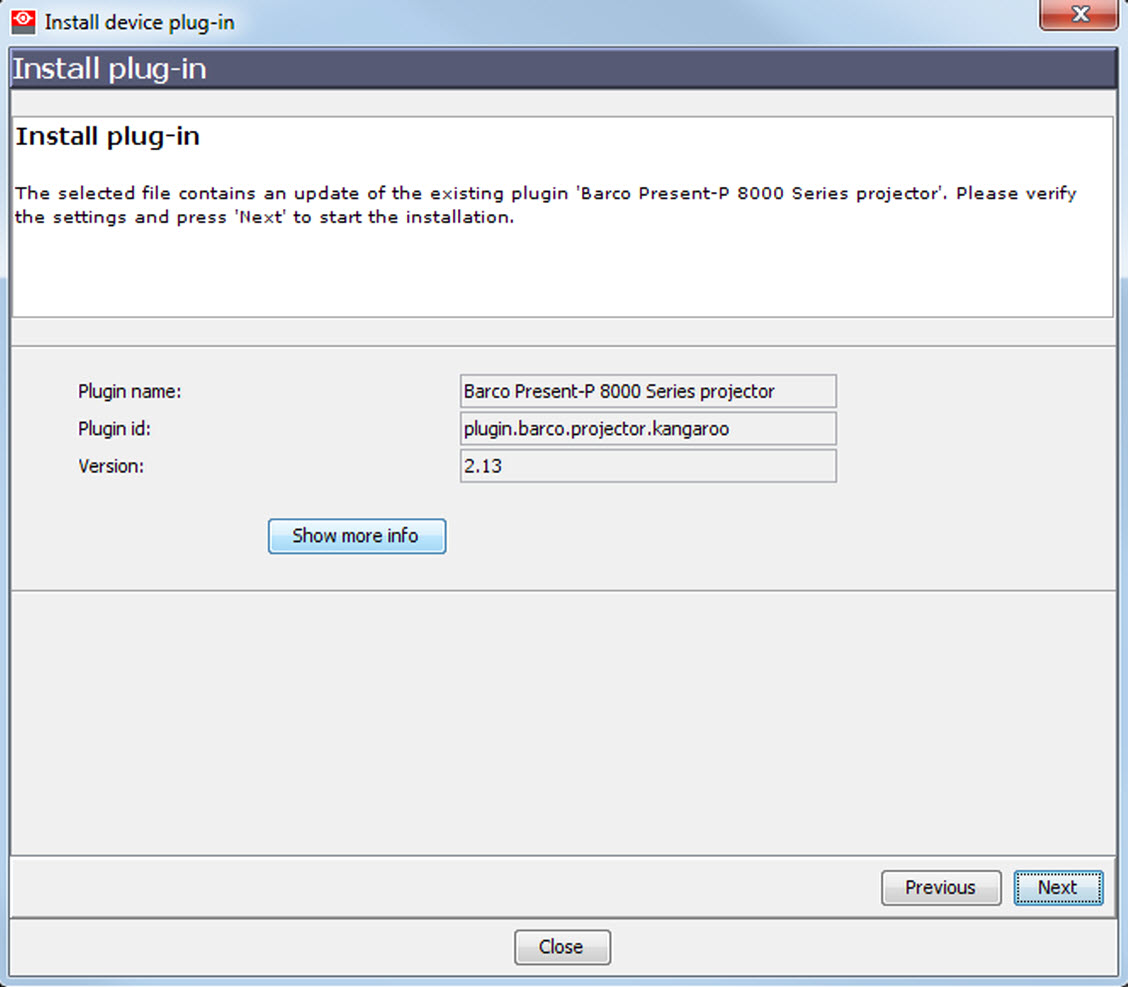
Click Next.
An overview of projector name, plug-in ID and version is given.
A question dialog box appears to ask if you really want to install the selected plug-in.
Click Next to continue.
Installation procedure starts. Result is displayed in a dialog box. A restart of Projector Toolset is necessary to activate the new installed plug-in.
Check and click Finish.
Projector Toolset will be closed.
Restart Projector Toolset.
The new plug-in is activated.