8.2 Connector configuration

What can be done?

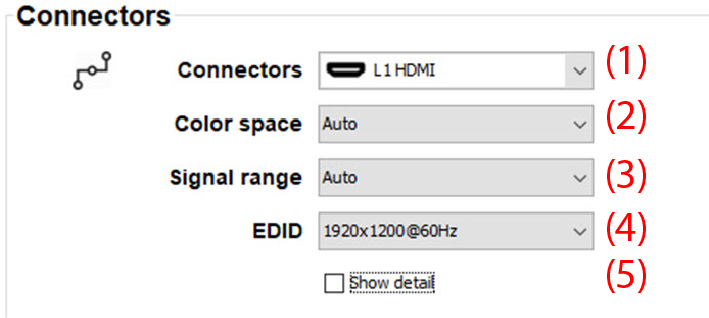
The connector pane allows to change the settings for each input connector to the projector.

By default all options for every connector are set to automatic, together with the native Extended Display Identification Data (EDID).

When entering the menu for each input connector, the following changes can be made:

How to configure
  1. While in the I/O tab, go to the Connectors pane and click on the drop down list next to Connectors and select the desired connector (1).

    Image 8–3 Connector configuration

    The current settings are filled out.

  2. Set the desired Color space (2). Click on the drop down box and select the desired value.
  3. Select the desired Signal range (3). Click on the drop down box an select the desired value.
  4. Set the video timing when others than the native for the connector. Click on the drop down box next to EDID and select the desired value (4).

    Note: You cannot change the EDID for SDI connectors.
Show connector details

Details of the source can be shown. Check the check box in front of Show details (5).

Image 8–4 Connector details