Purpose
When blending images from multiple projectors, the measured color coordination values of each projector can be altered to a desired common level. This so that the projected colors are identical over all projectors used.
When blending images from multiple projectors, the measured color coordination values of each projector can be altered to a desired common level. This so that the projected colors are identical over all projectors used.
There are two ways to make an adjustment:
Via values. To enter a value for specific coordinate or temperature, click on the up down control of the spin box until the desired value is reached
click inside the input field, select the current value and enter a new value.
Select the desired . Click on the drop down box and select the mode.
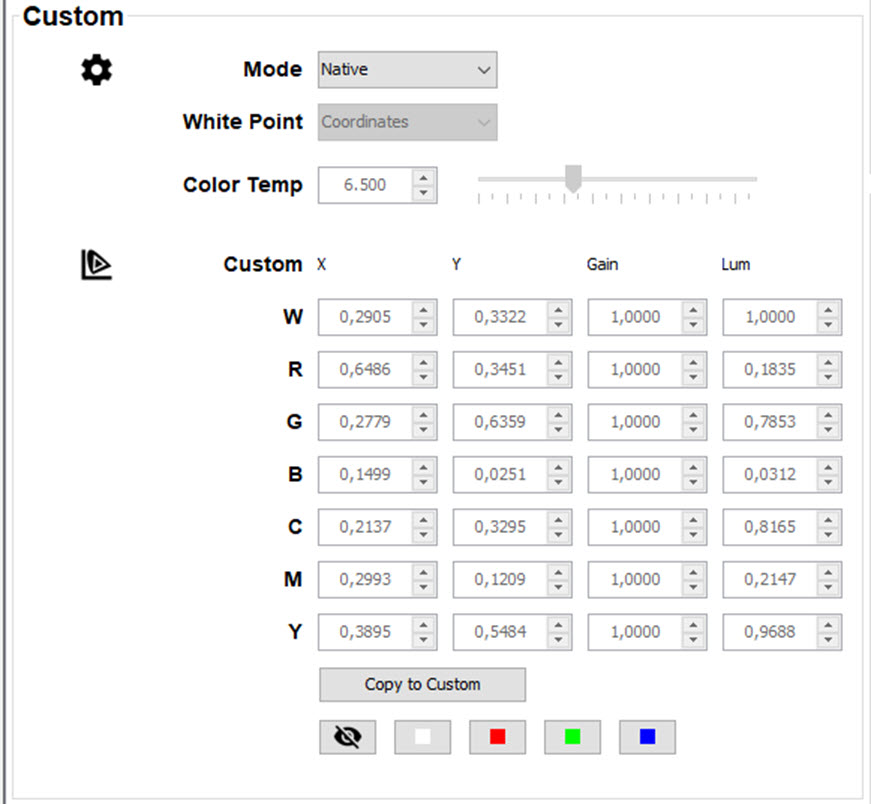
The following modes are possible (modes can change per type of projector):
Configure the white point. Make your selection between or . Click on the drop down box and select the desired setting.
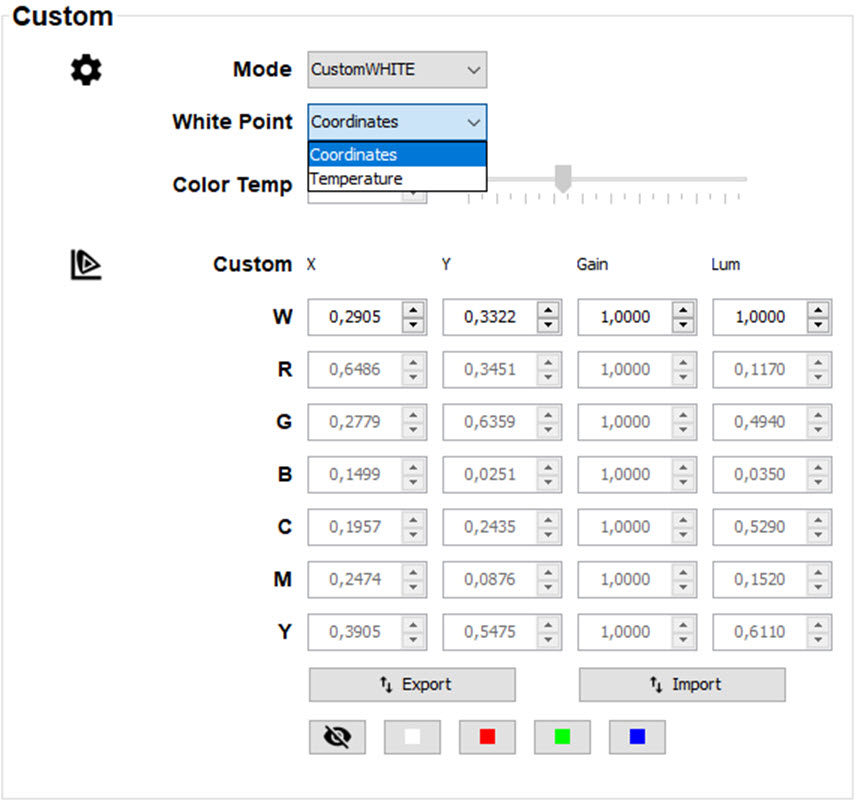
If coordinates is selected, the color temp field is blanked out and the coordinates for white are available for changing.
If temperature is selected, the color temp field is activated and can be changed. The color coordinates for white are blanked.
The values are automatically stored in the custom setting;
Click on the color buttons to select a:

Click on the remove button to remove the current selected pattern.
Before using the color gamut point to adjust the color settings, make your selection in Custom for Mode and White point. Depending on that selection, or the 3 corner points or the white point become available for adjusting.
Check or uncheck the check box before .
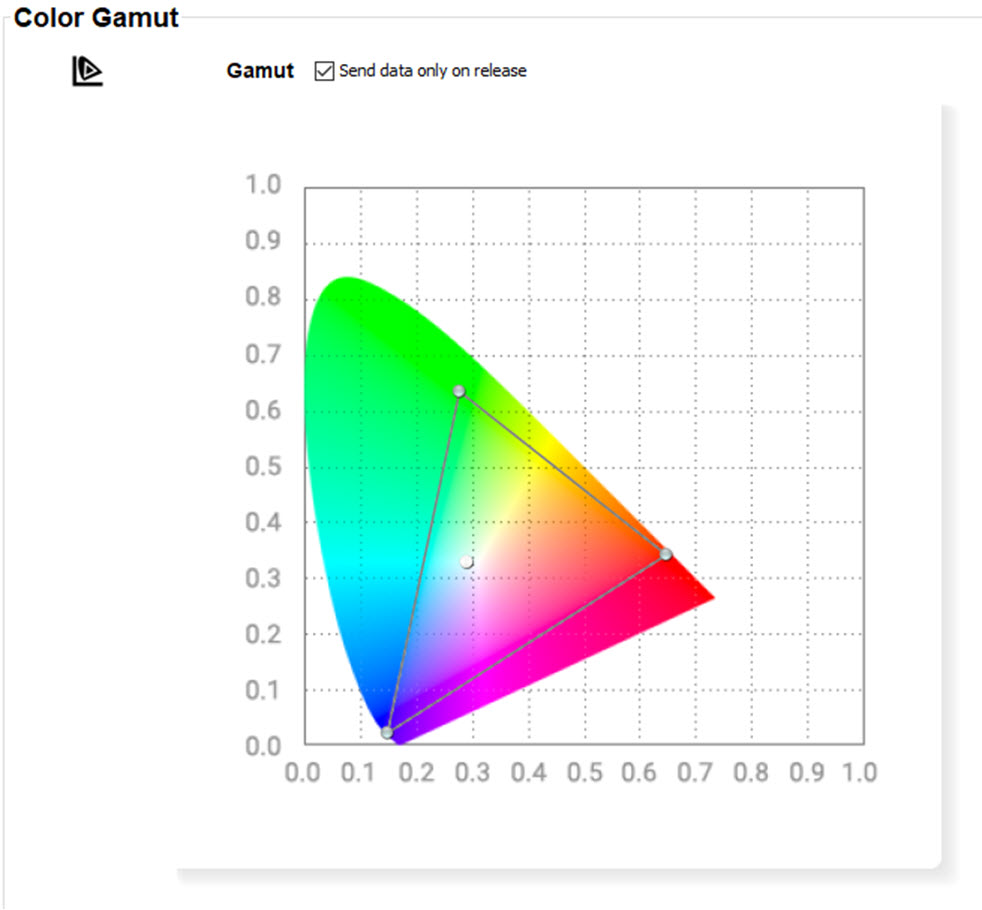
Checked: the new values will only be send to the projector when releasing the dragged point in the new location.
Unchecked: the value of the new location will continuously be sent when moving the point.