What can be done ?
For each possible light output a PIN code can be entered. Once used, the PIN codes can be changes for a next use.
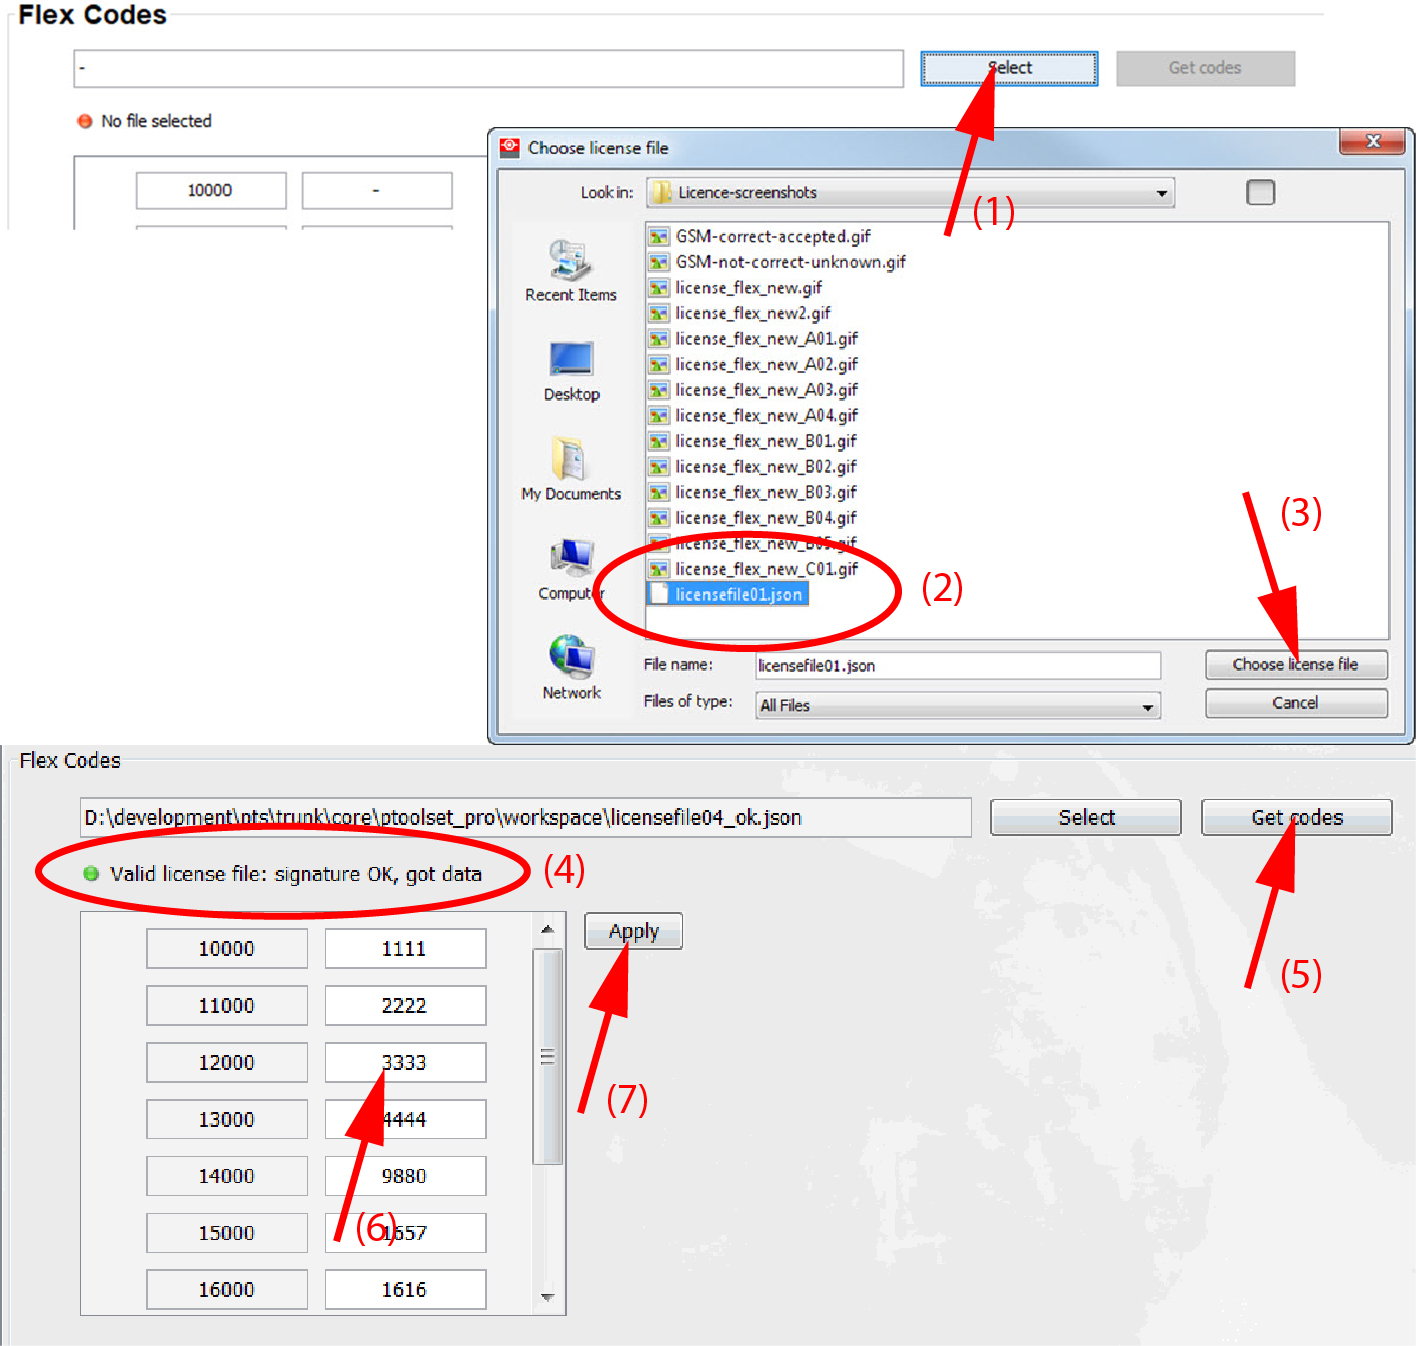
This can only be done when the correct license file is uploaded and available to start up the process or when for projectors with a pre-loaded license file with a correct flex code file.
Some type of projectors have a pre-installed license file (check with your sales representative for the projector types). To activate the flex codes, you can ask for a free Free flex code file linked with your projector type and serial number.
For all other projectors, the flex functionality is optional. You can buy a license which will be linked with your projector type and serial number. After uploading the license file the flex codes can be activated by uploading the same license again in the Flex Codes pane.
Every time you want to change the current flex codes as owner of the projector, you will need your license file or flex code file. The signature in the license (flex code) file will be compared with the one installed on the projector. When there is a match the codes become available.