General
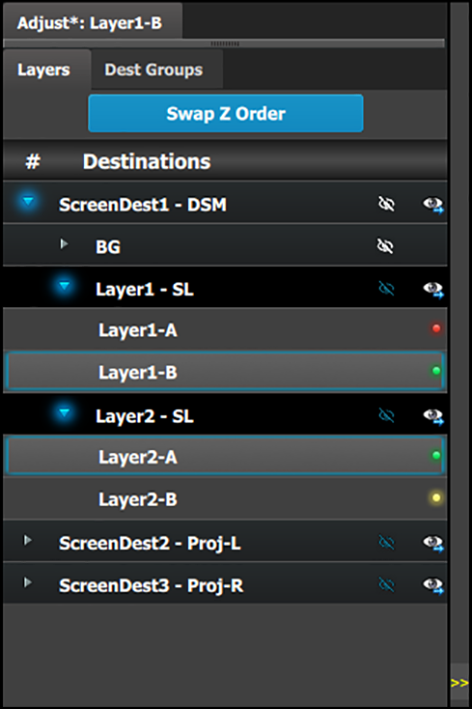
In the Layer menu, users can manage the layer in the selected destination and update its attributes.
In the Layer menu, users can manage the layer in the selected destination and update its attributes.
Layer configuration menu is accessed by clicking on the Layer tab.
 | This menu provide:
|
List of destination:
‘LEDs:’ The LEDs provide an indication of the “A” and “B” backgrounds or sources.
Note that there is no A or B side of the scaler, only A and B usage, all layers are independent of each other in respect to Z-order.

There are several rules that apply when changing Z order:
Adjustments to layers are performed in the “Adjust” panel:
Select the layer from the list
Select the layer from the preview canvas.
The layer is selected.
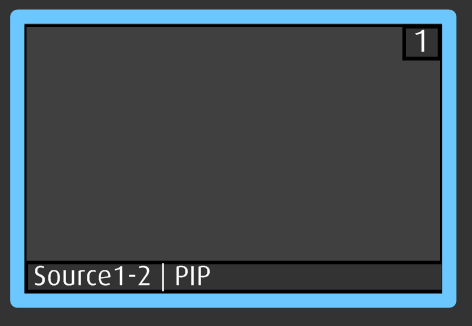
When the layer is selected and is visible on the canvas, it will have a blue highlight around the layer.
Click on the Adjust tab that is on the top of the adjustment area.
The layer adjustment panel is displayed.
The Layer adjustment panel allows access to general layer adjustments and takes effect only if a layer is selected.
The upper part of the panel is always visible:
This part includes:
|
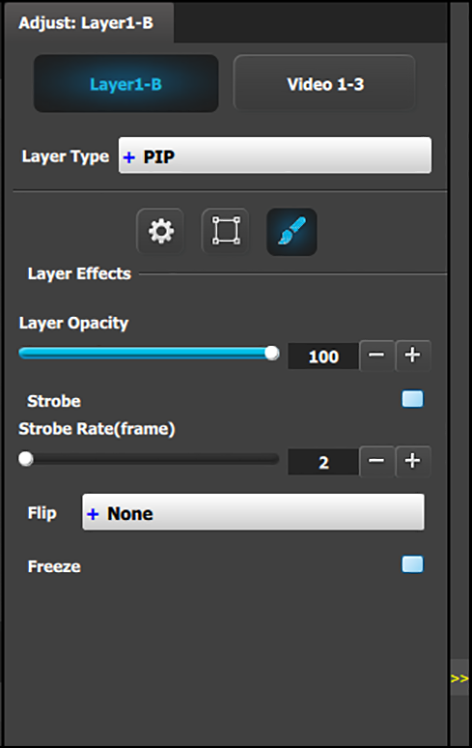
The lower part of the panel provides menus for layer sizing and color adjustments
|
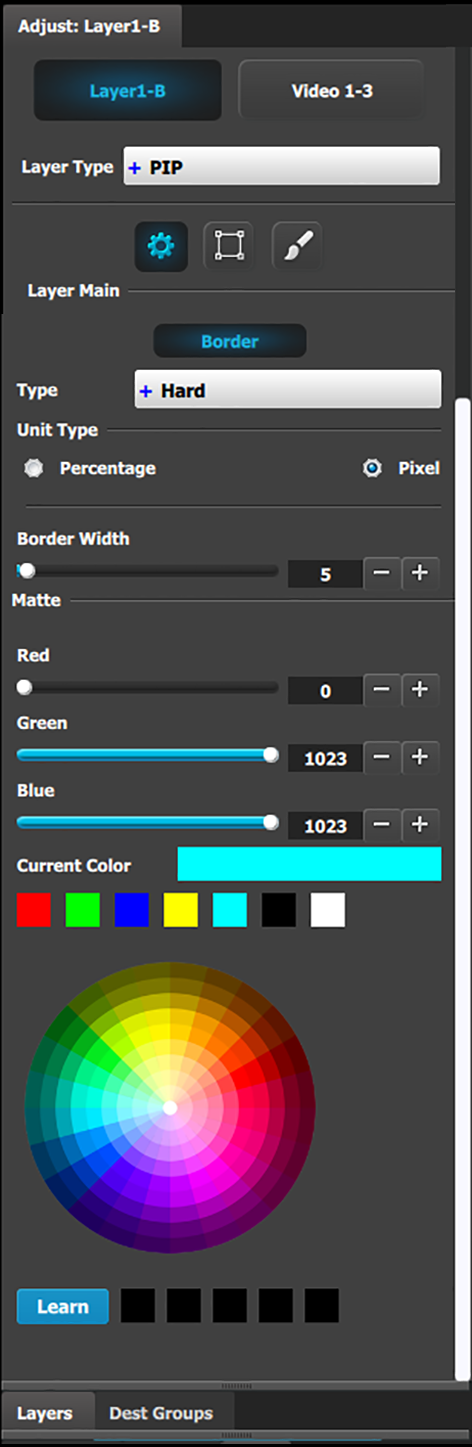
The first selection is the choice for the layer type: PIP or a Key. Depending on the selection, the rest of the menu will adapt.
The Main adjustment panel is variable according the Layer type.
Layer type = PIP (Border Tab):
This menu allows users to adjust the PIP borders.
 |
|
| Layer type = Key; Mode = Luma | |
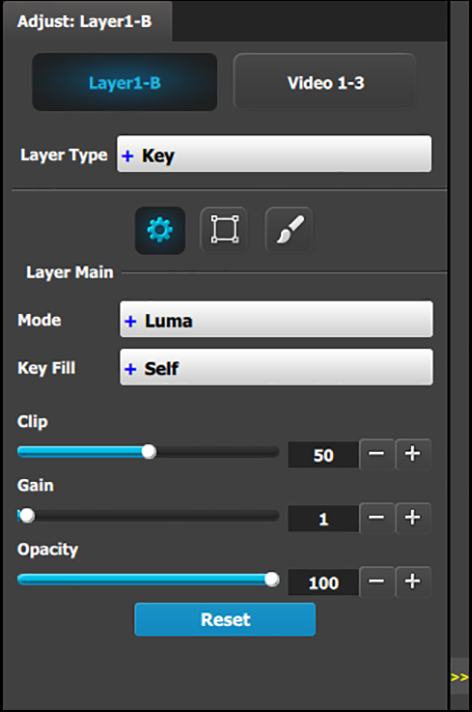 | A Luma (Luminance) Key is one in which the hole-cutting information is derived from the luminance (brightness) level of the key source. Source on the Key Bus can be selected as the “cut.” You can select Self or Matte, Preset Bus or Split for the “fill” source. Clip: Adjust the threshold of the video that “cuts” into the background. A hole is cut into the background anywhere that foreground luminance is greater than the clip level.
Gain: Adjust the sensitivity of the key, enabling you to change the sharpness of the keyed image. Gain only affects the edge of the key hole, as set by the clip.
Opacity: Adjusts the opacity of the keyed image, from fully opaque to fully transparent.
Reset: Press to return all clip, gain and opacity settings to their default values. |
| Layer type = Key; Mode = Chroma | |
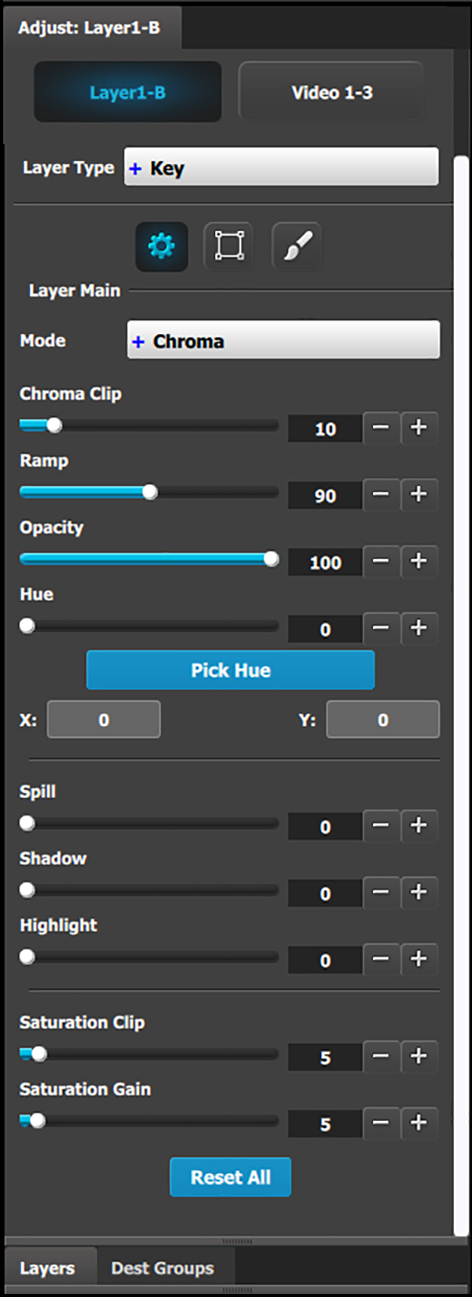 | A Chroma (Chrominance) Key is one in which the hole-cutting information is derived from a color in the key source. After selecting a Hue color to key out, it may be necessary to make additional adjustments to improve the look of the overall compositing effect. Chroma Clip: This is an angle, centered around the Hue color. Any color inside this angle is fully keyed out.
Ramp: This is an angle, also centered around the Hue color. It must be equal to or larger than the Chroma Clip angle. Inside the Chroma Ramp angle, the colors keyed out ramp linearly the closer the foreground color approaches the Chroma Clip angle. Outside the Chroma Ramp angle, the foreground colors are not suppressed.
Opacity: This allows the key source to become increasingly transparent with respect to the background source.
Hue: This field selects the color to be removed or keyed out of the input. While this can be manually adjusted, the "PICK HUE" feature also changes this number.
Spill: Spill removes unwanted “key” color, which is generally a result of reflection from the (green or blue screen) background, on the foreground object.
Shadow: This allows shadows to be preserved or removed in the foreground image (opposite of Highlight).
Highlight: This allows highlights to be preserved or removed in the foreground image (opposite of Shadow).
Saturation Clip: This defines the threshold along the Saturation axis where keying begins. Below the clip threshold, the colors are not keyed out. Above the clip threshold, the colors follow the results of Chroma Clip and Gain, but they depend on the Saturation Gain setting as this creates a linear key color strength ramp in the key area.
Saturation Gain: This defines the transition along the saturation axis between keying off and keying on.
Reset:Press to return all clip, gain and opacity settings to their default values. |
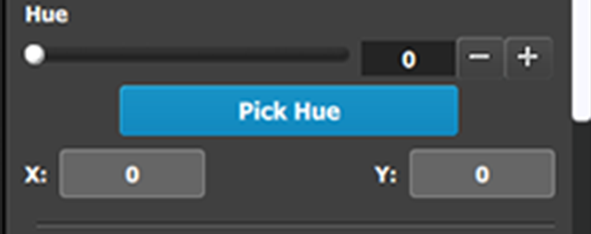
The Pick Hue button allows the user to pick and apply a selected hue from any single Layer.
Click on the Pick Hue button.
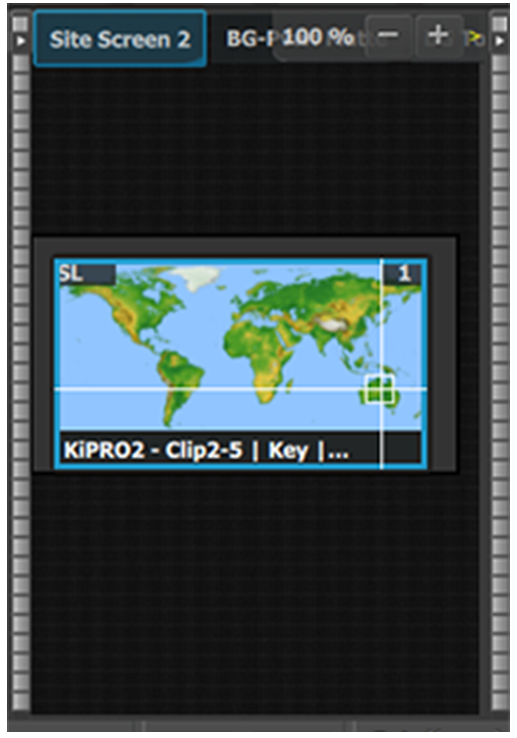
Clicking on the Pick Hue button for a Layer places a crosshair on the Layer in Preview in the Programming Diagram area.
Move the crosshair to the desired hue.
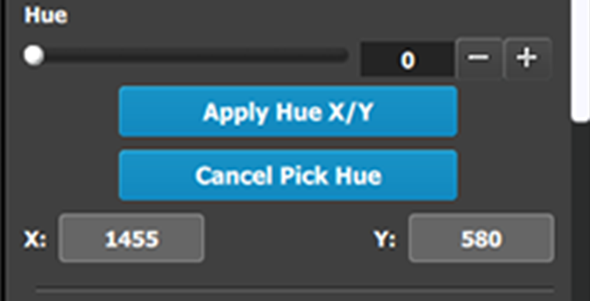
The user can move the crosshair using either the cursor or the X and Y edit boxes.
Complete the operation by clicking on the Apply Hue X/Y button, or cancel the operation by clicking on the Cancel Pick Hue button.
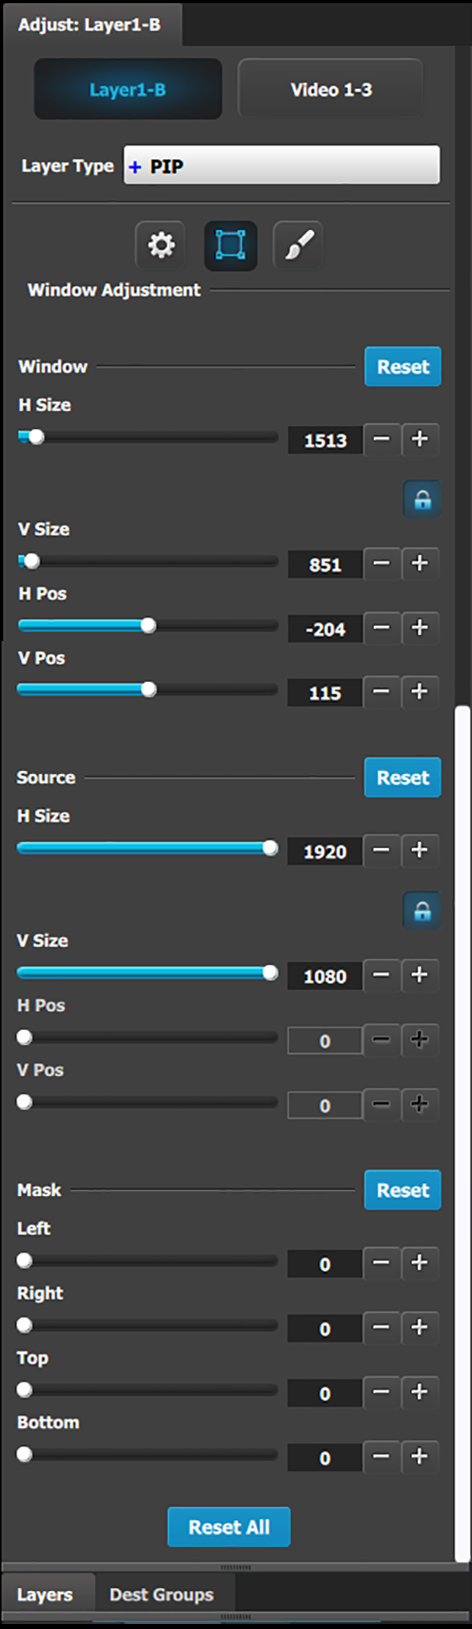 | The following PIP Adjustment Menu functions are provided: (All figures are in pixels)
|
 |
Note that almost all color correction effects (except “invert”) work on a keyframe by keyframe basis. This enables you to morph effects from keyframe to Keyframe. |