5.3 Using menu system

General

This section describes the conventions for using the menu system of the Event Master devices. For reference, the following illustration shows the System Menu.

Image 5–3 System menu
Note: The unit’s display screen is four lines high. Throughout this chapter, entire menus are shown for ease of reference, unless otherwise noted.

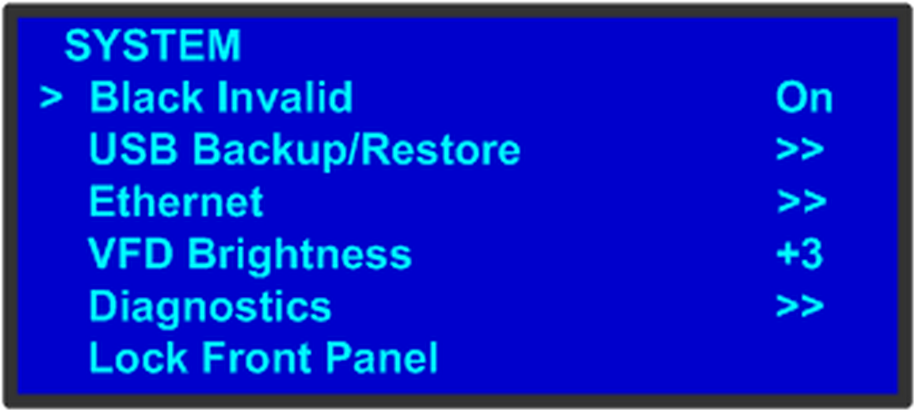
Please note the following important menu rules and conventions:

Making a menu selection

To select a menu item, use the ADJUST knob to scroll to the item, then press the SEL button on the front panel.

Note: You must press SEL to accept the value.
Note: Throughout this user’s guide, the term “select” is used as an abbreviation for “scroll to a menu line and press SEL.”

Example: Select the Ethernet menu to begin configuring network settings.

Exiting a menu
Answering a menu query

The SEL button is used to answer Yes to certain menu queries. The ESC button is used to answer No to menu queries. Sometimes the two buttons are appropriate to answer menu queries. The following illustration shows an example of a menu query.

Image 5–4 Validation error message
Edit name

Sometimes, it is necessary to edit name, like the name of a configuration file, for example. To modify name use the following procedure:

  1. Navigate to submenu (For example, the following illustration shows the USB Backup Config submenu).

    Image 5–5 USB Backup Config submenu

    The navigator cursor (>) is at the field targeted.

  2. Press SEL

    The navigation cursor changes to the edit cursor. A blank field for the first character becomes available and this field is marked by an underscore.

  3. Use the ADJUST knob to scroll to the first character you want to use for the format name.

    Turning the ADJUST knob clockwise once moves to the next letter of the alphabet. If you start with an upper-case letter, as shown in the preceding illustration, then the next letter is also a capital letter. If you start with a lower-case letter, the next letter is a lower-case letter:

    • F –> G
    • f –> g

    If you start with a number, the next character is a number.

    Continuing to turn the ADJUST knob clockwise at the end of the upper-case alphabet displays a series of punctuation marks you can use in the format name.

    Continuing to turn the knob clockwise at the end of the punctuation marks displays the lower-case alphabet in order.

    When you reach the end of the lower-case alphabet, turn the ADJUST knob counter-clockwise to scroll back through the options in order.

  4. Press SEL. The cursor moves to the next character field, which is now blank with an underscore.
  5. Repeat the previous steps as many times as needed, pressing SEL for each character selection.
  6. When you have selected all the characters, press SEL again to save the name.
Note: A file name can consist of up to 19 alpha-numeric characters.