Overview
The panel, standard attached to a stand, is compatible with the VESA 100 mm standard. Thus, it can be used with an arm that is approved by VESA. This chapter shows you how to release the panel from the stand and how to attach it to an arm. If you’re not using an arm, you can skip this chapter.
Unlock the stand locking mechanism and put the display in the highest position.
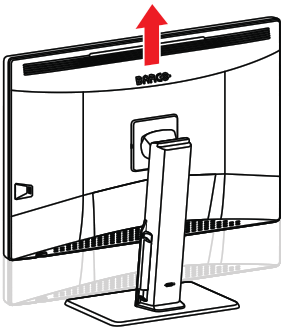
Image 2–6 - Put the display face down on a clean and soft horizontal surface. Be careful not to damage the panel screen.
Push the VESA mount cover to the right and lift the cover on the right with your finger or a flathead screwdriver.
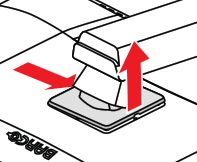
Image 2–7 Push the VESA mount cover to the left and release the cover on the left with a flathead screwdriver.
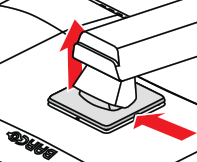
Image 2–8 Rotate the VESA mount cover to uncover the screws fixing the panel to the stand.
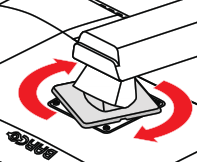
Image 2–9 Unscrew the 4 fixation screws while supporting the stand.
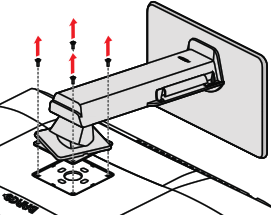
Image 2–10 Attach the panel firmly to the arm using 4 M4 screws.
Respect the following rule to select an appropriate screw length:
- Lmin = T + W + 6.5 mm
- Lmax = T + W + 10 mm
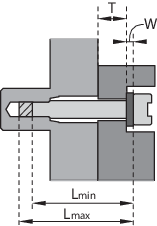
Image 2–11