How to power On the projector
Power on the AC switch (1) and wait until the power button on the control panel is solid red.
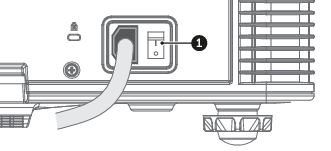
Image 5–1 Turn on the projector by pressing the POWER button (2) on the control panel or the ON key (3) on the remote control.
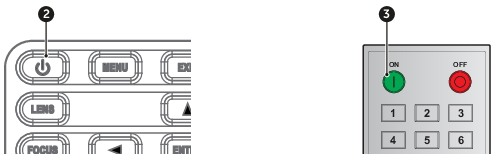
Image 5–2 The status LED (4) will flash orange. The startup screen will display and the status LED will turn to solid green.
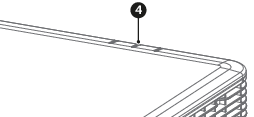
Image 5–3 Is this the first time that the projector starts up? (First installation or after a factory reset)
- If yes, a popup window appears with the request to accept Barco’s End User License Agreement (EULA). Select CONTINUE to accept the EULA terms and to proceed using the projector. If you do not accept the EULA terms (CANCEL), the projector will be switched off.


Image 5–4 Turn on your source. The projector detects the source you selected and displays the image.