9.8 Auto image setup

About auto image setup

Automatically adjust the image to achieve better performance.

Tip: Auto adjustment is performed via the optional camera module. Please ensure that the camera is installed and not covered by any objects.

The auto adjustment process could take more than one minute to complete!

Auto focus

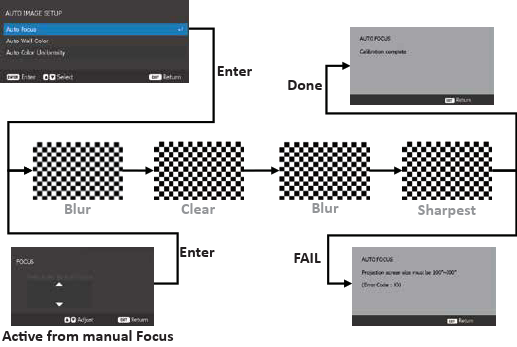
Auto adjust the focus motor to get the sharpest and balanced image:

Image 9–7
Note: Install the projector parallel to the screen to get the best calibration result.
Note: It is recommended to correct the focus manually after the system is installed to ensure the performance of Auto Focus function.
Auto wall color

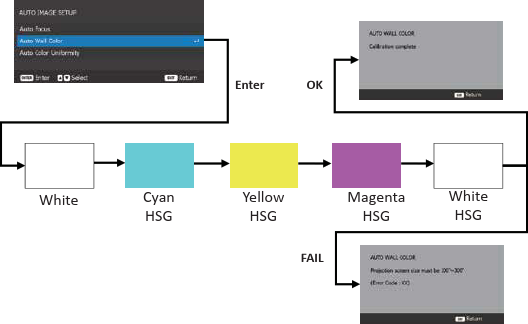
The auto HSG adjustment is for the color compensation of background colors:

Image 9–8
Note: Depending on the room brightness or screen conditions, the calibration performance may vary.
Note: If the target data is out of color range of the projector, the color calibration will not be performed correctly.
Auto color uniformity

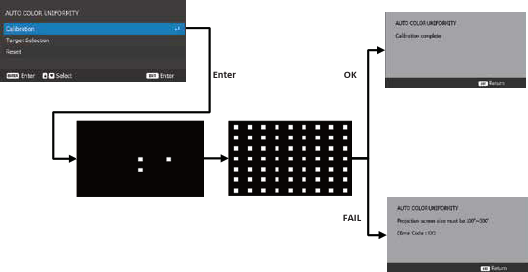
The adjustment of image uniformity is to control the uniformity gain of the whole projected image, to improve its image uniformity performance.

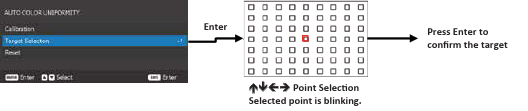
The user can choose one of 63 Positions (9x7) to be the target and adjust the uniformity gain of other positions to match the target to improve the uniformity performance:

  1. Select the target points.

    Image 9–9
  2. Start the calibration.

    Image 9–10
Note: Depending on the room brightness or screen conditions, the calibration performance may vary.
Note: If the target data is out of color range of the projector, then the color calibration will not be performed correctly.
When encountering problems with auto image

If you encounter problem with auto image functions, verify the following: