7.13.2 Adjusting the boresight

Why boresight adjustment ?

Boresight adjustment is needed if the image is still unsharp after the focus adjustment. The boresight adjustment tilts the lens holder to parallel the lens plane and the DMD plane to fully focus the image on the screen.

Required tools
How to adjust
  1. To perform the boresight adjustment, turn the boresight screws clockwise or counter-clockwise using the L shaped socket tool or U-shape tool and the three boresight extenders.

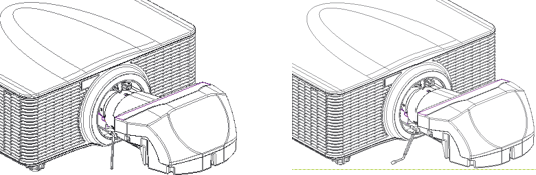
    Note: Use the silver L shape key for the LSM type 1 and the black L shape or U-shape tool for the LSM type 2.
    Image 7–32
  2. Display a test pattern by pressing the Pattern key on the remote control.
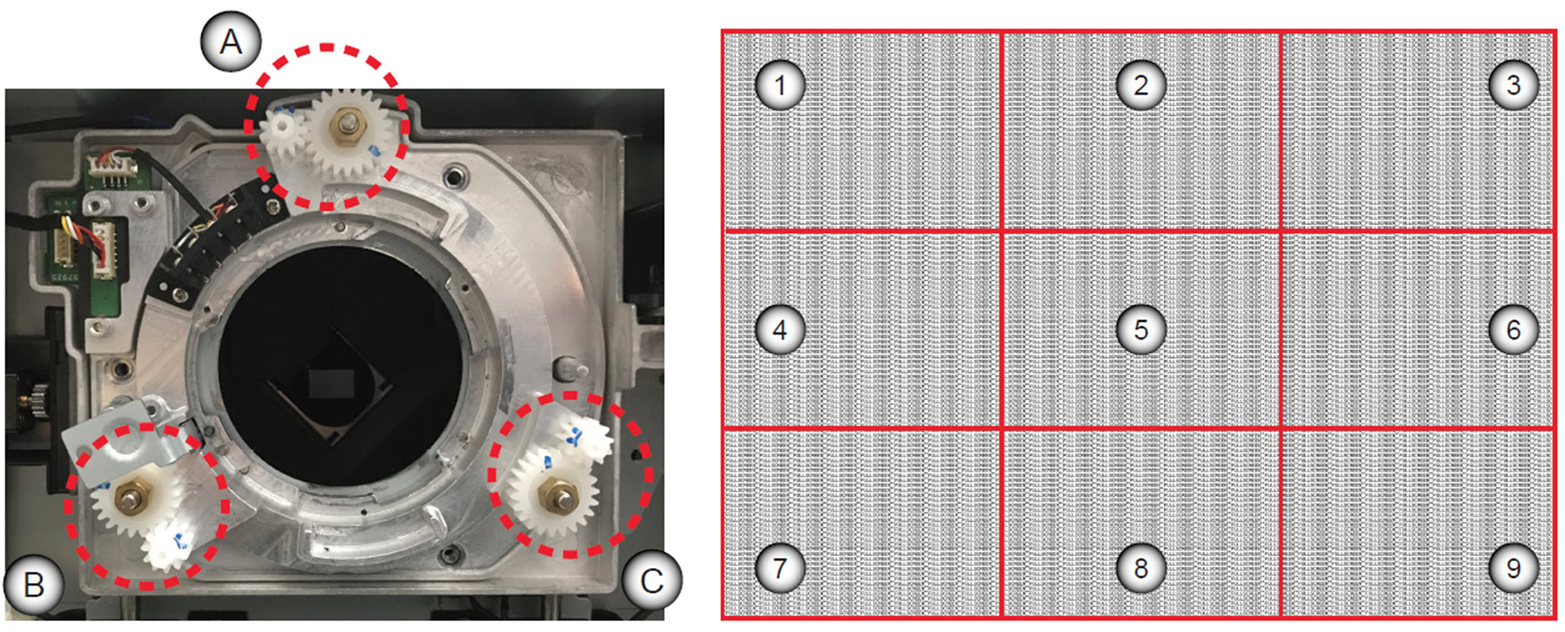
    Note: The projector cannot display the input sources during the boresight adjustment.
    Image 7–33
  3. To focus the left bottom area of the screen (point 4 and 7), turn boresight screw B clockwise or counter-clockwise.
  4. To focus the right bottom area of the screen (point 6 and 9), turn boresight screw C clockwise or counter-clockwise.
  5. To focus the top corners of the screen (point 1 and 3), adjust the image back focus and focus by pressing the Zoom and Focus keys on the remote control.
  6. To focus the center bottom area of the screen (point 8), turn boresight screw A clockwise or counterclockwise.
  7. Repeat from step 3 until the image is as sharp as possible in the center, left, right, top, and bottom of the screen.