7.13.1 Adjusting the image position and focus

What must be done?

After the UST lens is installed, turn on the projector and adjust the image position.

Required tools
How to adjust
  1. Place the projector as close as possible to the screen. Make sure the screen is flat and the projector is perpendicular to the screen.
  2. Turn on the projector.
  3. To display a test pattern, press the Pattern key on the remote control.

    The test image could be out of focus and the bottom edge may appear obscured or in dark.

  4. To remove the obscured bottom edge, adjust the image position by pressing the Lens V keys to shift the image up or down.
  5. If the obscured edge still exists after the lens shift, adjust the vertical position of the two M3 x L8 hex screws connecting the lens bracket and the lens support assembly, which mechanically moves the image up or down. Use a 2.5 mm allen key to adjust the M3 hex screws.
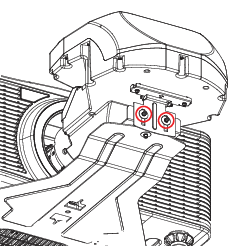
    Image 7–30
  6. To adjust the image focus, press the Zoom keys on the remote control to adjust the back focus and the Focus keys on the remote control to adjust the focus.
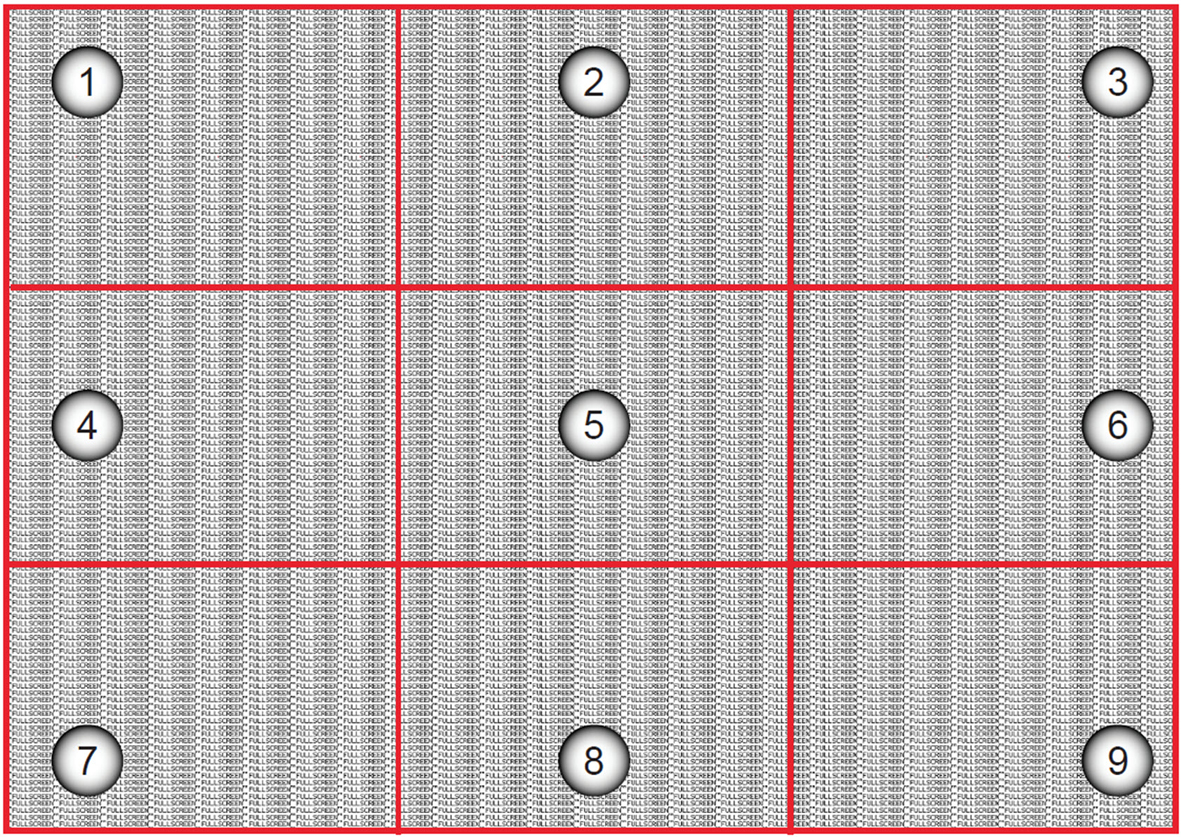
    1. Press Zoom keys to adjust the back focus until the screen center (point 5) is clear and sharp.
    2. Press Focus keys to adjust the image focus untill the screen corners (point 1, 3, 7, and 9) are clear and sharp.
    3. Repeat step a and b to balance the image focus at the center and corners.
    Image 7–31
    Note: The image focus should be tuned finely as the balance between the back focus and focus adjustment is very subtle. One press on the Zoom or Focus keys can make a big difference on the screen.