About the software preparation
Set the start mode of the projector to get it ready for the UST lens installation. During the setup process, the projector reduces the image brightness and performs a lens calibration to center the lens position.

Set the start mode of the projector to get it ready for the UST lens installation. During the setup process, the projector reduces the image brightness and performs a lens calibration to center the lens position.
Enable the UST Install mode. There are 2 possibilities:
You have another projection lens available: use the on screen display (OSD) menu.
You do not have another lens available: use the shotcut keys on the local keypad
Enable the UST Install mode by pressing the following keys on the local keypad or on the remote control unit: ‘Exit / Input / Left / Right’.
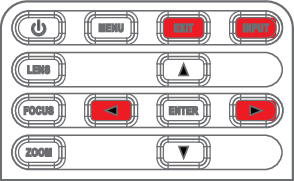
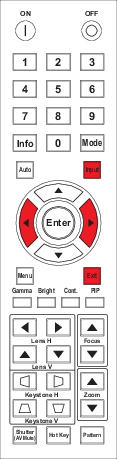
Switch off the AC power button.
The projector is now in the mode for an UST lens.