G62-W14 will detect the UST lens type while inserting the lens or reboot the projector. The image will automatically flipped as default and the lens memory function will be automatically disabled.
For G62-W9 and G62-W11 it depends on the used hardware and software.
Note: For any type of projector, do not use the memory recall functionality.
Tip: Please check the projected image, if required; please do manually flip the image while choosing the projection direction. Depending on your configuration, the lens memory function is automatically disabled when used with unsupported lens.
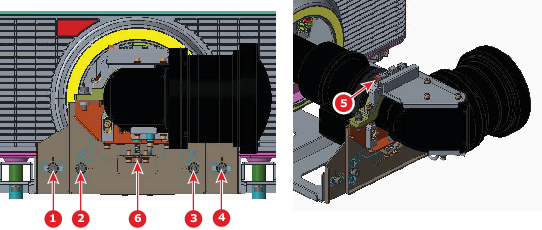
Location of the adjustment screws
Before adjusting the lens, make sure that screws 1 to 4 on the adapter are not tightened, and that screws 5 and 6 are in mid position.
Image 6–21
How to adjust
Start up the projector and display a test pattern.
Shift the UST lens to the target position.
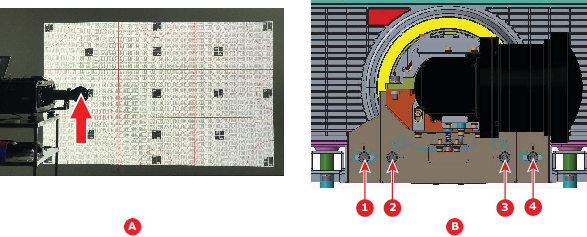
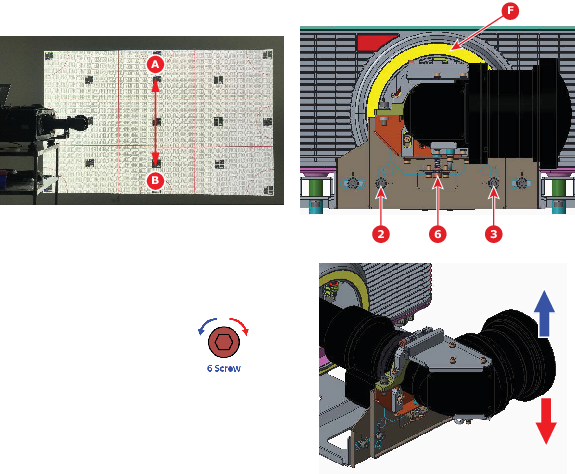
Vertically lift the lens by hand to have the image as good as possible (reference A).
Tighten the vertical shifting screws 2 & 3 to secure this target position (reference B).
Image 6–22
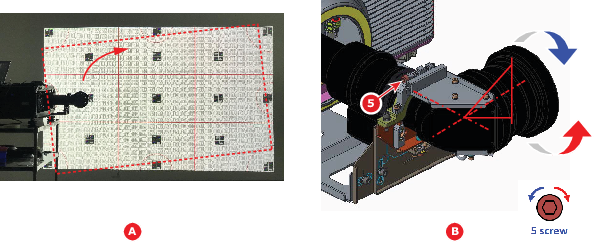
Fine-tune the tilt of the projected image, using screw 5. Using this method, you can adjust ±7.5°.
Image 6–23
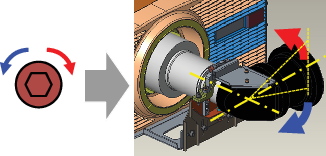
Tip: Turning screw 5 clockwise will tilt the image counterclockwise. Turning the screws counterclockwise will tilt the image clockwise.Image 6–24
Fine-tune the focus of the projected image vertically, using points A and B on the following image as reference points. The resolution/balance between both points should be the same.
Use the focus software feature to help focus the image.
Use adjustment screw 6 to help focus the image.
Use the focus ring at the end of the lens to help focus the image.
If necessary, loosen screws 2 and 3 a bit to push the lens a bit upward or downward to spot any variation in image quality.
Image 6–26
Note: Screws 2 & 3 are tightened but lens can be pushed softly up or down to observe the image quality variation.
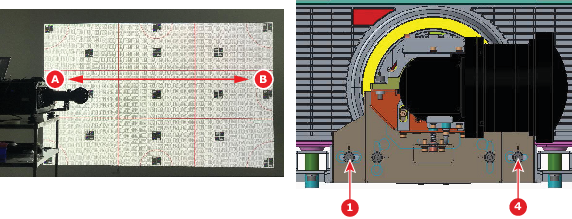
Is the horizontal resolution/unbalance acceptable when comparing between region C and D.
If yes, tighten screws 1 and 4.
If no, push lens softly horizontal and check the image quality. Tighten screws 1 and 4 when you have an acceptable image quality.
Image 6–27
Adjust Focus function in OSD and Focus Ring to have the best image quality.
If the image quality is still unacceptable, please restart the procedure.
Caution: Do not execute any lens movements when the UST lens is fixed in the Lens Support.