8.10.6.9 Unit ID

Location
  1. Navigation side bar: Configuration
  2. Central work window: Detail View or System View
  3. Right panel: Adjust unit
About unit ID

The unit ID is used during linking and allows the software to differentiate each Encore3 with a designated number. This number can either be a ‘0’ or a ‘1’. It is recommended to assign ‘0’ to the host unit. If two units are linked, then the IDs are defined during the linking step. For more information, see “Multi-unit systems”.

How to change
  1. Is there more than one unit in the system?
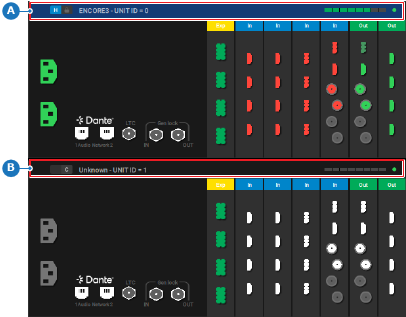
    • If yes, click on the header of the desired unit (reference A or B) in the central work window. Go to next step.
    • If no, go to next step.
    Image 8–41 Example where the host unit is selected
    A
    Host unit selection area
    B
    Client unit selection area
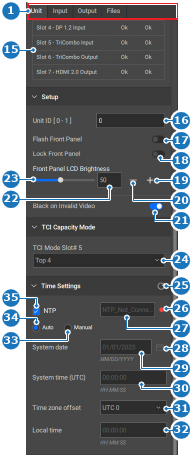
  2. Enter a desired ID in the input field after Unit ID [ 0 - 1 ] (reference 16).

    Note: Only ‘0’ or ‘1’ is supported as unit ID.
    Image 8–42
    1
    Category selection
    15
    Temperature diagnostics table
    16
    Unit ID input field
    17
    Flash unit front panel toggle
    18
    Lock unit front panel toggle
    19
    Increase unit front panel brightness
    20
    Decrease unit front panel brightness
    21
    Solid black signal on invalid video toggle
    22
    Front panel brightness input field
    23
    Front panel brightness slider
    24
    Active input ports drop down
    25
    Refresh time settings button
    26
    NTP server status
    27
    NTP server input field
    28
    Calendar menu
    29
    Manual date input field
    30
    Manual system time input field
    31
    Manual time zone drop down
    32
    Manual local time input field
    33
    Manual time settings radio button
    34
    Automatic time settings radio button
    35
    Use NTP server toggle
  3. Click the save icon () in the header.