5.2.4.1 Hardware diagnostics

Location

System > Diagnostics > Hardware

About diagnostics

Hardware diagnostics can be run on the entire system or on individual components of the system. These tests will use the entire capacity of the selected option. During the test the involved components will not be usable. An overview of all results and possible issues will be generated after the diagnostics have been completed. These can be stored in a log file.

Prerequisites

The Encore3 must be idle before the diagnostics can be run.

Required parts

8GB+ USB stick formatted in FAT32.

How to run
  1. Must the entire Encore3 be tested?

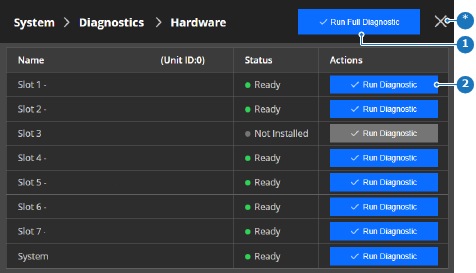
    • If yes, tap on Run Full Diagnostics (reference 1).
    • If no, tap on Run Diagnostics (reference 2) in the same row as the desired component.
    Note: Do not run diagnostics during live production. Doing so will disrupt the video output.
    Tip: Status of the component must be Ready be included in the diagnostics.
    Image 5–9
    1
    Full diagnostic button
    2
    Specific diagnostic button
    *
    Close button

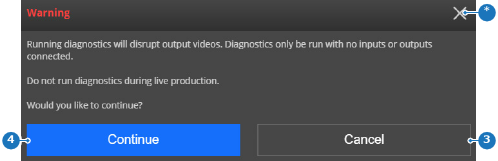
    A warning pop-up is shown

  2. Tap Continue (reference 4) to run the diagnostics.

    Image 5–10
    3
    Cancel button
    4
    Continue button
    *
    Close button

    The selected parts are tested. This may take several minutes depending on the chosen option.

  3. Review the diagnostic result in the pop-up.
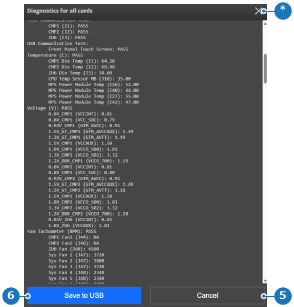
    Image 5–11
    5
    Cancel button
    6
    Save button
    *
    Close button
  4. Insert a USB stick in the desired port: (optional)
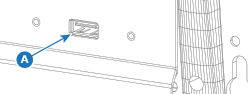
    • ‘USB-A’ port (reference A) at the front.
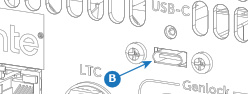
    • ‘USB-C’ port (reference B) at the back.
    Image 5–12
    Image 5–13
  5. Tap on Save to USB (reference 6, Image 5–11) to store a copy of the diagnostics. (optional)

    The diagnostic files are stored under the folder ‘EM\logs’ with the extension .tar.gz.

  6. Remove the USB stick. (optional)