Introduction of the user interface
The user interface is built up out of two distinct sections:
- The meeting room provider user interface
- The ClickShare settings app
The user interface is built up out of two distinct sections:
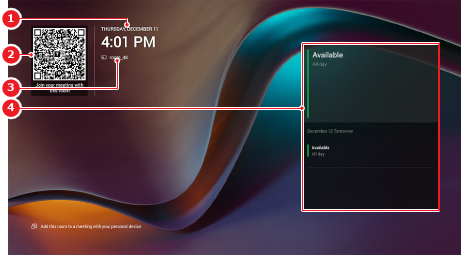
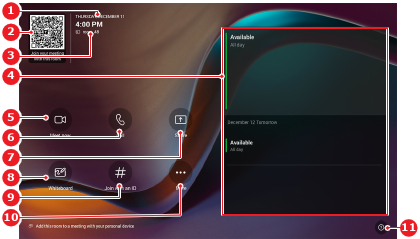
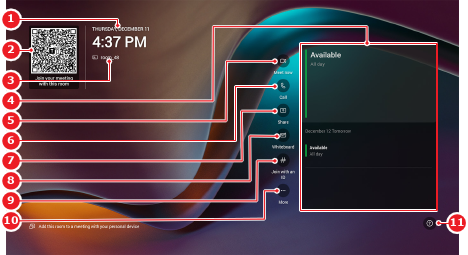
The Microsoft Teams user interface is the home screen for the ClickShare system. How the interface looks depends on the configuration of the meeting hardware. This interface is intended to be used by the meeting attendees or host to control the meeting. For more information about the functionality of the user interface, see the documentation of Microsoft Teams.
The following screenshots show some examples of how the Microsoft Teams user interface looks:
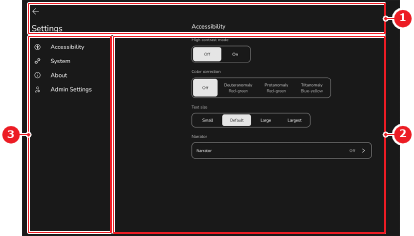
The ClickShare settings app controls the settings of the entire ClickShare system, any connected peripherals and the meeting room provider. The main purpose of the ClickShare settings app is to allow installers or IT professionals to configure and manage the meeting room. Some user settings are also available.
The user interface is built up out of the following sections:
The ClickShare settings app has two built in accounts:
Different settings and options will be available depending on the account that is logged in.
Settings appear in different categories depending on the account that is currently logged in. These settings have the same functionality regardless of category. See the following table for an overview of settings that are in different locations.
| Setting | User account category[1] | Admin account category[2] |
| Control Panel settings | ||
| Restart |