5.4.6 Securing the USB-C cables to the Base Unit

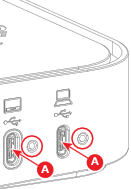
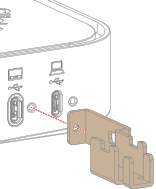
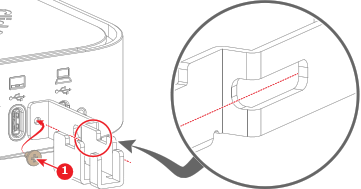
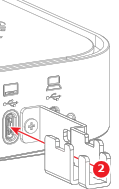
About the USB-C cable lock

To reduce the possibility of ‘USB-C’ cables losing contact or becoming loose overtime, a metal locking mechanism was designed. This locking mechanism will keep the ‘USB-C’ cable in place. A rigid lock will increase the contact between the cable and the port, ensuring increased stability during data transfer.

About supported ports

The following two ports (reference A) on both the Hub Core and the Hub Pro can support the USB-C cable lock. All other ports do not support the locking mechanism.

All supported ports follow the same general procedure.

Tip: Each supported ‘USB-C’ port has a screw hole next to it.
Image 5–44
A
Supported ‘USB-C’ port
Required tools

Phillips screwdriver PH0

Required parts

USB-C lock

How to secure
  1. Position the USB-C cable lock over the desired ‘USB-C’ port as illustrated.

    Image 5–45
  2. Secure the USB-C cable lock to the Base Unit with a screw (reference 1). Use a PH0 Phillips screwdriver.

    Tip: Guide the screw driver through the cutout and along the red dotted line to tighten the screw.
    Image 5–46
  3. Install the ‘USB-C’ cable in the ‘USB-C’ port (reference 2) through the USB-C cable lock.

    Image 5–47
  4. Secure the cable to the USB-C cable lock with a cable tie. (optional).

    Image 5–48