Location & availability
- Menu: > > > >
- Access level: admin
ClickShare supports the different frequencies for Wi-Fi signals. These frequencies are grouped into three main Wi-Fi bands:
Each band supports different channels with slightly different frequencies. These small differences allow different Wi-Fi channels to have an overlap without interfering with each other. Setting different channels for Wi-Fi signals that might have an overlap is called staggering. It is recommended to stagger Wi-Fi channels as much as possible across all wireless network devices.
Must the Base Unit send out a Wi-Fi network?
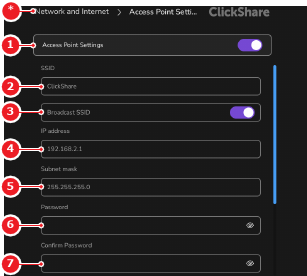
Enter or update the desired name of the Wi-Fi network after (reference 2, Image 7–16).
Must the Wi-Fi network be visible to any Wi-Fi device?
Enter or update the IP address of the access point after (reference 4, Image 7–16). (optional)
Enter or update the desired subnet mask of the access point after (reference 5, Image 7–16). (optional)
Enter a password for the Wi-Fi network after (reference 6, Image 7–16).
Enter the same password a second time after (reference 7, Image 7–16).
Select the desired frequency after (reference 8).
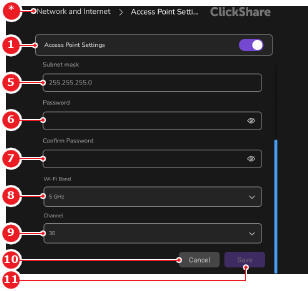
Select the desired channel after (reference 9, Image 7–17).