Overview
This article explains how to physically install the ClickShare Control Panel. It is the next step after setting up the USB-C cable connection with the Control Panel. Click here to view the connection setup process.
Installation options include:
- Option 1: Placement loosely on a table
- Option 2: Securing upright on a table
- Option 3: Securing flat on a table
- Option 4: Mounting on a wall
Required tools:
- Screwdriver and nut driver
- Components included in the packaging box with Control panel
- Round stand
- L-shaped bracket
- Short screws (2 nos.)
- Long (M4) screws (2 nos.)
- Washers (2 nos.)
- Nuts (2 nos.)
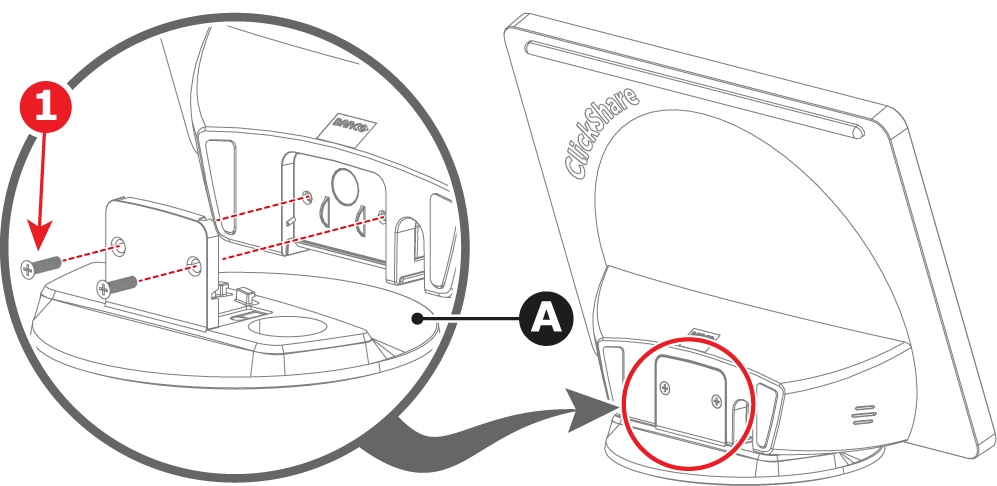
How to install standing on a table with the round stand
-
Install the round stand (A) on the Control Panel. Use the two short screws (1).
-
Place the assembled Control Panel in a desired location on the table.
-
Connect the ‘Source’ side of the cable (C) to the Base Unit.
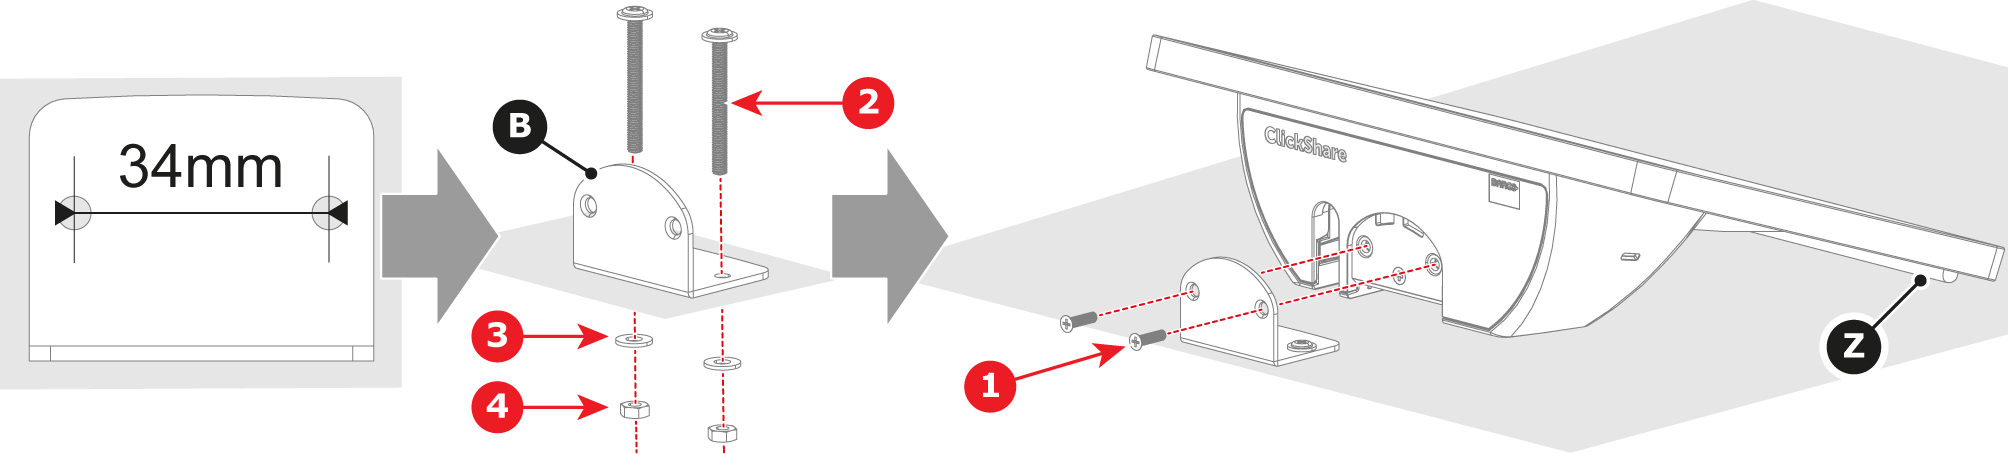
How to secure to a table in the upright position
-
Drill two holes in the table at the desired location. Ensure the holes are spaced 34mm apart.
-
Install the L-shaped bracket (B) in the desired location on the table. Use the two long screws (2), two washers (3) and two nuts (4).
-
Install the Control Panel onto the prepared base as illustrated. Use the two short screws (1).
-
Connect the ‘Source’ side of the cable (C) to the Base Unit.

How to secure to a table in the flat position
-
Drill two holes in the table at the desired location. Ensure the holes are spaced 34mm apart.
-
Install the L-shaped bracket (B) in the desired location on the table. Use the two long screws (2), two washers (3) and two nuts (4).
-
Install the Control Panel onto the prepared base as illustrated. Use the two short screws (1). Ensure the rubber strip (Z) makes contact with the table.
-
Connect the ‘Source’ side of the cable (C) to the Base Unit.
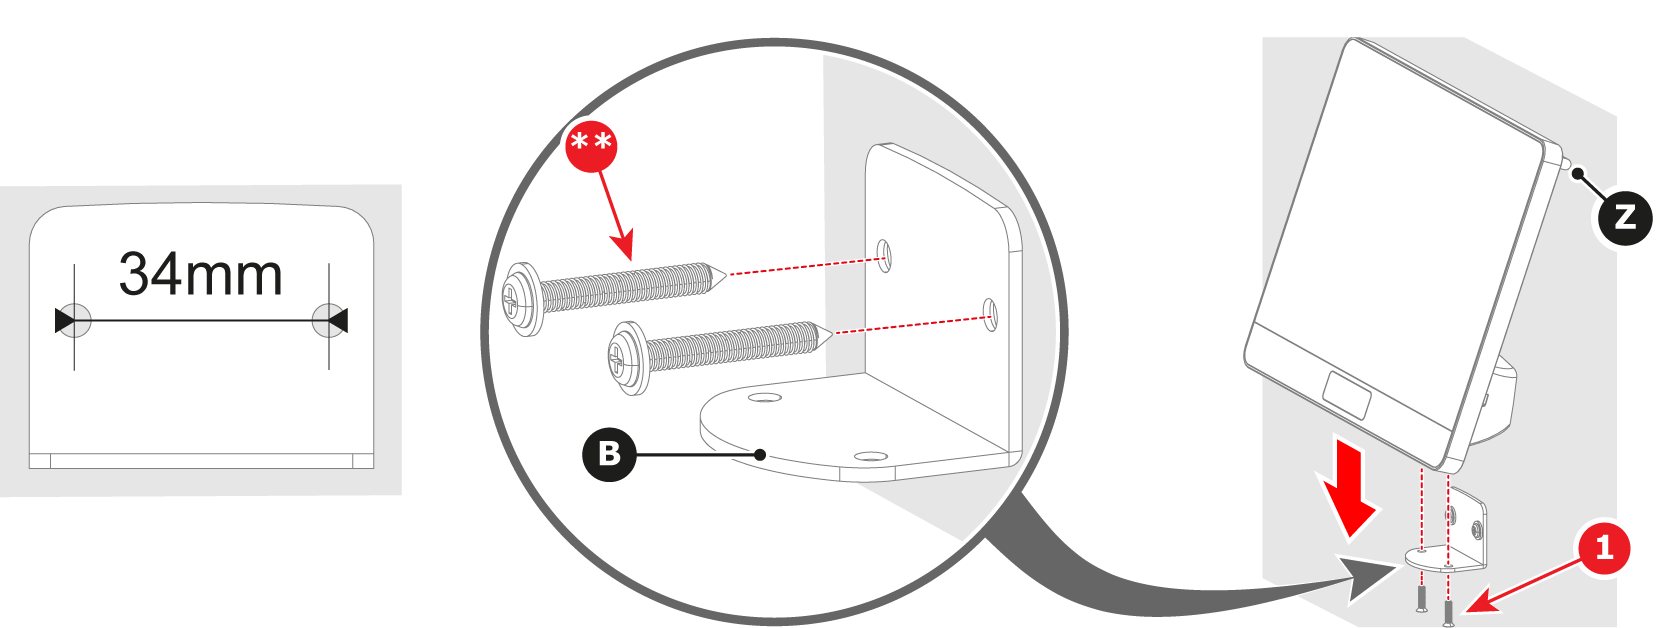
How to secure to a wall
-
Drill two holes in the wall at the desired location. Ensure the holes are spaced 34mm apart.
-
Install the L-shaped bracket (B) to the wall. Provide two M4 screws at least 25.4mm long (**).
-
Install the Control Panel on the secured L-shaped bracket (B). Use the two short screws (1). Ensure the rubber strip (Z) makes contact with the wall.
-
Connect the ‘Source’ side of the cable (C) to the Base Unit.