
Testing ClickShare Conference peripheral functionality in macOS can be done without using specific conferencing software (UC&C tool such as MS Teams, Zoom, Webex...) since ClickShare Conference makes your peripheral device available in macOS.
For the below procedures, the speakerphone and camera or speakerphone with an integrated camera is connected to the CX Base Unit and the Button is inserted into a Mac PC.
Info! Depending on the nature of the peripheral (camera, speakerphone or all-in-one device), either the audio playback & recording, video streaming or both audio playback & recording and video streaming should be tested. Visit the supported peripherals overview page to find the list of supported peripheral devices
Testing audio playback and recording
For macOS Ventura and above
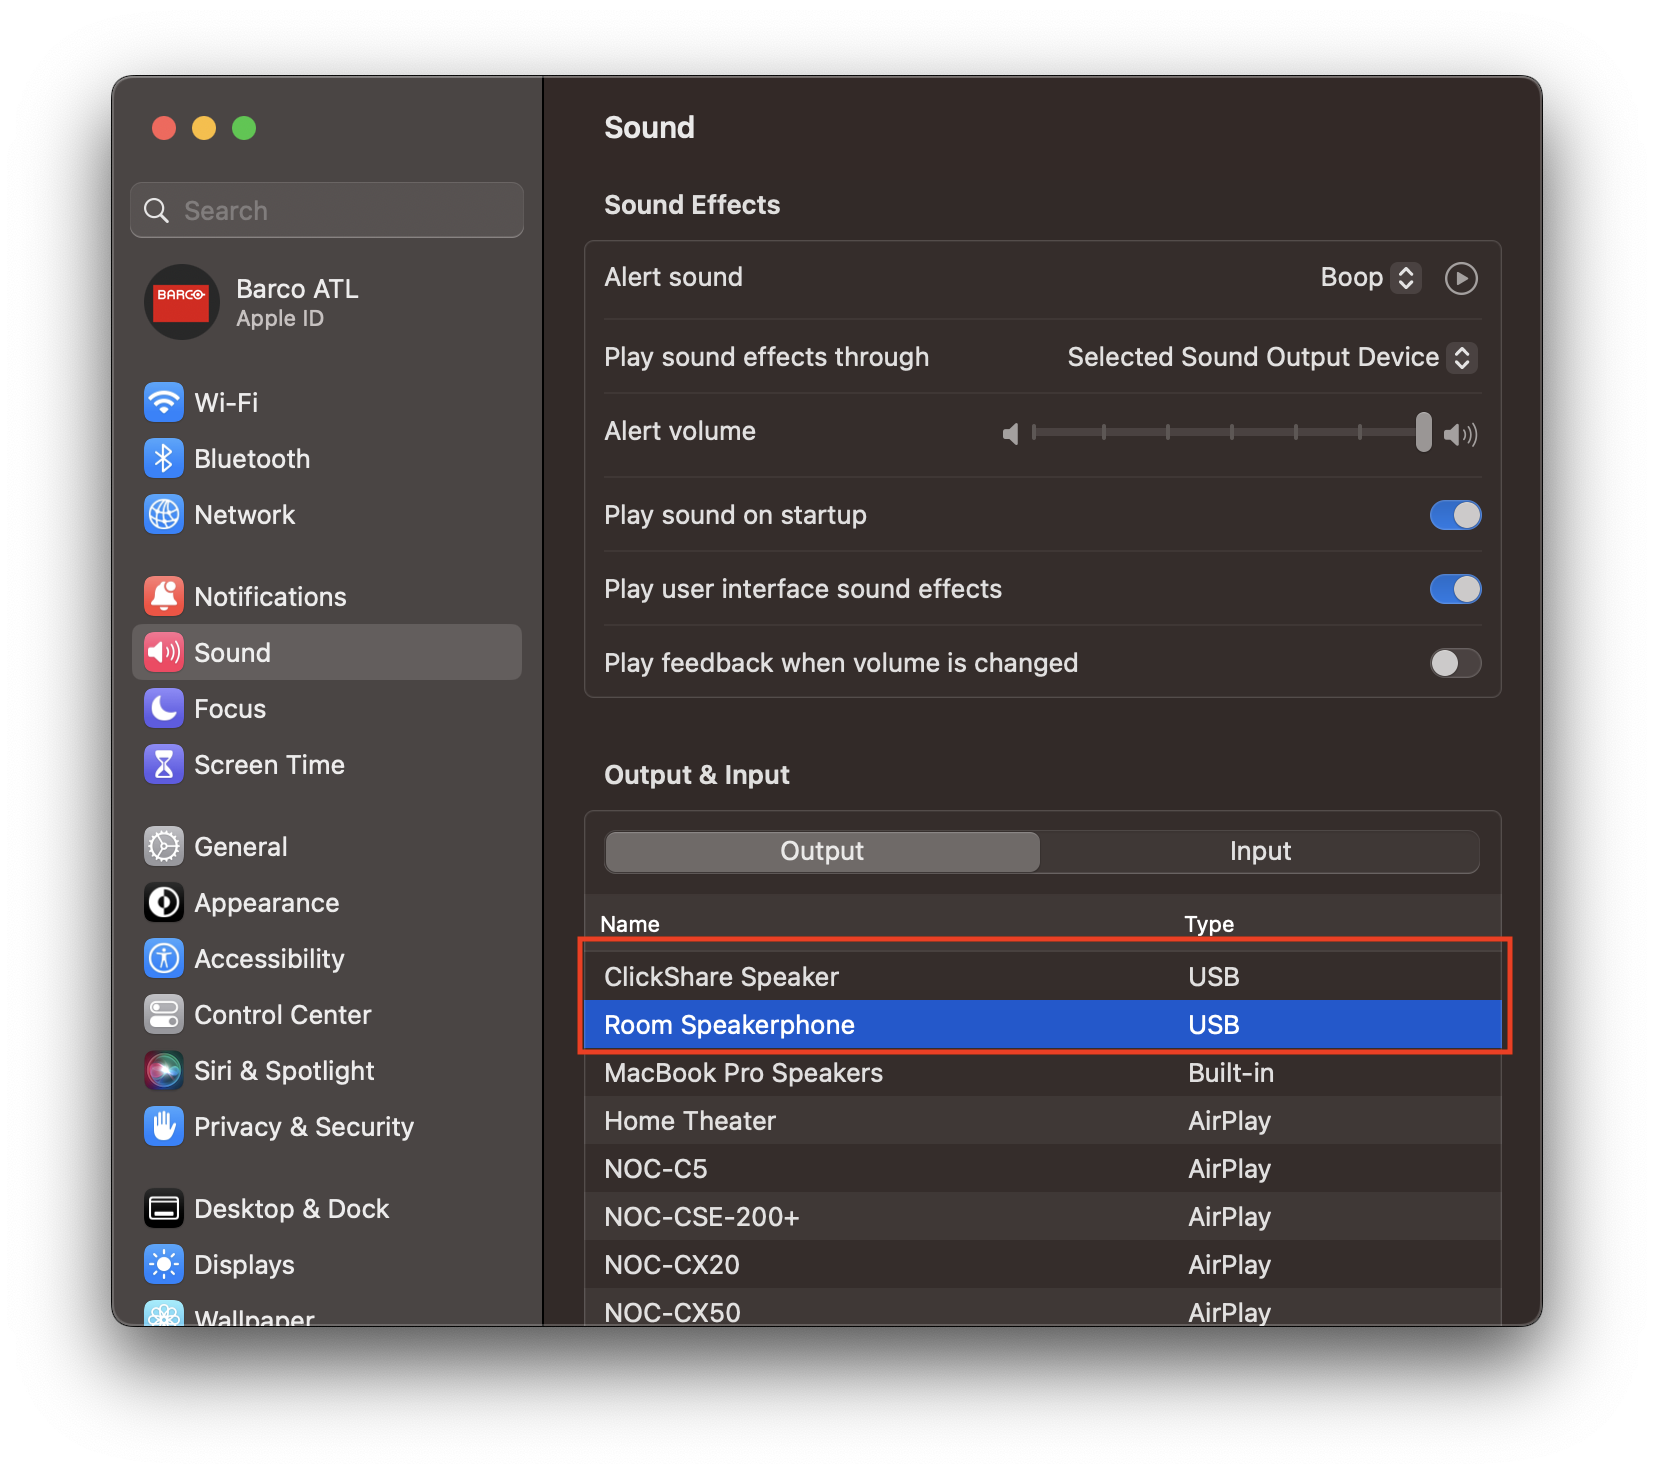
- In macOS Ventura, open System Settings and select Sound in the left-hand panel.

- With the Sound Settings open, click the Output tab and then select the Output device you want to test such as: Room Speakerphone or ClickShare Speaker.
- With your output device selected, test it by playing an Alert Sound by clicking the play button at the top of the page.
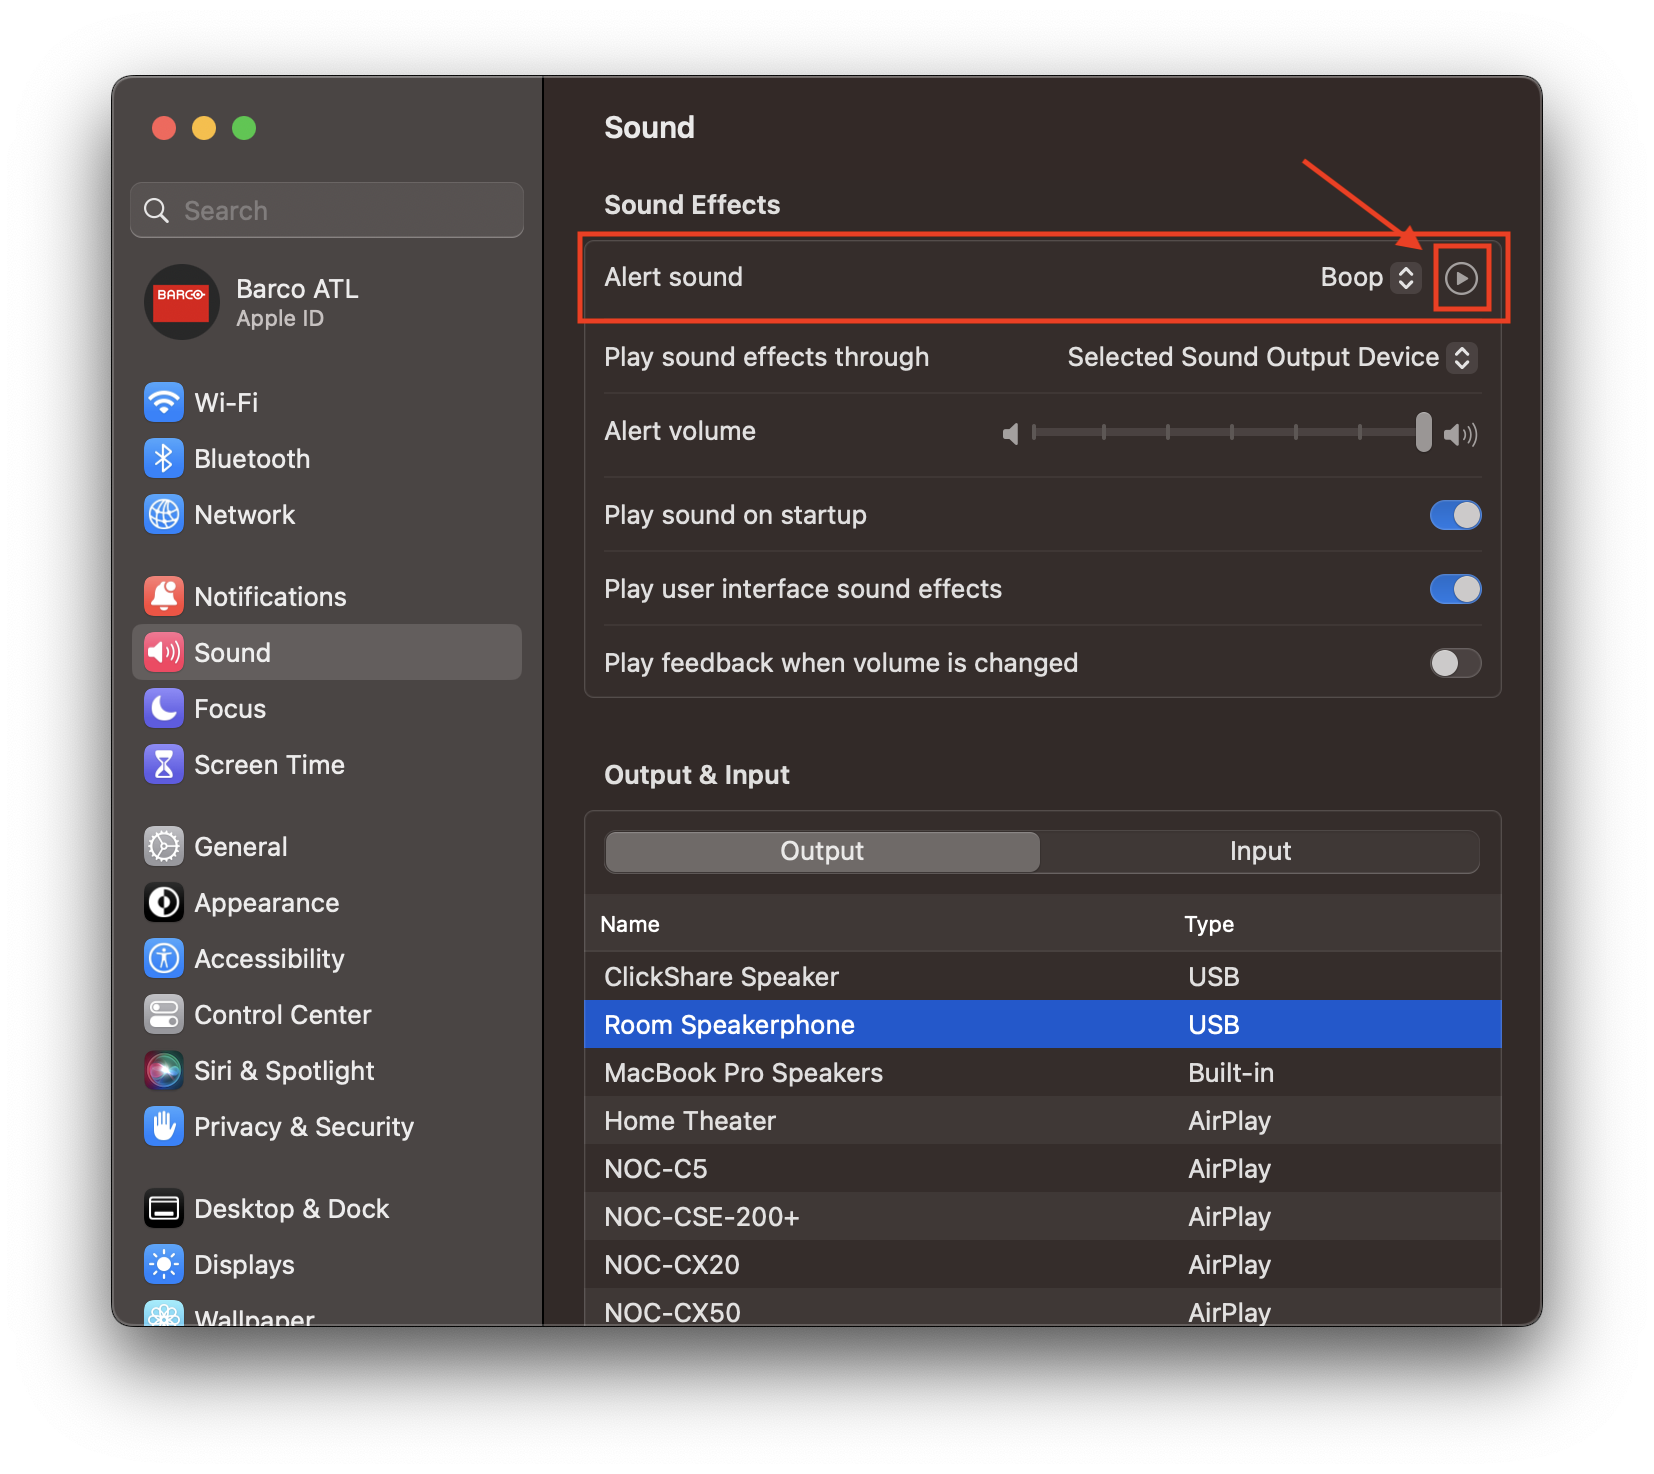
- If you hear the test sound from the selected output device, you have successfully tested audio playback from your Mac to the speakerphone!
- Next, click the Input tab and then select the recording device you want to test, such as a Room Speakerphone. Monitor the input level for activity.
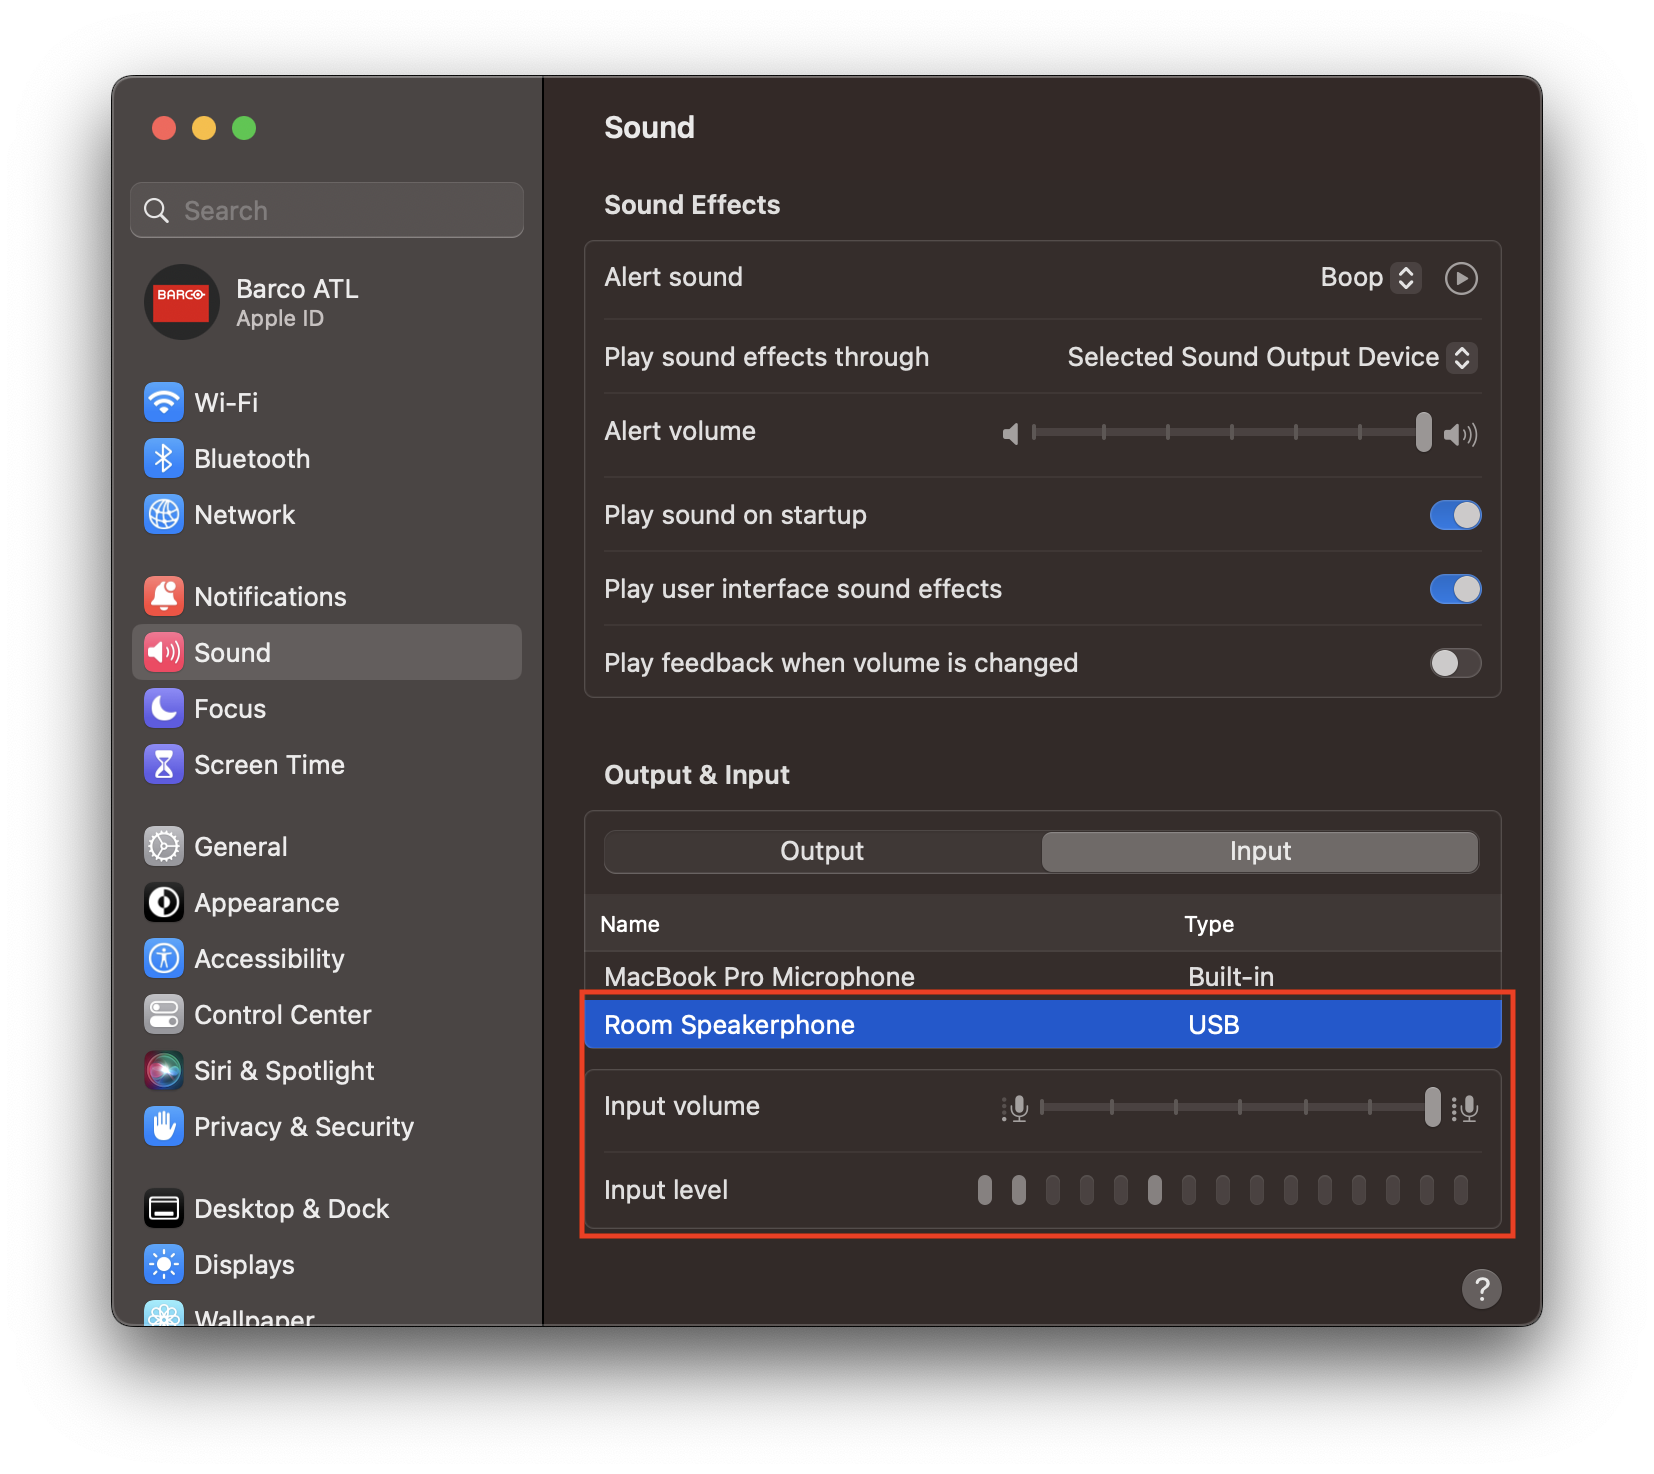
- If you see the Input level moving, you have successfully tested audio recording from your connected speakerphone!
Testing video recording/streaming
- Start the built-in Photo Booth app to preview the content from all internal and connected cameras. The following will be shown initially.
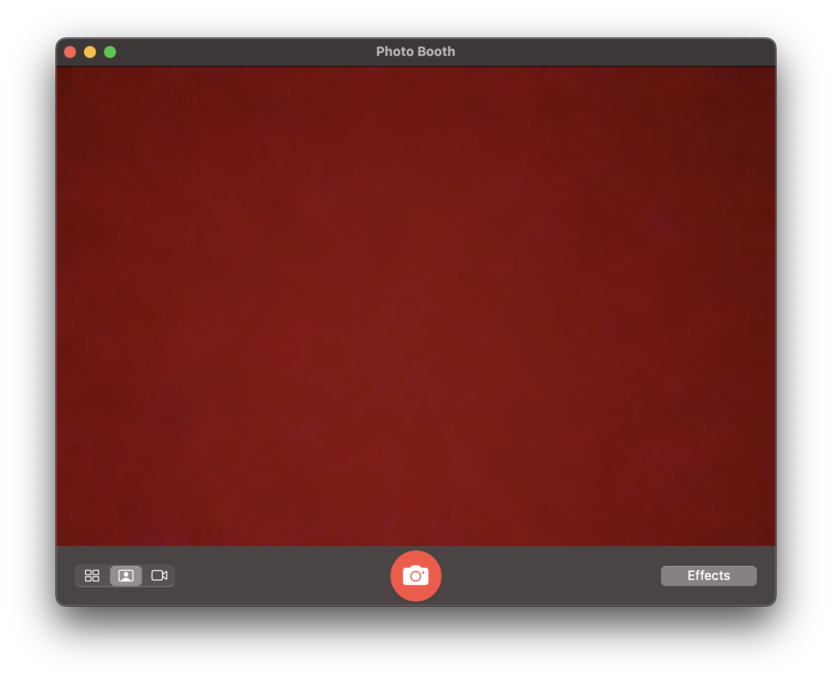
- By default, if your Mac has a built-in camera, it will be selected first.
To change to the room camera, click the Camera menu in the menu bar and then click Room Camera.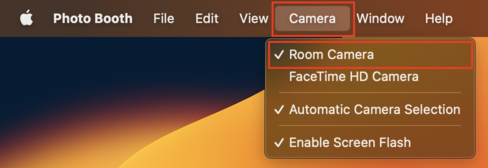
- If a new Room Camera is selected, a switchover will occur, and the following will be shown for a few seconds.
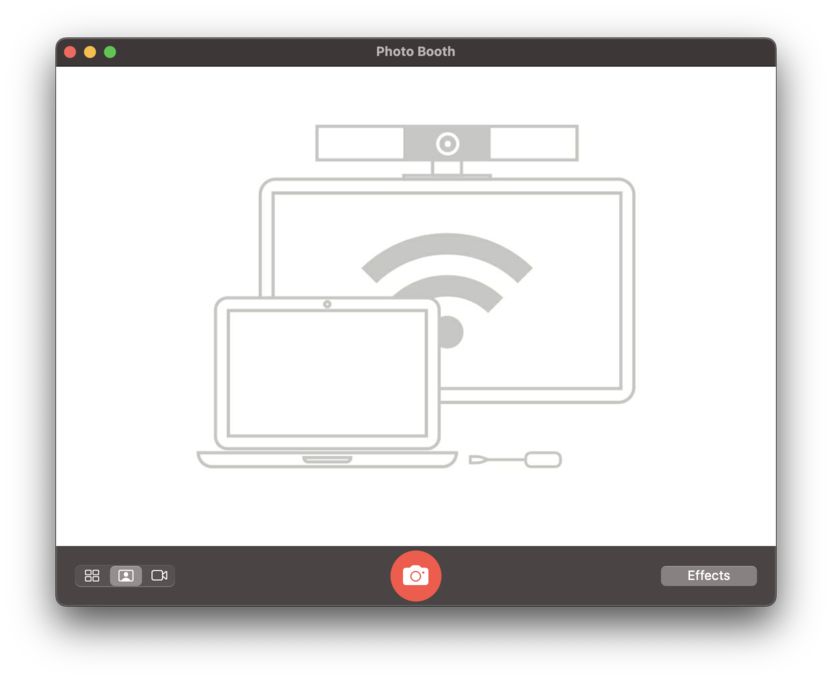
- A live feed from the connected camera will be visible after the previous screen disappears. If so you have successfully tested video recording from your connected camera to your Mac.
Related Articles
- Testing peripheral's functionality with ClickShare Conference Base Unit without UC&C tools on Windows
- What peripherals can be used with ClickShare Conference and are there any limitations?
- Different ClickShare Conference Interoperability levels explained
- How to select the ClickShare Conference peripherals in your UC&C tool

