3.7.2.1 Base Unit firmware upgrade

About software update

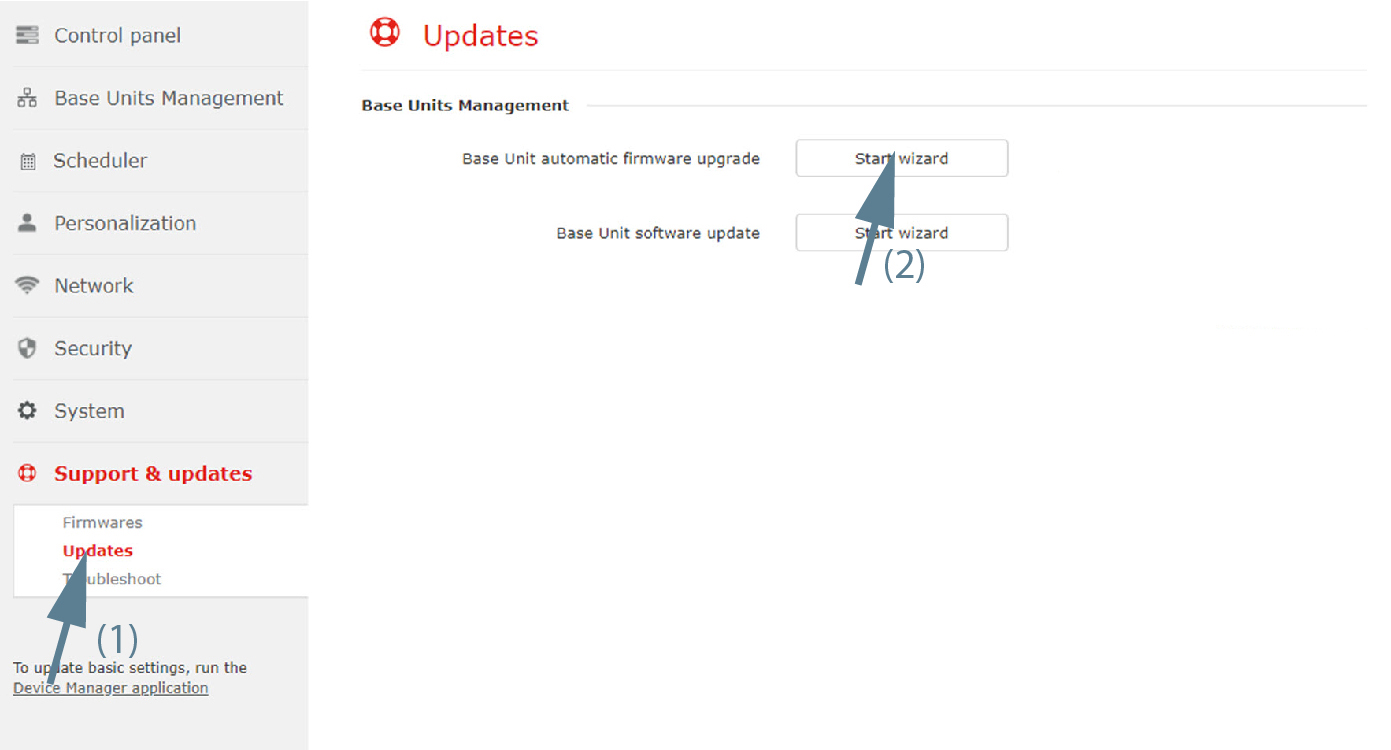
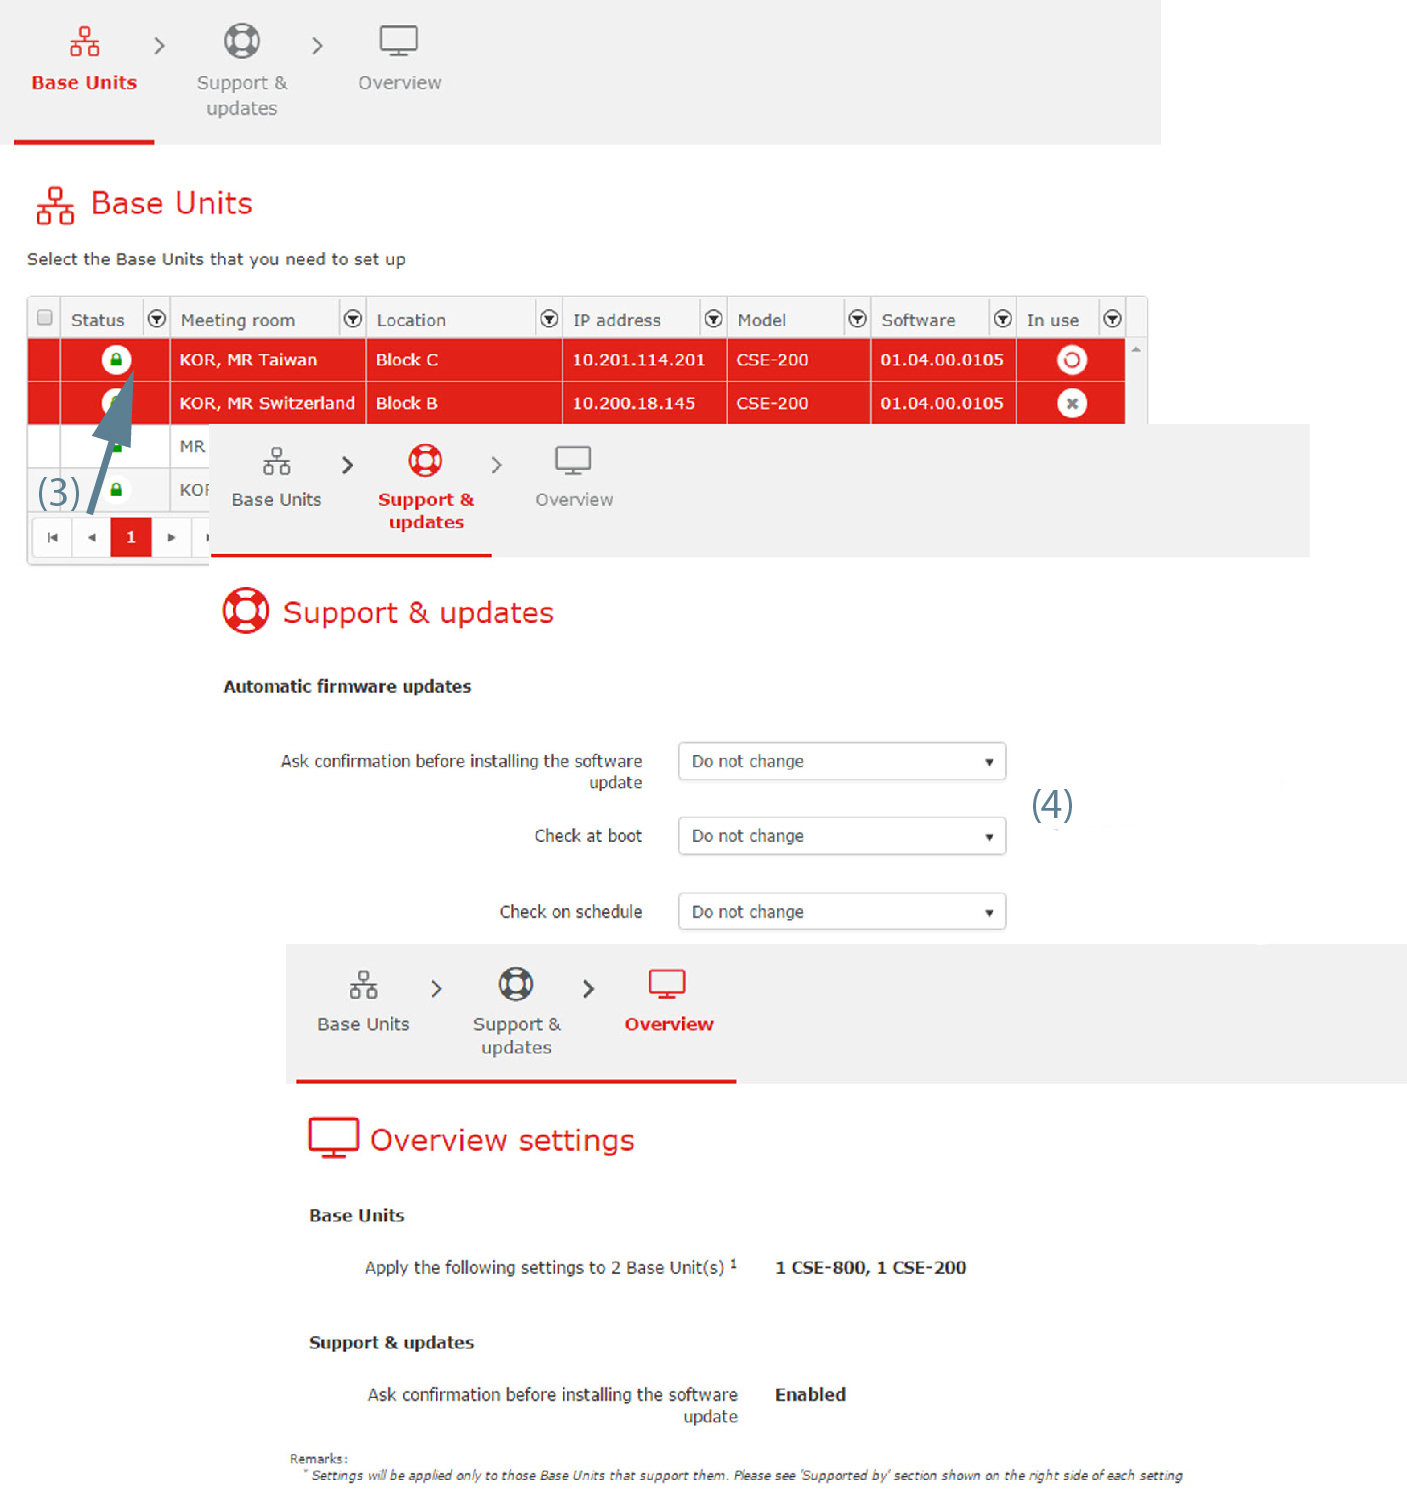
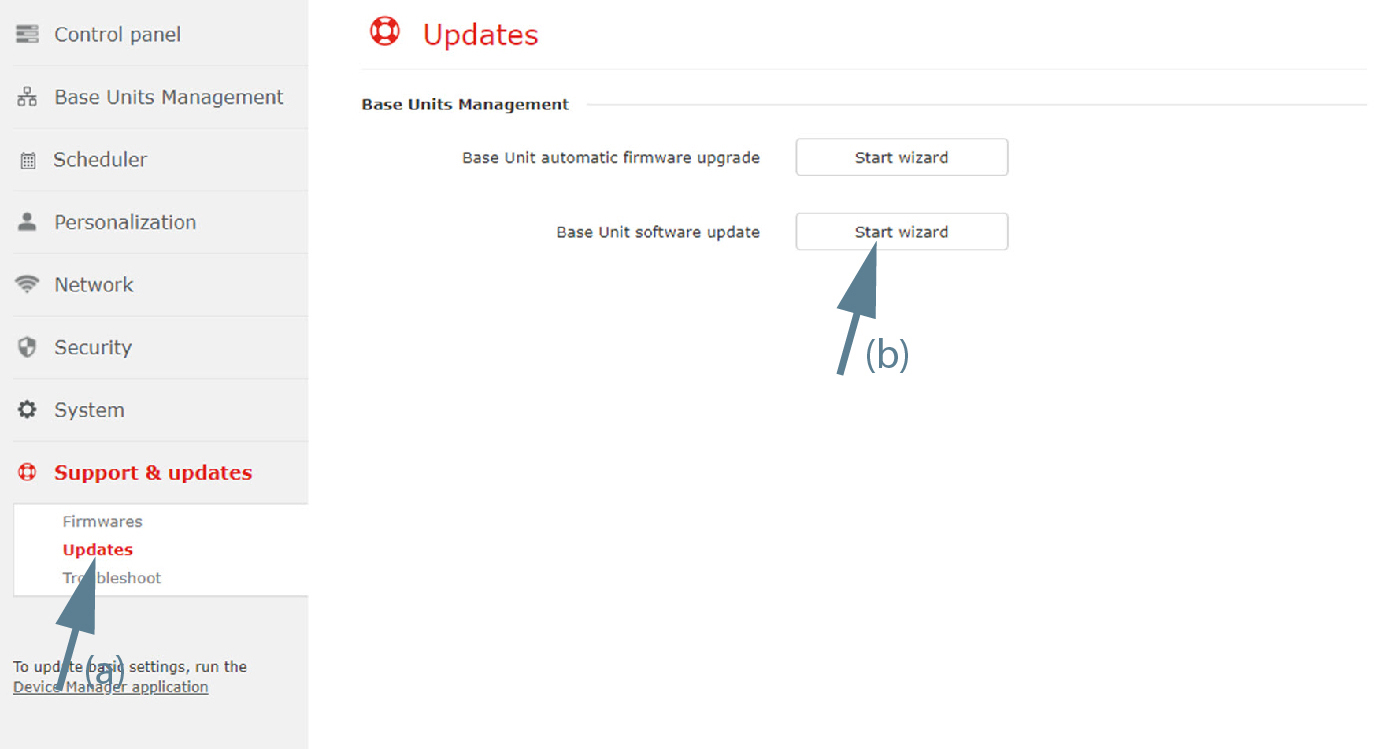
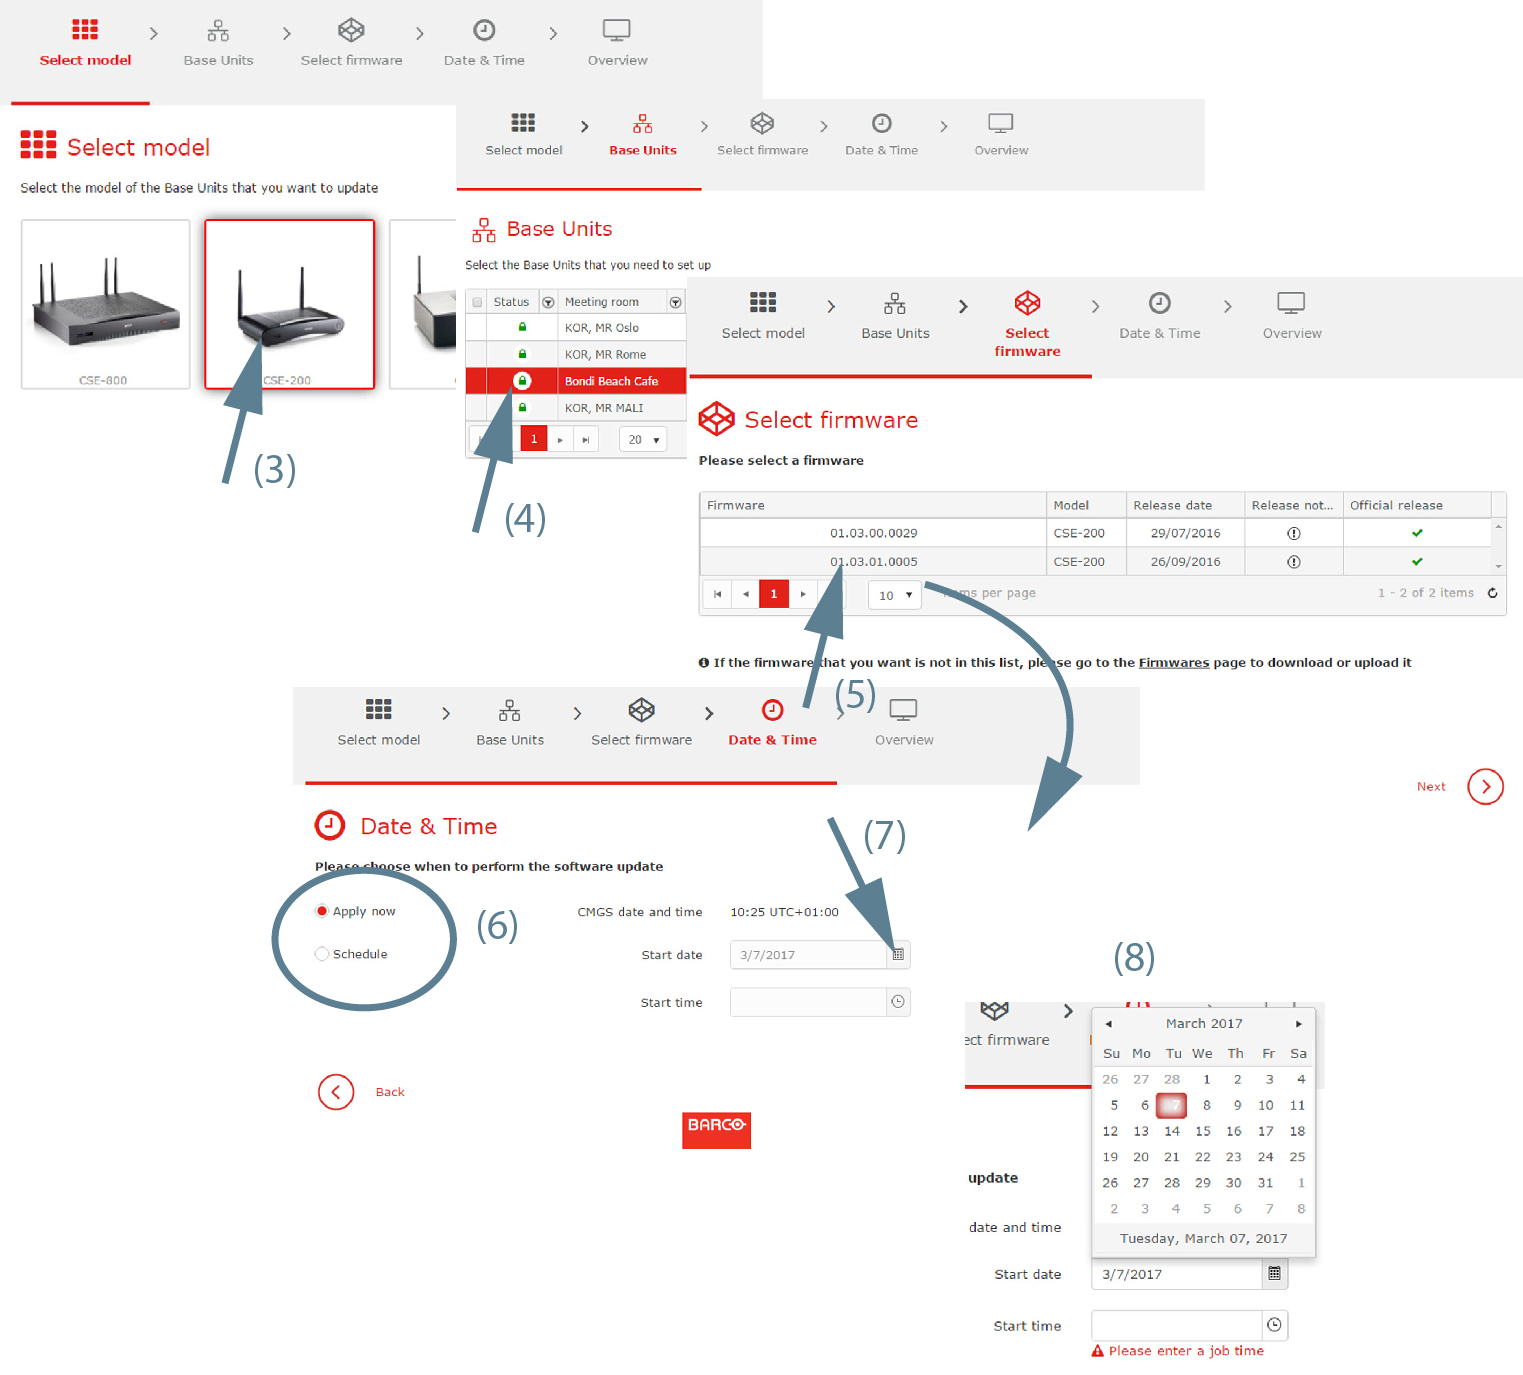
The firmware of a single Base Unit or of multiple Base Units can be updated with XMS (virtual) Edge. The update can be executed immediately or it can be scheduled.

The Base Unit firmware must be loaded on the XMS (virtual) Edge, prior the update. XMS (virtual) Edge may directly download a firmware from Barco site, or the firmware may be uploaded to XMS (virtual) Edge.

Note: An update takes between 10 and 20 minutes for a CSC-1, CSE-200, CSE-200+,CSE-800, C-5, C-10, CX-20, CX-30, CX-50, CX-50 Gen2, CB Core and CB Pro and 15 up to 30 minutes for a CSM-1.
Automatic firmware update[4]
  1. Select Support & updates and click on Updates (1).

    Image 3–83 Start firmware update wizard
  2. Click on the Start wizard button next to Base Unit automatic firmware upgrade (2).
  3. Select the Base Unit(s) to update (3).

    Image 3–84 Automatic firmware updates
  4. Check the settings and change if necessary (4). To change a setting, click on the drop down box and select the desired setting.

    The following can be changed:

    • Ask confirmation before installing the software update: enable or disable or do not change.
    • Check at boot: enable or disable or do not change
    • Check on schedule: enable or disable or do not change.
  5. Click Next to continue.

    The Overview page is displayed with changed settings.

  6. Click Finish.
Software update[5]

This procedure is similar to the software update procedure in Base Units - Support & updates - Software updates.

  1. Select Support & updates and click on Updates (1).

    Image 3–85 Start software update wizard
  2. Click on the Start wizard button next to Base Unit software upgrade (2).
  3. Select your model and click Next to continue (3).

    Image 3–86 Software updates
  4. Select the Base Unit(s) that need(s) to set up and click Next (4).
  5. Is the firmware you want in the list?

    • If yes, Continue with step 6.
    • If no, go first to the Firmwares page. For more info, see “Firmwares”.
  6. Select the firmware version and click Next to continue (5).
  7. To apply the firmware immediately, check the radio button in front of Apply now (6).

    To schedule the update in the future, check the radio buton in front of Schedule. Fill out a day (mm/dd/yyyy) (7) and hour (hh:mm) (8) if necessary.

    or

    click on the icon in the date field to open a calender and select a month and a day. To change the month, click on the right or left arrow next to month name until the desired month and year are obtained. Click on a number in the number field to setup the day.

  8. When date and time is filled out, click Next.

    The Overview page is displayed with the new scheduled settings.

  9. Click Finish.

[4] only for CSE devices

[5] all models