E.2 Stacking HDX projector projectors

Caution: Maximum stack three (3) projectors in a table mounted configuration.

Maximum stack two (2) projectors in a ceiling mounted configuration.

How to stack
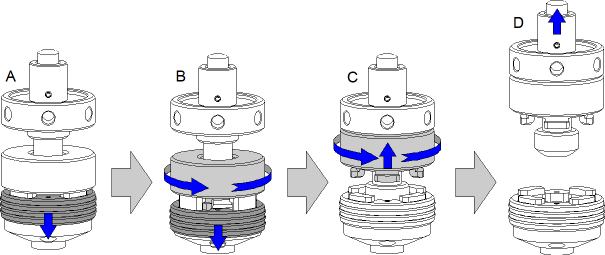
  1. Mount stacking points on lower projector. See “Mount stacking points”.
  2. Mount a bottom carry handle on the upper projector. See “Mounting the bottom carry handler”.
  3. Place the projector with carry handle on top of the projector with stacking points.

    Make sue that all interlocking pins match with their corresponding interlocking sockets.

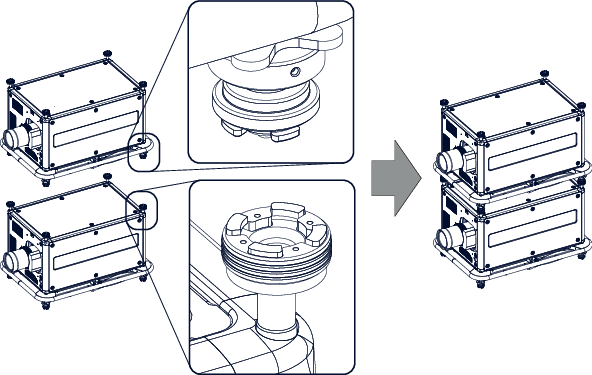
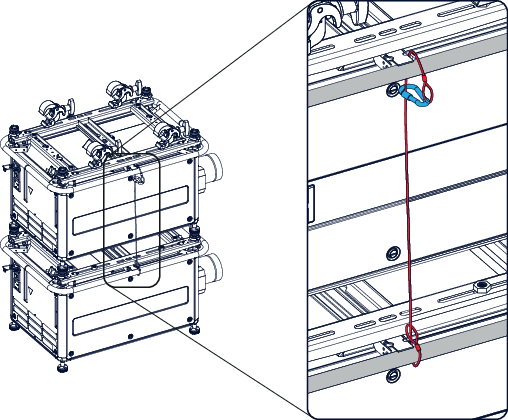
    Image E–2 Dual stack
    Tip: In case of stacking projectors for a ceiling mount configuration, first turn the projectors upside down before placing the projectors on top of each other.
  4. Attach the two projectors together by closing all four interlocking adapters.

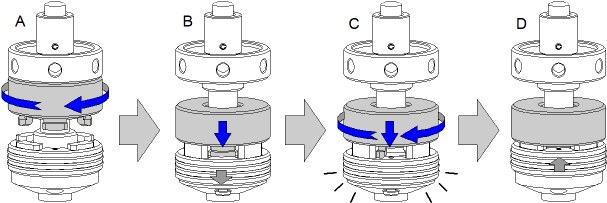
    Image E–3 Interlocking, close
Extra actions for ceiling mounted stack

Two safety cables must be mounted between both projectors, one at each longitudinal side.

  1. Mount the safety cable around the carrying handle of the bottom projector. Push the safety hook through the loop.

    Image E–4 Security cables, mount
  2. Mount the other end of the security cable around the carry handle of the top projector and clasp the safety hook round the cable as illustrated.

    Make sure that the falling distance is maximum 20 cm. If necessary, before clasping the safety hook around the cable, turn the cable a few time around the carry handle.

  3. Repeat this procedure for the second safety cable on the other side of the carry handle.
Warning: Always use both safety cables of the lowest projector to secure a stacked projector in a ceiling mount configuration.
How to open an interlocking adapter
  1. Open an interlocking adaptor as illustrated.

    Image E–5 Interlocking, open
Warning: Never open an interlocking adapter of a stacked projector which is still suspended. First place the stacked projectors on the floor.