General
This area is specifically for layer adjustments.

This area is specifically for layer adjustments.
The area is broken up into several sub areas. The left side is for alignment, priority, size and position of the layer. Middle is for layer transition. The right is for misc. operations.

Buttons in this area operate on selected layers in the preview workspace. If no layers are selected, all buttons in this panel is disabled, except for the “Select All” button. “Select All” selects all the BG tabs and layers in preview for the selected Destinations regardless of the current view. The area is divided into several sections. Detail description of each section is provided below.
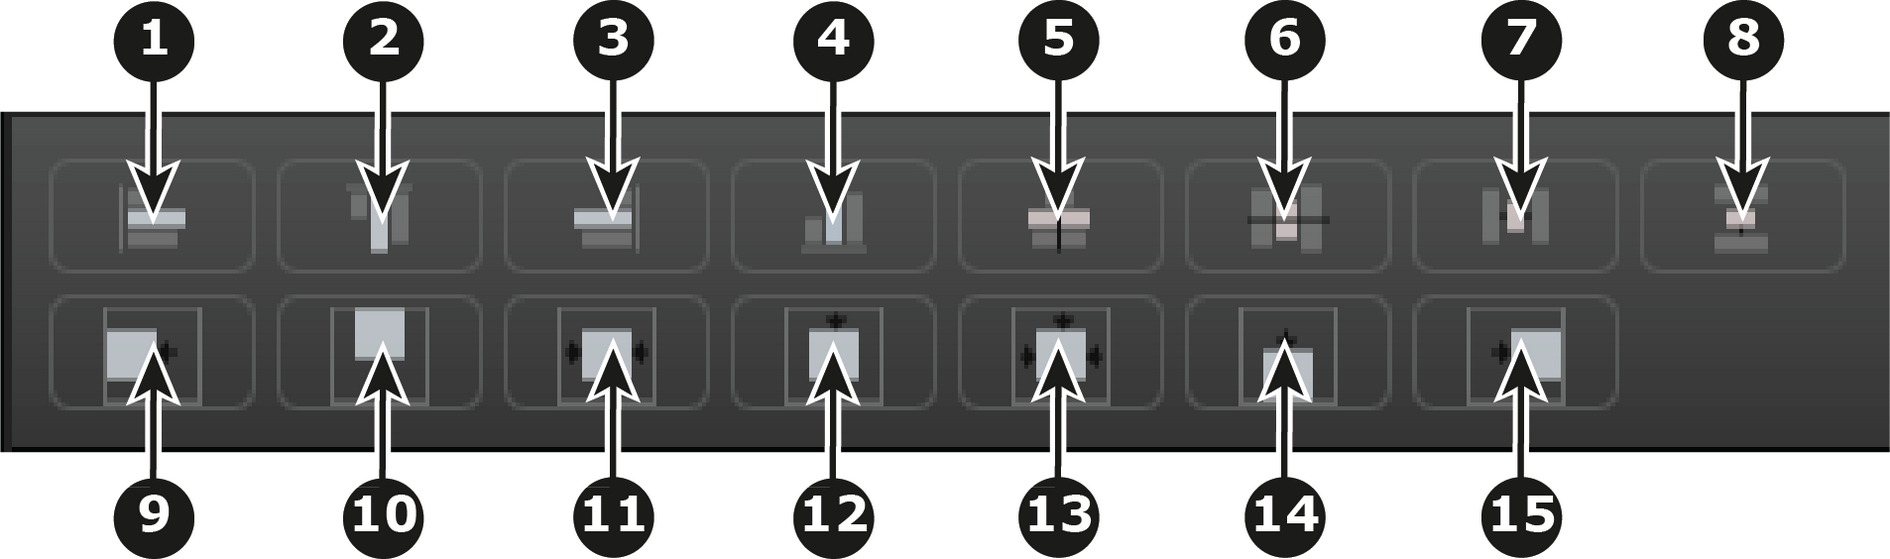
| 1 | Align Left to align the left edges of all selected PIPs to that of the leftmost PIP. |
| 2 | Align Top to align the top edges of all selected PIPs to that of the topmost PIP. |
| 3 | Align Right to align the right edges of all selected PIPs to that of the rightmost PIP. |
| 4 | Align Bottom to align the bottom edges of all selected PIPs to that of the bottommost PIP. |
| 5 | Align Relative HCenter to take into consideration the center of the horizontal offsets of all selected PIPs and aligns them on their vertical axes there. |
| 6 | Align Relative VCenter to take into consideration the center of the vertical offsets of all selected PIPs and aligns them on their Horizontal axes there. |
| 7 | Distribute Horizontally uniformly distributes the horizontal spacing between the leftmost and rightmost of all selected PIPs. Three or more layers in a Screen Destination must selected to use this tool. |
| 8 | Distribute Vertically uniformly distributes the vertical spacing between the topmost and bottommost of all selected PIPs. Three or more layers in a Screen Destination must selected to use this tool. |
| 9 | Align all selected PIPs along the destination’s left edge. |
| 10 | Align all selected PIPs along the destination’s top edge. |
| 11 | Center Horizontally to center all selected PIPs horizontally, along the destination’s vertical axis. PIPs do not change vertical position. |
| 12 | Center Vertically to center all selected PIPs vertically, along the destination’s horizontal axis. PIPs do not change horizontal position. |
| 13 | Center to center all selected PIPs vertically and horizontally, along the destination’s horizontal and vertical axes. |
| 14 | Align all selected PIPs along the destination’s bottom edge. |
| 15 | Align all selected PIPs along the destination’s right edge. |
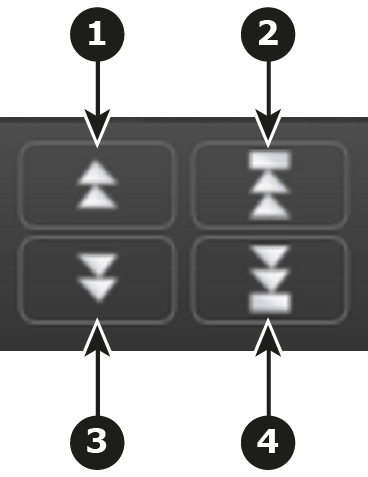
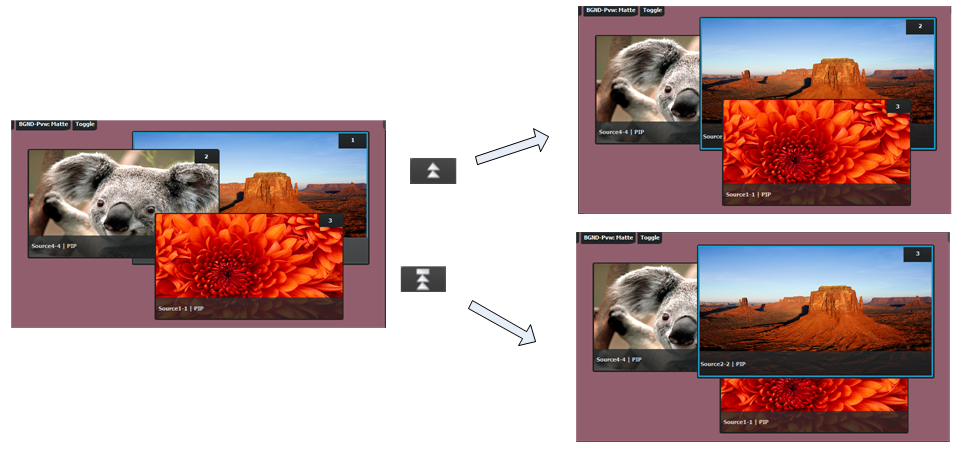
| 1 | Moves the selected layer up in priority and swaps with the layer previously above. |
| 2 | Moves the selected layer to the top of the priority and swaps it with the layer previously on top. |
| 3 | Moves down in priority and swaps the z-order of the selected layer with the layer previously below. |
| 4 | Moves the selected layer to the bottom of the priority and swaps it with the layer previously at the bottom. |
Example:

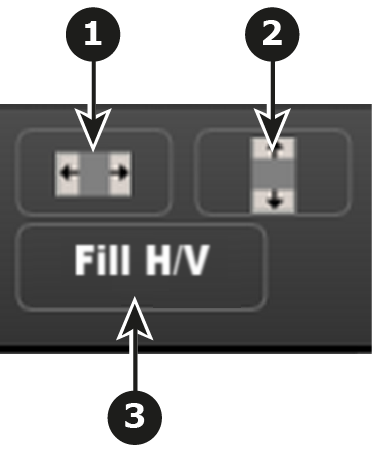
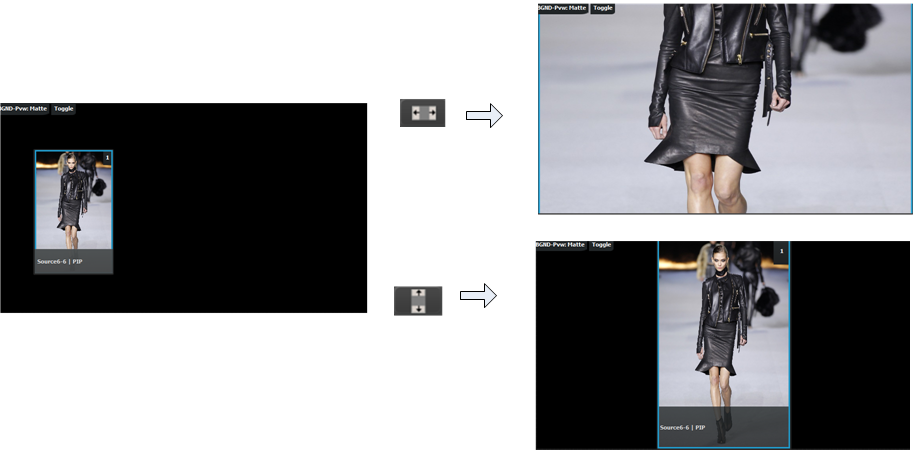
| 1 | Full Screen Horizontal takes the selected PIP(s) to full screen, using the destination’s width as the guide. If borders are on, they will be taken into account. |
| 2 | Full Screen Vertical takes the selected PIP(s) to full screen, using the destination’s height as the guide. If borders are on, they will be taken into account so that they are visible. |
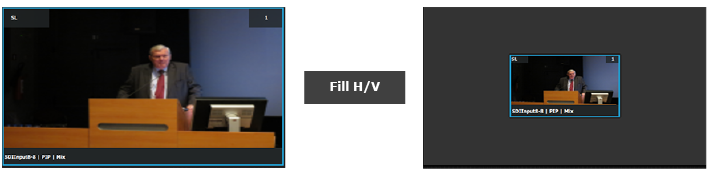
| 3 | Fill H/V will stretch the selected layer to cover the whole destination from top to bottom. and from left to right, without respecting the aspect of the source. |
Resize example:
Fill H/V example
Trans
Selected layer(s) on Preview transitions to Program according at the rate indicated in the rate box following the transition pattern. The layer on Program does NOT fade in preview at the same time. The layer on Program appears in Preview when the transition is completed.
Cut
Instantly transitions the selected layer(s) on Preview to Program
Arm
Enables moves for selected layer that have beginning and ending keyframes. Move rate is determined in the layer’s keyframe adjustment panel.
Hide
Selected BG Tab or layer(s) will not be visible during a Relative Preset save. See more about Relative Presets in the Complete vs Relative subsection of “Programming Menu > Adjustment area > Presets configuration”.
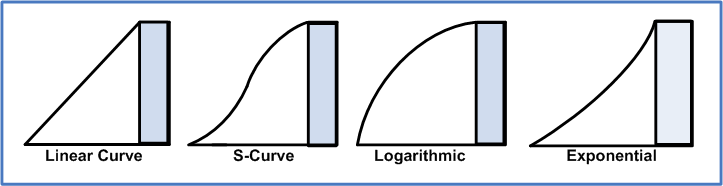
Transition Type
Four transition types are available: Linear, S-Curve, Logarithmic and Exponential
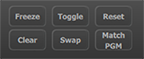
Freeze
Freezes the image that is displayed in the layer. The layer can no longer be positioned and sized within the destination. The text of a frozen layer turns blue and a “freeze” icon (snowflake) appears on the bottom right corner.
Reset
Positions the layer in the center of the destination. Vertical size is set to about 500 pixels and horizontal size is set to maintain the aspect ratio of the source.
Clear
Removes the selected layer from preview. If the selected layer is on program, this button is disabled unless the Program is unlocked.
Toggle
Enables the sources to toggle back and forth with each transition.
Swap
Enables the size and position of the mixing layer(s) to swap back and forth from Preview to Program.
Match PGM
Match PGM button forces the selected layer on Preview to have the same source and layer attributes as the layer in Program.
Select All / Unselect All
Freezes the image that is displayed in the layer. The layer can no longer be positioned and sized within the destination. The text of a frozen layer turns blue and a “freeze” icon (snowflake) appears on the bottom right corner.
Selection of anything allows the selected objects on Destinations to be armed.