Select the desired input using one of the following methods:
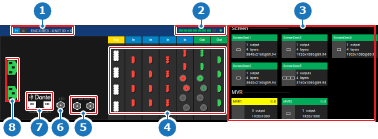
Click on the desired input connector from the card layout (reference 4) in the central work window.
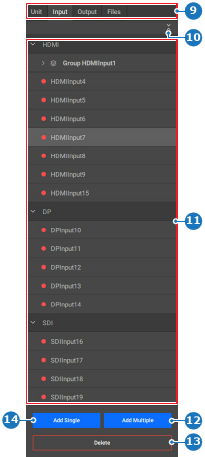
Select the desired inputs or groups from the list (reference 11) in right panel.
Note: Only one option can be selected at a time.
Tip: Selections from one method are automatically reflected in the other methods as well.
Image 8–66
1
Unit details
2
Screen resource indicator
3
Used/available resource mapping overview
4
Event Master card connector status
5
Genlock connection status
6
LTC connection status (not yet supported)
7
Dante audio connection status (not yet supported)
8
Power connection status
Image 8–67
9
Category selection
10
Collapse or expand all inputs
11
Input list per type
12
Create multiple inputs button
13
Delete selected input button
14
Create single input button
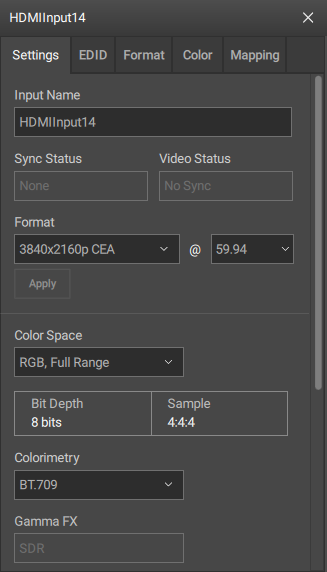
A detail window pops up in the central work area.
Edit any desired settings in the pop-up window.
Note: Some settings require advanced knowledge. Ensure enough training and understanding of the setting before editing.
Tip: This pop-up window can be moved anywhere within the central work area.
Tip: Provide clear names that reflect the intended purpose.
Tip: If these custom HDR metadata or formats will be needed in the future, then it is possible to save them using the custom files feature. For more information, see “Files”.


 ) in the header.